How to Check a Well Pressure Tank: Complete Diagnostic Guide
Your pressure tank is one of the most critical components in your well system, yet it's often overlooked until problems arise. This essential piece of equipment stores pressurized water, reduces pump cycling, and provides consistent pressure throughout your home. When a pressure tank fails, you'll notice symptoms ranging from rapid pump cycling to pressure fluctuations and premature pump failure. This comprehensive guide will teach you how to properly inspect, test, and diagnose your pressure tank to ensure reliable operation.
📋 In This Guide
- Understanding How Pressure Tanks Work
- Signs Your Pressure Tank May Have Problems
- Step-by-Step Tank Inspection
- Understanding Tank Capacity vs. Drawdown
- Common Pressure Tank Problems and Solutions
- Maintaining Your Pressure Tank
- When to Replace Your Pressure Tank
- Choosing a Replacement Tank
- DIY vs. Professional Service
- Conclusion
- Related Articles
Understanding How Pressure Tanks Work
Before diving into diagnostics, it's important to understand what happens inside your pressure tank. Modern residential pressure tanks are typically bladder or diaphragm tanks. Inside the steel shell, a flexible rubber bladder or diaphragm separates two chambers: one contains water from your well pump, the other contains compressed air.
When the pump runs, water fills the bladder, compressing the air chamber. This stored pressure pushes water out to your fixtures when you open a faucet. The compressed air acts like a spring, maintaining pressure even when the pump isn't running. This design allows your pump to rest between cycles, extending its life and providing steady pressure.
Key Tank Specifications
- Tank capacity: Total volume of the tank (not usable water)
- Drawdown: Amount of water the tank delivers between pump cycles
- Precharge: Air pressure in the tank when empty of water
- Working pressure: Operating pressure range matching your switch settings
Signs Your Pressure Tank May Have Problems
Watch for these warning signs that indicate tank issues:
Rapid Pump Cycling
If your pump turns on and off every few seconds or with minimal water use, the tank has likely lost its air precharge or the bladder has failed. This "short cycling" is the most common symptom of tank failure.
Pressure Fluctuations
Noticeable pressure changes during water use—strong flow that suddenly weakens—suggests the tank isn't maintaining proper pressure.
Waterlogged Tank
A tank full of water with no air cushion is "waterlogged." The tank will feel heavy, and you may hear water sloshing when you tap or rock it.
Water in the Air Valve
If water comes out when you check the air valve (Schrader valve) at the top of the tank, the bladder has ruptured.
Low Water Pressure
Consistently low pressure can result from improper precharge settings or a failing tank.
Visible Damage
Rust, corrosion, bulging, or leaks on the tank exterior indicate serious problems requiring replacement.
Step-by-Step Tank Inspection
Step 1: Visual Inspection
Start with a thorough visual examination:
- Check for rust, corrosion, or paint bubbling
- Look for water stains indicating leaks
- Inspect connections for drips or mineral deposits
- Check the tank's support and mounting
- Look for bulges or deformities in the tank shell
Step 2: The "Knock Test"
A simple but revealing test:
- Knock on the tank at various heights
- A properly charged tank will have different sounds: hollow/resonant where air is, solid/dull where water is
- The water level should be roughly in the lower third to half of the tank when the system is at rest
- If the entire tank sounds solid, it's likely waterlogged
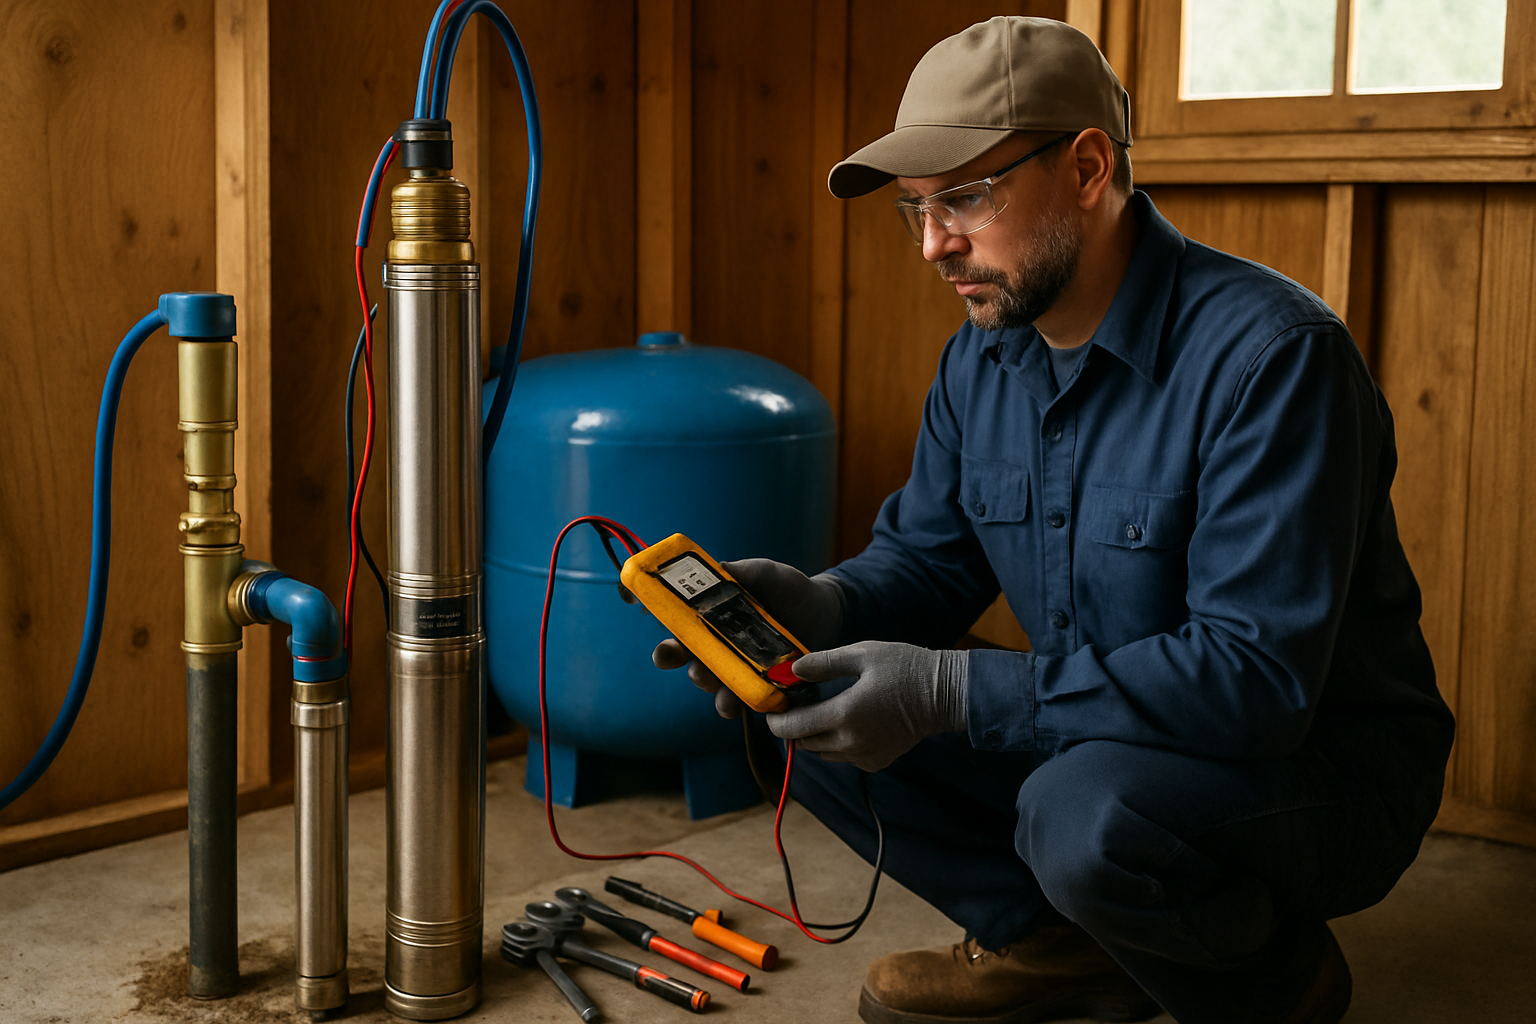
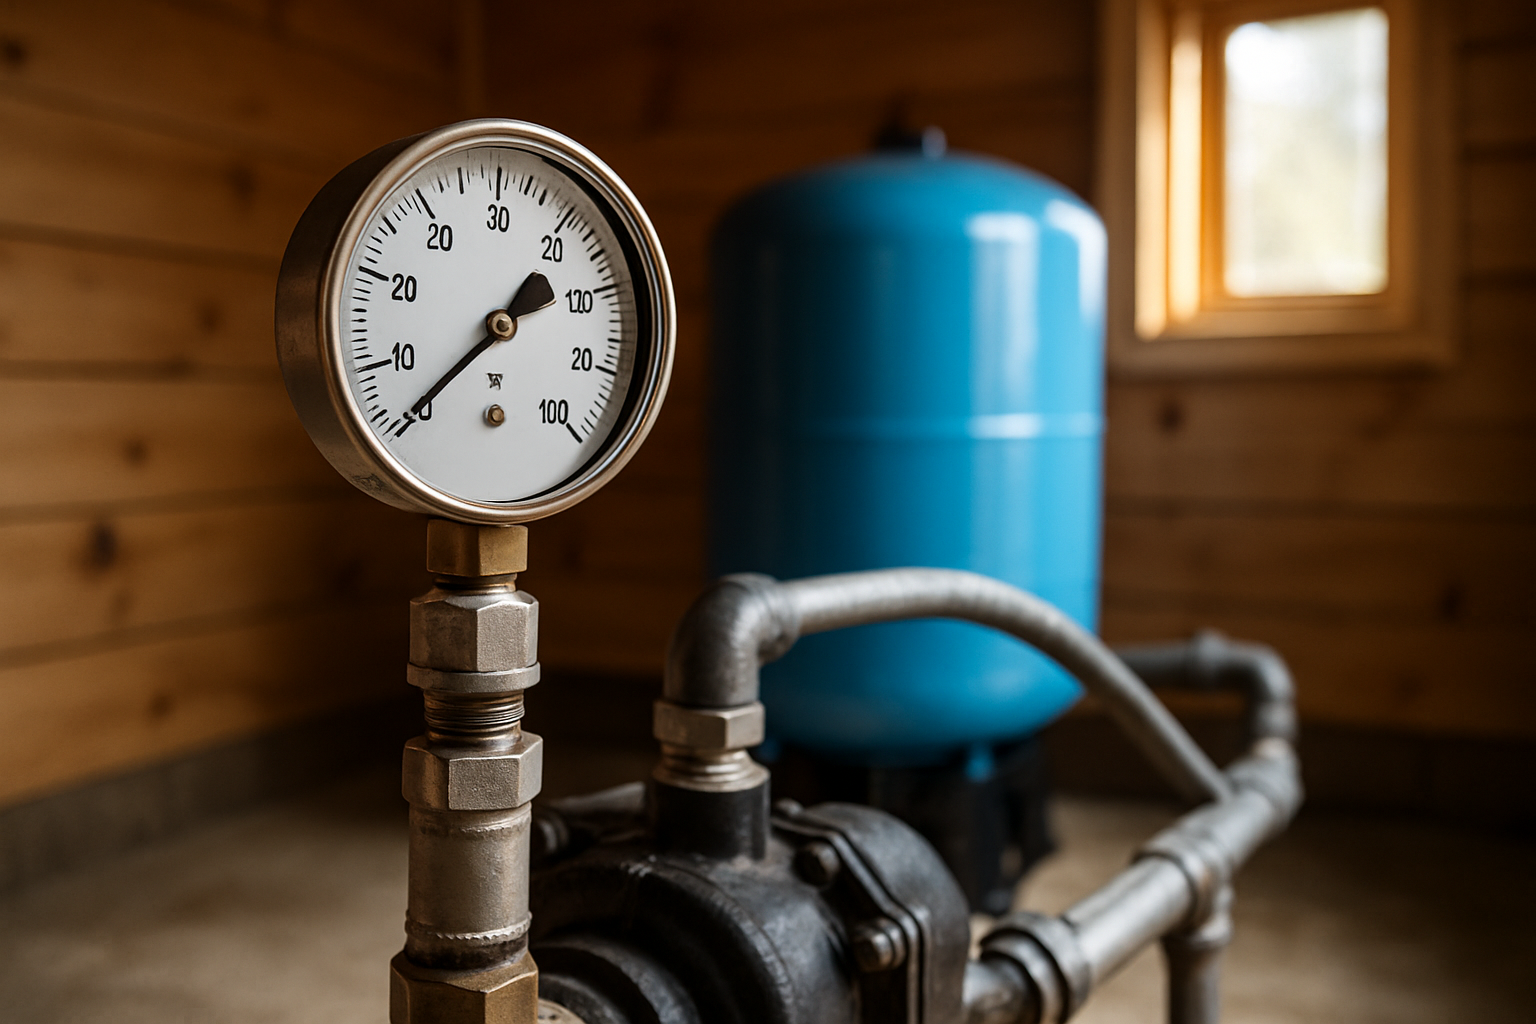
Step 3: Check the Air Pressure
This is the most important diagnostic step:
- Turn off power to the well pump at the breaker
- Drain system pressure by opening a faucet until flow stops completely
- Locate the air valve (Schrader valve like on a tire) on top of the tank
- Remove the cap and check for water spray. If water sprays out, the bladder is ruptured—the tank needs replacement
- Use a tire pressure gauge to check the air pressure
- Record the reading and compare to specifications
Correct Precharge Pressure
The tank's air precharge should be 2 PSI below your pressure switch's cut-in setting:
- 30/50 PSI switch → 28 PSI precharge
- 40/60 PSI switch → 38 PSI precharge
- 20/40 PSI switch → 18 PSI precharge
If precharge is low but no water came from the valve, you can add air with a standard tire pump or compressor. If precharge is too high, release air until it's correct.
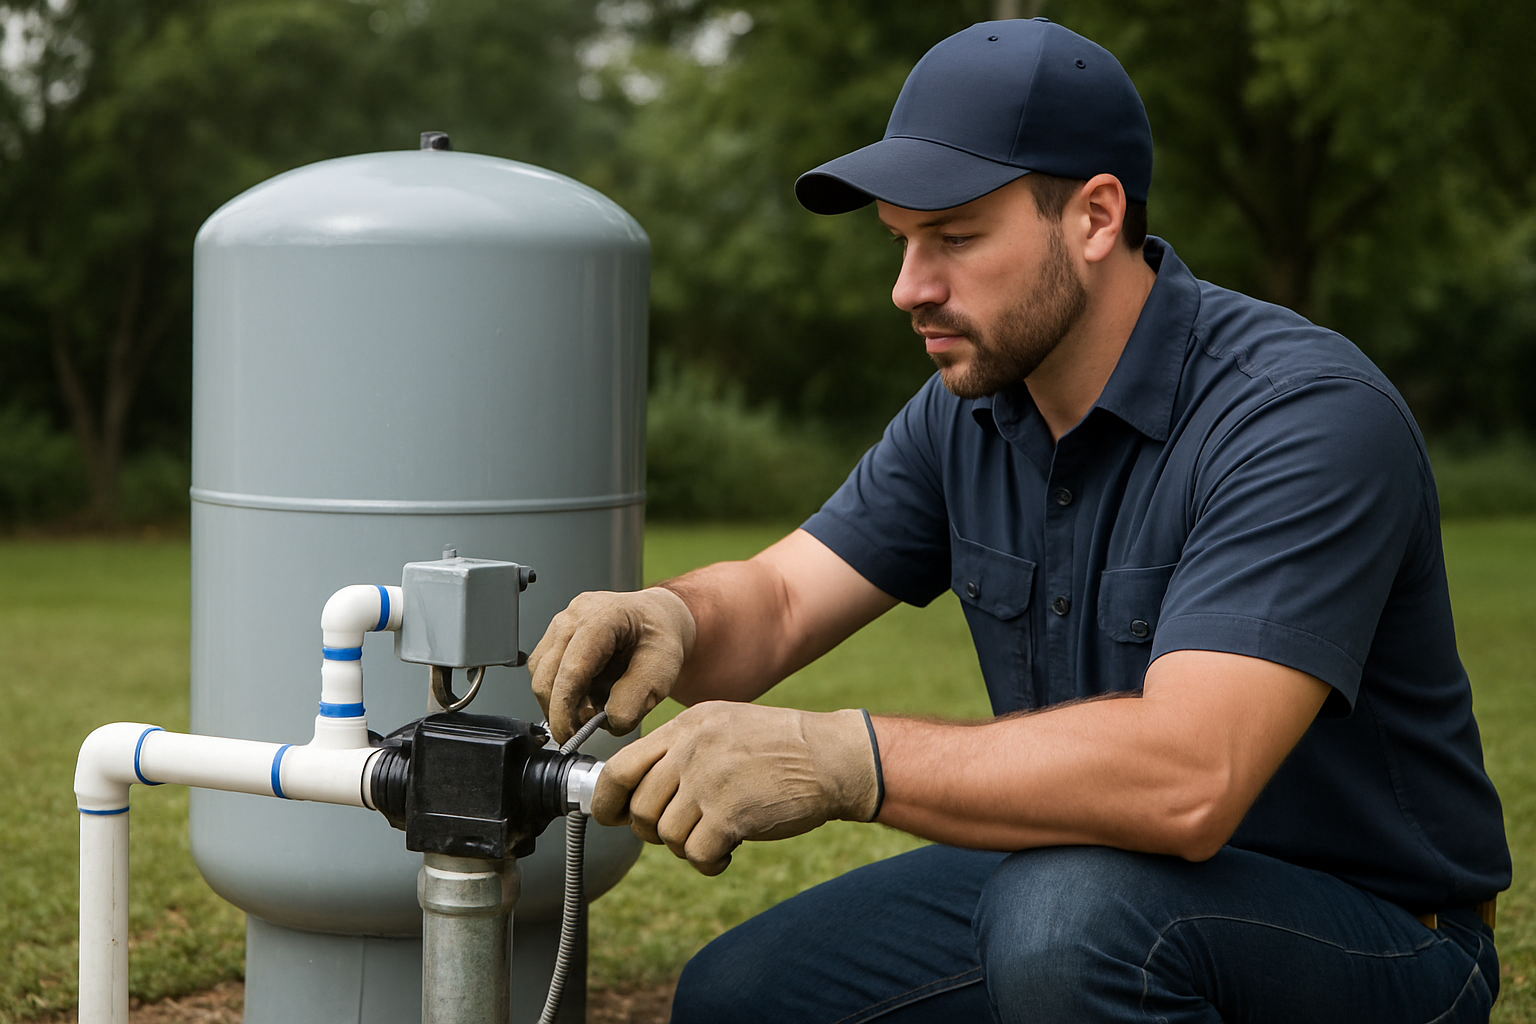
Step 4: Monitor Pump Cycling
After checking and correcting precharge:
- Restore power and let the system pressurize
- Open a faucet and time how long before the pump starts
- Close the faucet and time how long until the pump stops
- A properly functioning system should allow several minutes of moderate water use before the pump cycles
Step 5: Drawdown Test
Measure actual tank performance:
- Let the pump fill the tank completely (pressure at cut-out)
- Turn off power to the pump
- Open a faucet and collect water in measured containers
- Continue until the pump would normally turn on (pressure at cut-in)
- The total collected is your drawdown capacity
Compare this to the tank's rated drawdown. If actual drawdown is significantly less (say, 50% or less of rated), the tank is not performing properly.
Understanding Tank Capacity vs. Drawdown
A common misconception is that a "20-gallon tank" provides 20 gallons of water. In reality, actual usable water (drawdown) is much less due to the air cushion. Typical drawdown percentages:
- Standard tanks: About 25-30% of total capacity
- High-acceptance tanks: About 35-40% of total capacity
For example, a standard 44-gallon tank might provide 10-14 gallons of drawdown, not 44 gallons.
Common Pressure Tank Problems and Solutions
Problem: Low Air Precharge
Symptoms: Rapid cycling, waterlogged feel
Cause: Air naturally permeates through the bladder over time
Solution: Drain tank, add air to correct pressure, recheck periodically
Problem: Ruptured Bladder
Symptoms: Water from air valve, severe short cycling, tank entirely waterlogged
Cause: Age, manufacturing defect, over-pressurization, or chemical damage
Solution: Replace the tank (bladders are generally not field-replaceable)
Problem: Excessive Precharge
Symptoms: Reduced drawdown, pump cycles quickly even though tank seems to have air
Cause: Over-inflation or mismatched pressure settings
Solution: Release air to proper level (2 PSI below cut-in)
Problem: Tank Corrosion
Symptoms: Rust, leaks, weakened shell
Cause: Age, condensation, water chemistry
Solution: Replace the tank; corroded tanks can fail catastrophically
Problem: Undersized Tank
Symptoms: Frequent but normal cycling, pump starting with light use
Cause: Tank too small for household demand
Solution: Install a larger tank or add a second tank in parallel
Maintaining Your Pressure Tank
Regular maintenance extends tank life and ensures reliable operation:
Monthly
- Listen for normal pump cycling patterns
- Check for visible leaks or corrosion
- Note any pressure fluctuations during use
Quarterly
- Check and record system pressures (cut-in and cut-out)
- Perform the knock test
Annually
- Check and adjust air precharge
- Inspect all connections and fittings
- Test the pressure relief valve if equipped
- Consider professional inspection
When to Replace Your Pressure Tank
Plan for replacement when:
- Bladder has ruptured (water from air valve)
- Tank cannot hold air precharge
- Significant rust or corrosion is present
- Tank is over 10-15 years old (preventive replacement)
- Tank shows bulging, dents, or structural damage
- You're experiencing repeated problems despite maintenance
Don't wait for catastrophic failure—a burst pressure tank can cause flooding and property damage. Proactive replacement is much less costly than water damage repairs.
Choosing a Replacement Tank
If replacement is needed, consider:
- Drawdown capacity: Match or exceed your current tank's performance
- Physical size: Ensure the new tank fits the available space
- Connection size: Match existing plumbing connections
- Quality: Choose reputable brands with good warranties
- Pressure rating: Must exceed your maximum system pressure
Popular quality brands include Well-X-Trol, Flexcon, and AO Smith. Investing in a quality tank pays off in longevity and reliability.
DIY vs. Professional Service
Checking your pressure tank is well within DIY capabilities for most homeowners. However, consider professional help for:
- Tank replacement (especially for large tanks)
- Diagnosing complex system issues
- Sizing calculations for new installations
- When working in confined spaces
- If you're uncomfortable with the procedures
Conclusion
Your pressure tank plays a vital role in your well system's performance and longevity. Regular inspection and maintenance—particularly checking and maintaining proper air precharge—can prevent common problems like rapid pump cycling and premature pump failure. By understanding how your tank works and knowing what symptoms to watch for, you can catch problems early and ensure reliable water service for your home.
Remember: a few minutes of preventive maintenance can save hours of hassle and hundreds of dollars in repairs. Make pressure tank inspection part of your regular home maintenance routine.
Need help with your pressure tank? Southern California Well Service provides expert diagnosis, repair, and replacement services. Contact us at (760) 440-8520 or visit www.scwellservice.com to schedule an inspection today.