Pressure Tank Maintenance Guide: Air Charge, Inspection, and Care
Your pressure tank does more than store water—it protects your well pump from excessive cycling that causes premature failure. Proper tank maintenance is one of the simplest ways to extend pump life and ensure consistent water pressure throughout your home.
Need professional help? Our licensed well technicians are here for you.
Call (760) 440-8520Understanding Your Pressure Tank
Modern pressure tanks use a rubber bladder or diaphragm to separate air from water. The air acts like a spring, compressing when the pump fills the tank and pushing water out when you open a faucet. This design prevents the pump from cycling on and off with every small water use.
How It Works: When your pump runs, water enters the tank and compresses the air charge. When you use water, the compressed air pushes water out until pressure drops to the "cut-in" point, triggering the pump to refill. Properly sized and charged tanks provide several gallons of water between pump cycles.
Bladder vs Diaphragm: Bladder tanks (like Well-X-Trol) have a replaceable rubber bladder—though replacement often isn't worth the cost. Diaphragm tanks use a permanently attached membrane. Both work similarly and last 7-12 years on average, with some lasting 15+ years in good conditions.
Why Air Charge Matters: The air pre-charge pressure determines how much "drawdown" (usable water) your tank provides. Incorrect air pressure causes rapid cycling, poor pressure, or even bladder damage. Checking this annually is the most important tank maintenance task.
Checking and Setting Air Charge
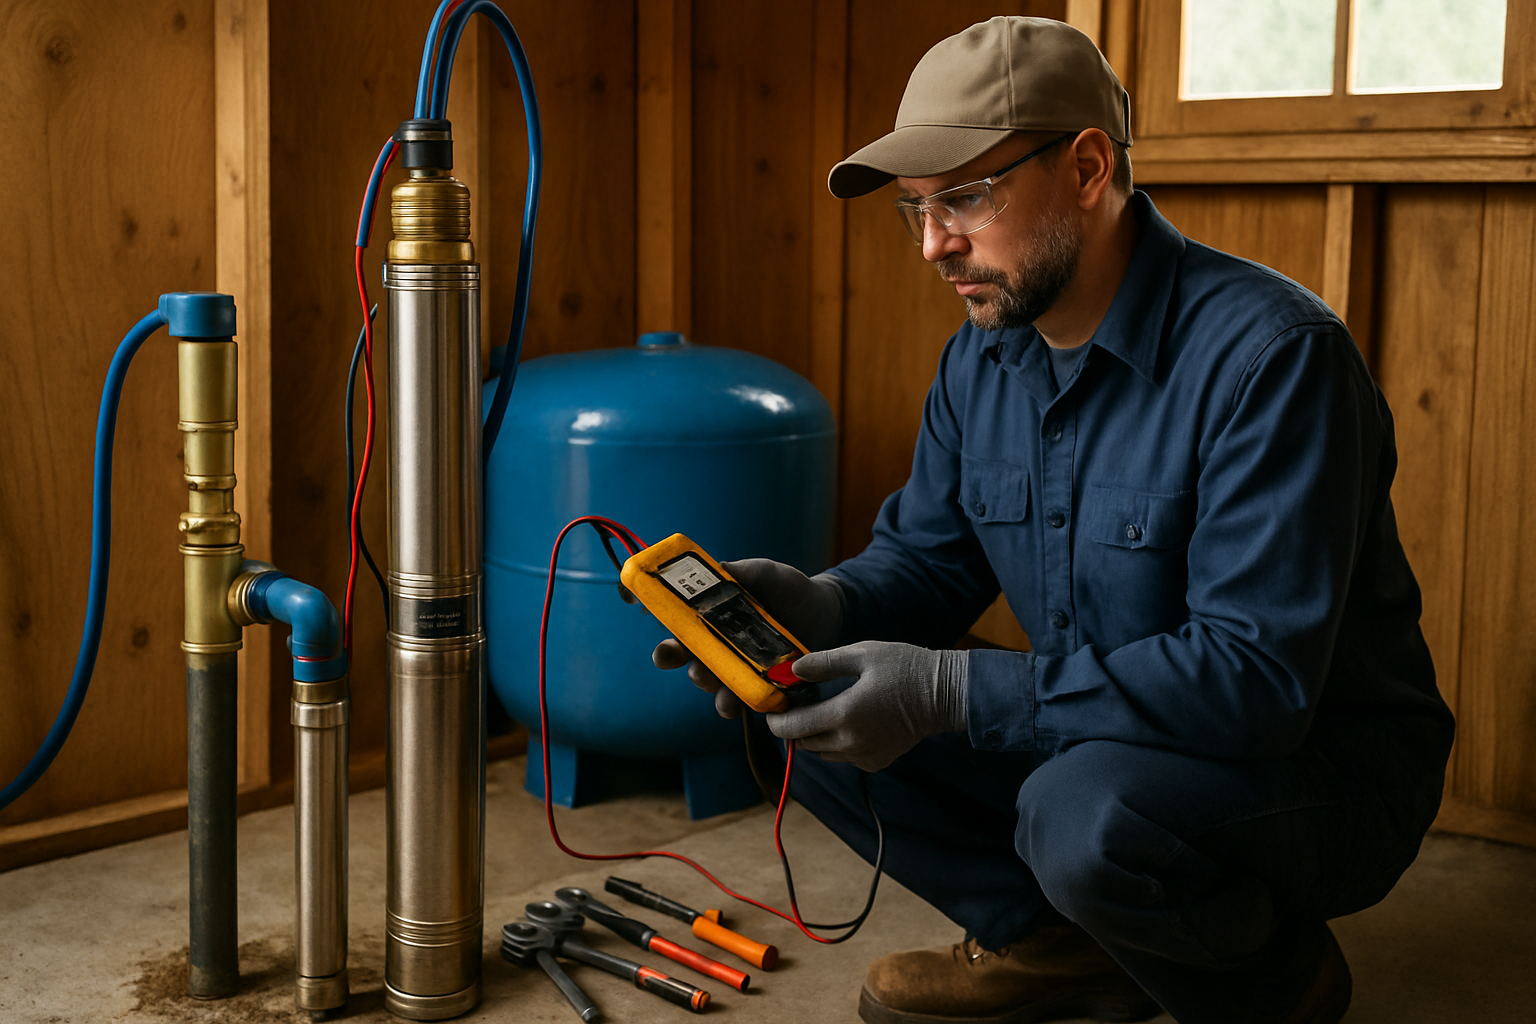
Checking your tank's air charge is a simple DIY task that takes about 15 minutes. Do this annually, or whenever you notice cycling issues.
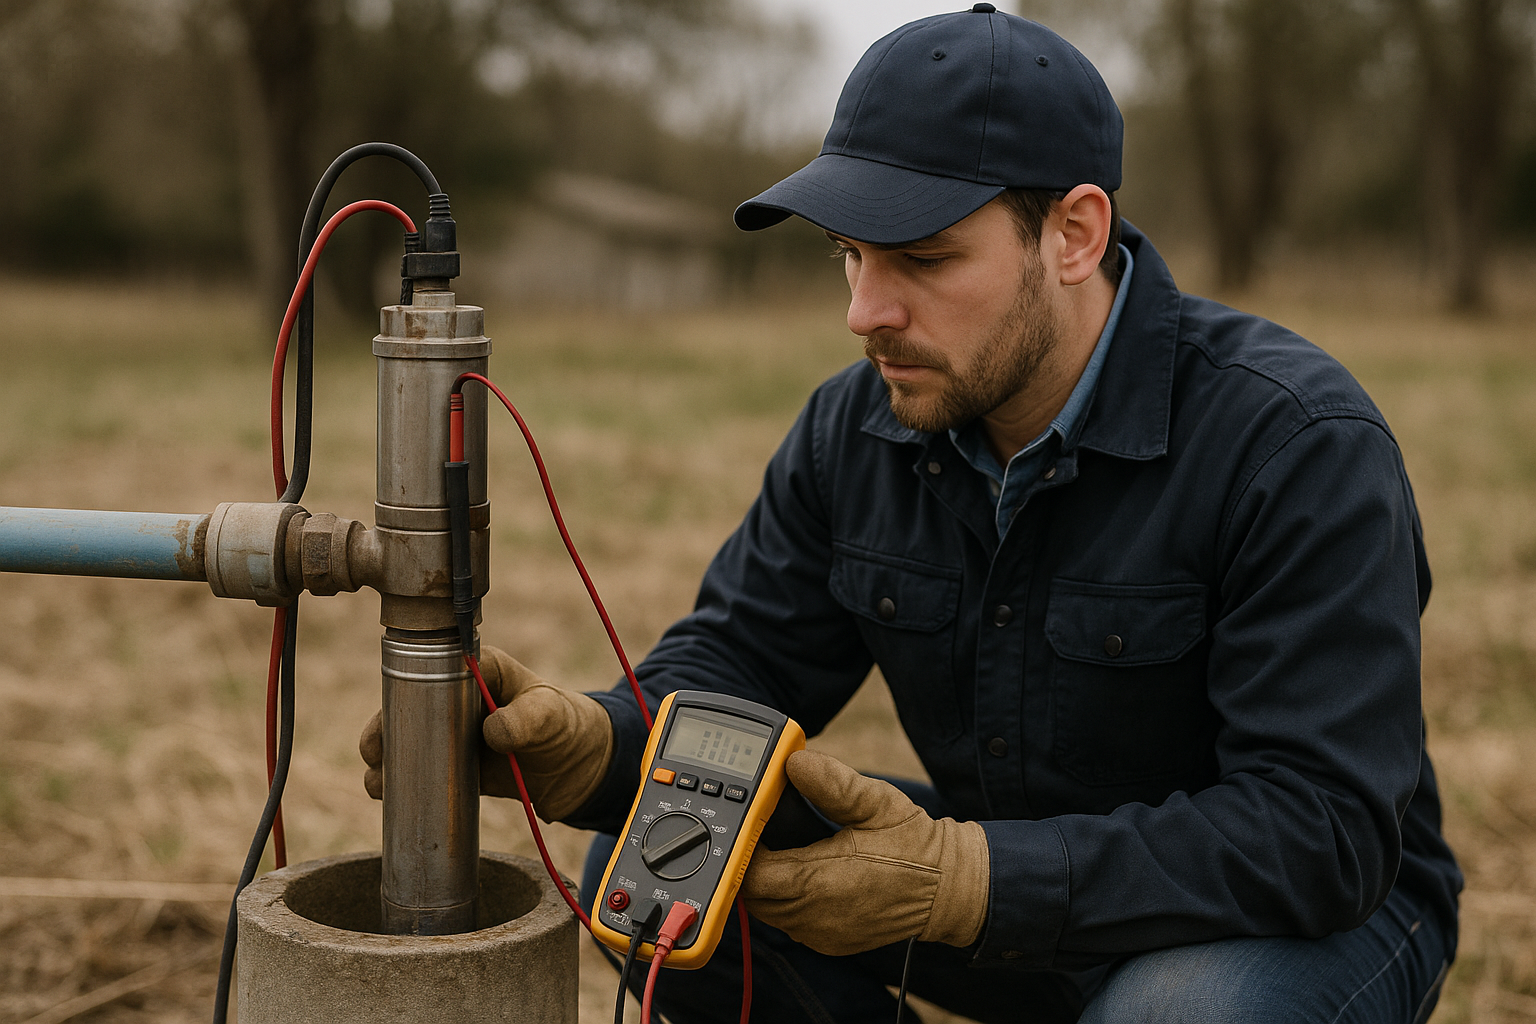
Step 1 - Turn Off Power: Switch off the pump at the circuit breaker. This prevents the pump from running while you're working and ensures accurate pressure readings.
Step 2 - Drain the Tank: Open a faucet and let water run until it stops (or slows to a trickle). The pump won't refill because you've cut the power. You need the tank empty because water pressure would give false air readings.
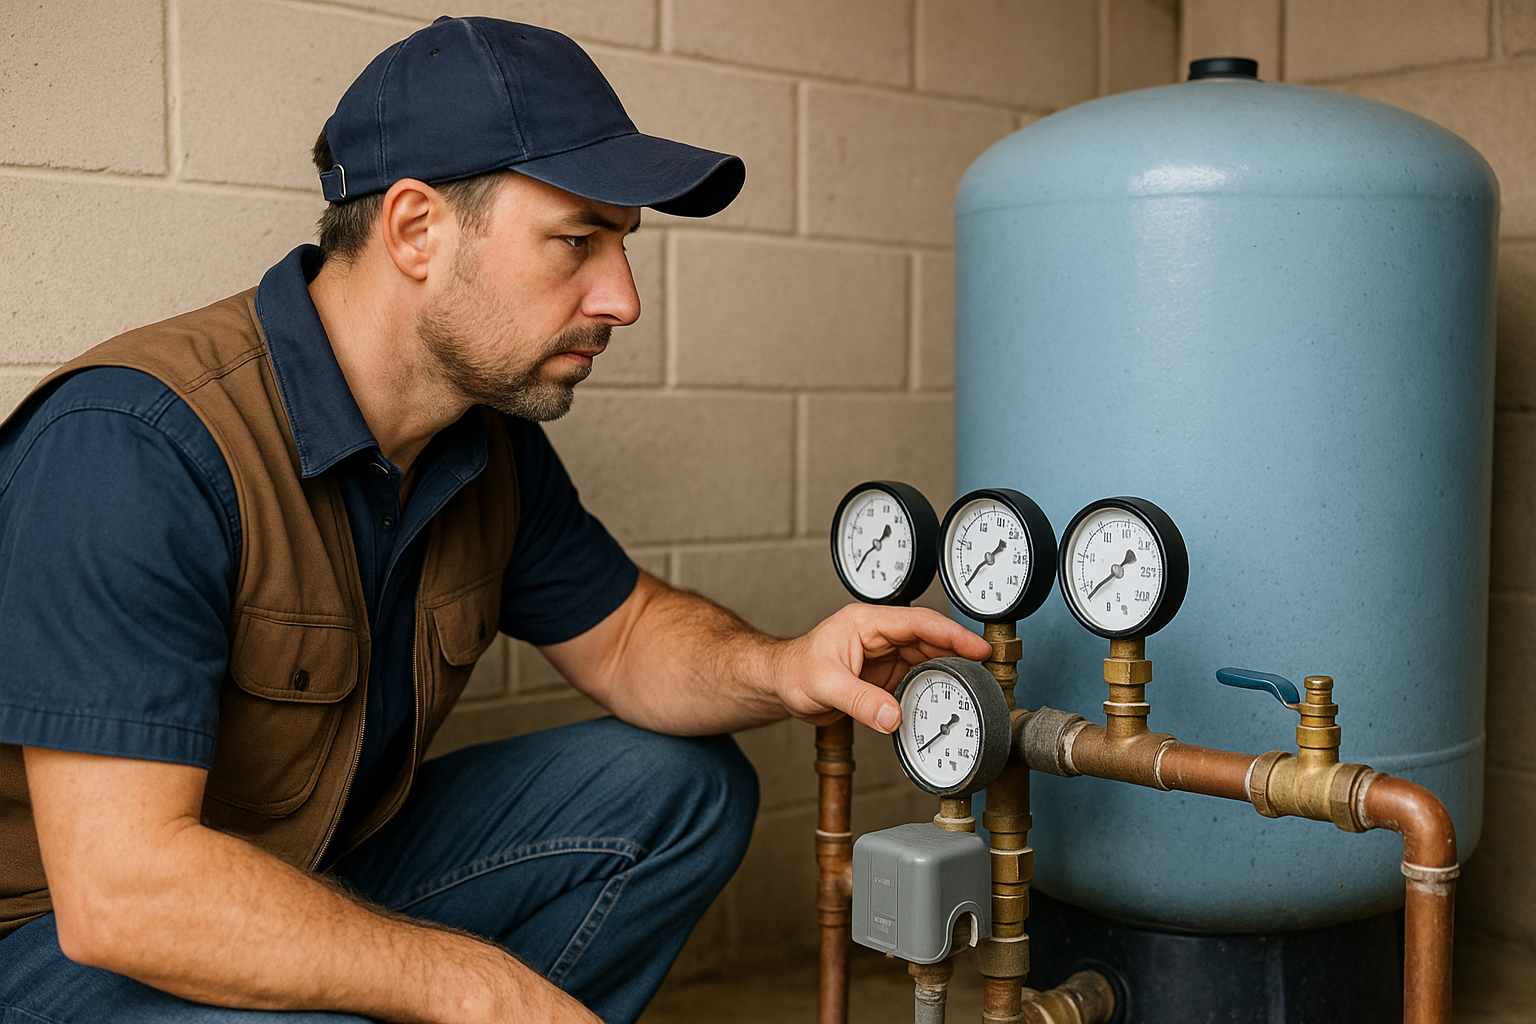
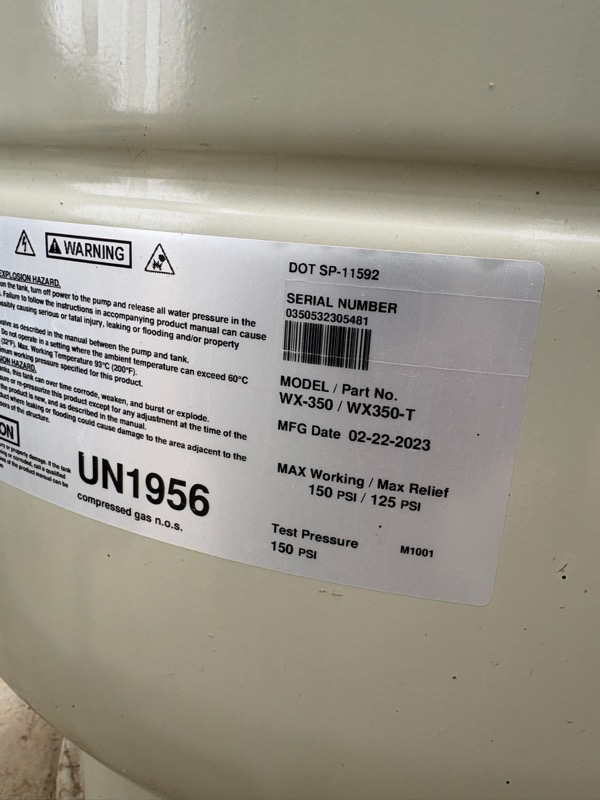
Step 3 - Check Air Pressure: Locate the air valve on top of the tank (looks like a tire valve, often under a plastic cap). Using a tire pressure gauge or digital gauge, check the pressure. Compare to the sticker on your tank or calculate: air charge should be 2 PSI below your pressure switch cut-in setting. For a 40/60 switch, that's 38 PSI.
Step 4 - Adjust If Needed: If pressure is low, add air using a bicycle pump, hand pump, or compressor. Add slowly, checking frequently. If pressure is too high, release air by pressing the valve core. Once correct, restore power and let the system refill.
Signs of Tank Problems
Pressure tanks don't fail suddenly—they give warning signs. Catching these early lets you plan a replacement rather than dealing with an emergency.
Rapid Cycling (Short Cycling): The most common sign of tank trouble. If your pump kicks on with every toilet flush or runs for just a few seconds at a time, your tank isn't providing adequate drawdown. This is usually waterlogging (failed bladder) or low air charge.
Water at the Air Valve: Press the air valve briefly when the tank is pressurized. Air should hiss out. If water spurts out, the bladder has failed and the tank is waterlogged. Replacement is the only fix.
Unusual Sounds: A healthy tank is silent. Sloshing or rumbling sounds suggest water and air are mixing—indicating a failed bladder. Banging pipes (water hammer) can indicate tank problems as well.
Physical Signs: Rust, corrosion, or moisture on the tank exterior suggest problems. Bulging or deformation indicates over-pressurization or internal corrosion. Any tank showing these signs should be inspected or replaced promptly.
Maintenance Best Practices
Good maintenance habits extend tank life and help you spot problems before they become emergencies.
- Annual Air Check: Check and adjust air charge once per year, ideally during your annual well system inspection. Write the date on the tank with a marker so you remember when it was last checked.
- Keep It Dry: Ensure good drainage and ventilation around your tank. Standing water or excessive humidity accelerates corrosion. If your tank is in a pit or basement, check for moisture intrusion.
- Inspect Fittings: Check connections for leaks or corrosion annually. Galvanic corrosion can occur where dissimilar metals meet—use dielectric unions if needed.
- Know Your Tank's Age: Most tanks last 7-12 years. If yours is approaching that age, start planning for replacement. A proactive swap costs the same as an emergency one but happens on your schedule.
- Record Baseline Performance: Note your tank's normal air charge, your system's cycle frequency, and any other baseline data. Changes from baseline indicate developing problems.
We install Well-X-Trol (Amtrol) and Flexcon pressure tanks — industry-leading bladder tanks that outlast standard diaphragm models. Proper sizing with a quality tank can double your pump's lifespan.
Frequently Asked Questions
How do I know if my pressure tank is waterlogged?
The telltale sign of a waterlogged tank is rapid pump cycling—the pump turns on and off every few seconds or with every small water use. You can also test by pressing the air valve (like a tire valve) on top of the tank when the system is pressurized: if water spurts out instead of air, the bladder has failed and the tank is waterlogged. A waterlogged tank can also feel unusually heavy or cold at the bottom.
Can I add air to my pressure tank while the pump is running?
No, never add air with the pump running or with the tank full of water. You must turn off the pump at the breaker, then drain the tank completely by opening a faucet until water stops flowing. Only then can you accurately check and adjust air pressure. Adding air to a tank under water pressure gives false readings and can over-pressurize the bladder, causing damage.
How long does it take to replace a well pressure tank?
A professional pressure tank replacement typically takes 1-2 hours for a straightforward swap. This includes draining the old tank, disconnecting plumbing, removing the old unit, installing the new tank, setting proper air charge, and testing the system. Cost ranges from $400-800 installed for most residential tanks (including the tank itself). DIY replacement is possible but requires plumbing skills and proper tools.
Get Expert Well Service
Southern California Well Service has served San Diego, Riverside, and San Bernardino counties for decades. Licensed C-57 contractor.
Call (760) 440-8520Available 24/7 for emergencies
Related Articles
Continue learning about well maintenance and troubleshooting