Sediment Filter Installation for Wells: Complete Guide
Sediment filtration is the most important first step in any well water treatment system. Sand, silt, rust, and other particles not only make water look dirty—they damage pumps, clog fixtures, and reduce the effectiveness of other treatment equipment.
📋 In This Guide
This guide covers everything you need to know about selecting, installing, and maintaining a whole-house sediment filter for your private well.
Why Well Water Needs Sediment Filtration
Unlike city water that's filtered at a treatment plant, well water often contains naturally occurring sediment. Common issues include:
What Sediment Filters Remove
- Sand and silt — From the aquifer itself, especially in sandy soil areas
- Rust particles — From iron in the water or corroding pipes
- Scale flakes — From hard water buildup breaking loose
- Organic matter — Plant material, algae, or debris
- Well casing debris — Particles from deteriorating steel casings
Problems Caused by Sediment
- Clogged faucet aerators — Reduced flow and sputtering
- Damaged appliances — Washing machines, dishwashers, water heaters
- Shorter pump life — Sediment wears pump components
- Fouled water softeners — Media bed becomes clogged
- Blocked UV systems — Particles shield bacteria from UV light
- Stained fixtures — Particularly with iron-containing sediment
- Plugged water heater elements — Reduced efficiency and failure
Types of Sediment Filters
Cartridge Filters (Most Common)
Replaceable filter cartridges in a housing. Most popular for residential wells.
Spun Polypropylene (Melt-Blown)
- Best for: General sediment, most well applications
- Advantages: Inexpensive, good dirt-holding capacity, no chemical release
- Disadvantages: Can't be cleaned, must be replaced
- Cost: $5-$15 per cartridge
Pleated Polyester
- Best for: Lower sediment loads, longer life between changes
- Advantages: Can be rinsed and reused (limited times), larger surface area
- Disadvantages: Higher initial cost, not ideal for heavy sediment
- Cost: $15-$35 per cartridge
String-Wound (Wound Polypropylene)
- Best for: Heavy sediment, sandy wells
- Advantages: Excellent dirt-holding, depth filtration traps different particle sizes
- Disadvantages: Can't be cleaned, pressure drop increases faster
- Cost: $8-$20 per cartridge
Gradient Density
- Best for: Wide range of particle sizes
- Advantages: Outer layers catch large particles, inner layers catch fine particles
- Disadvantages: More expensive, can't be cleaned
- Cost: $15-$40 per cartridge
Spin-Down (Centrifugal) Filters
Uses centrifugal force to separate heavy particles into a collection chamber.
- Best for: Heavy sand loads, pre-filter before cartridge filter
- Advantages: No cartridges to replace, just flush the chamber
- Disadvantages: Only removes larger particles (40-100+ micron)
- Cost: $75-$200 for the unit
Automatic Backwashing Filters
Media-based filters that automatically backwash to clean themselves.
- Best for: Very high sediment, commercial applications
- Advantages: No cartridge changes, handles heavy loads
- Disadvantages: Higher cost, uses water for backwashing, needs drain
- Cost: $800-$2,000+ installed
Understanding Micron Ratings
Micron ratings indicate the smallest particle size a filter can remove. Lower number = finer filtration.
| Micron Rating | Particle Size | What It Catches | Best Application |
|---|---|---|---|
| 100 micron | Fine sand | Sand, large debris | Pre-filter only |
| 50 micron | Human hair diameter | Sand, silt, visible particles | First-stage filter |
| 20-25 micron | White blood cell | Fine silt, some rust | Moderate sediment |
| 5 micron | Red blood cell | Fine sediment, rust, algae | Standard residential |
| 1 micron | Bacteria | Very fine particles, some cysts | Pre-UV, drinking water |
Choosing the Right Micron Rating
- 5 micron — Best choice for most wells, good balance of filtration and flow
- 1 micron — Use before UV sterilizers or for finest filtration
- 20-25 micron — Use as pre-filter before 5 micron if you have heavy sediment
- Don't go too fine — 1 micron filters clog quickly if used alone on dirty wells
Absolute vs. Nominal Ratings
- Nominal rating: Removes a percentage (usually 85%) of particles at that size
- Absolute rating: Removes 99.9% of particles at that size
For most sediment filtration, nominal ratings are fine. Absolute ratings matter more for critical applications like pre-filtering before UV sterilization.
Filter Housing Sizes
Standard Housing Sizes
| Size | Dimensions | Flow Rate | Best For |
|---|---|---|---|
| Standard | 2.5" x 10" | 3-5 GPM | Under-sink, point-of-use only |
| Big Blue | 4.5" x 10" | 8-12 GPM | Small homes, apartments |
| Big Blue 20" | 4.5" x 20" | 15-25 GPM | Most residential wells |
| Commercial | Multiple cartridges | 25+ GPM | Large homes, farms, commercial |
Recommendation: For whole-house well filtration, use 4.5" x 20" Big Blue housings. They handle typical residential flow rates (10-15 GPM) with minimal pressure drop and longer cartridge life.
Housing Features to Consider
- Clear vs. opaque housing — Clear lets you see when the filter is dirty, but may allow algae growth if exposed to light
- Pressure relief button — Makes cartridge changes easier
- Built-in pressure gauges — Shows when filter needs changing
- Mounting bracket — Secures the housing to the wall
- Inlet/outlet ports — Match your plumbing (usually 1" for whole-house)
Installation Location and Planning
Where to Install
- After the pressure tank — Protects the filter from pressure surges
- Before other treatment equipment — Sediment filter protects softeners, UV, etc.
- Before water enters the house — Whole-house protection
- Accessible location — You'll be changing cartridges frequently
- Protected from freezing — Frozen filters crack and leak
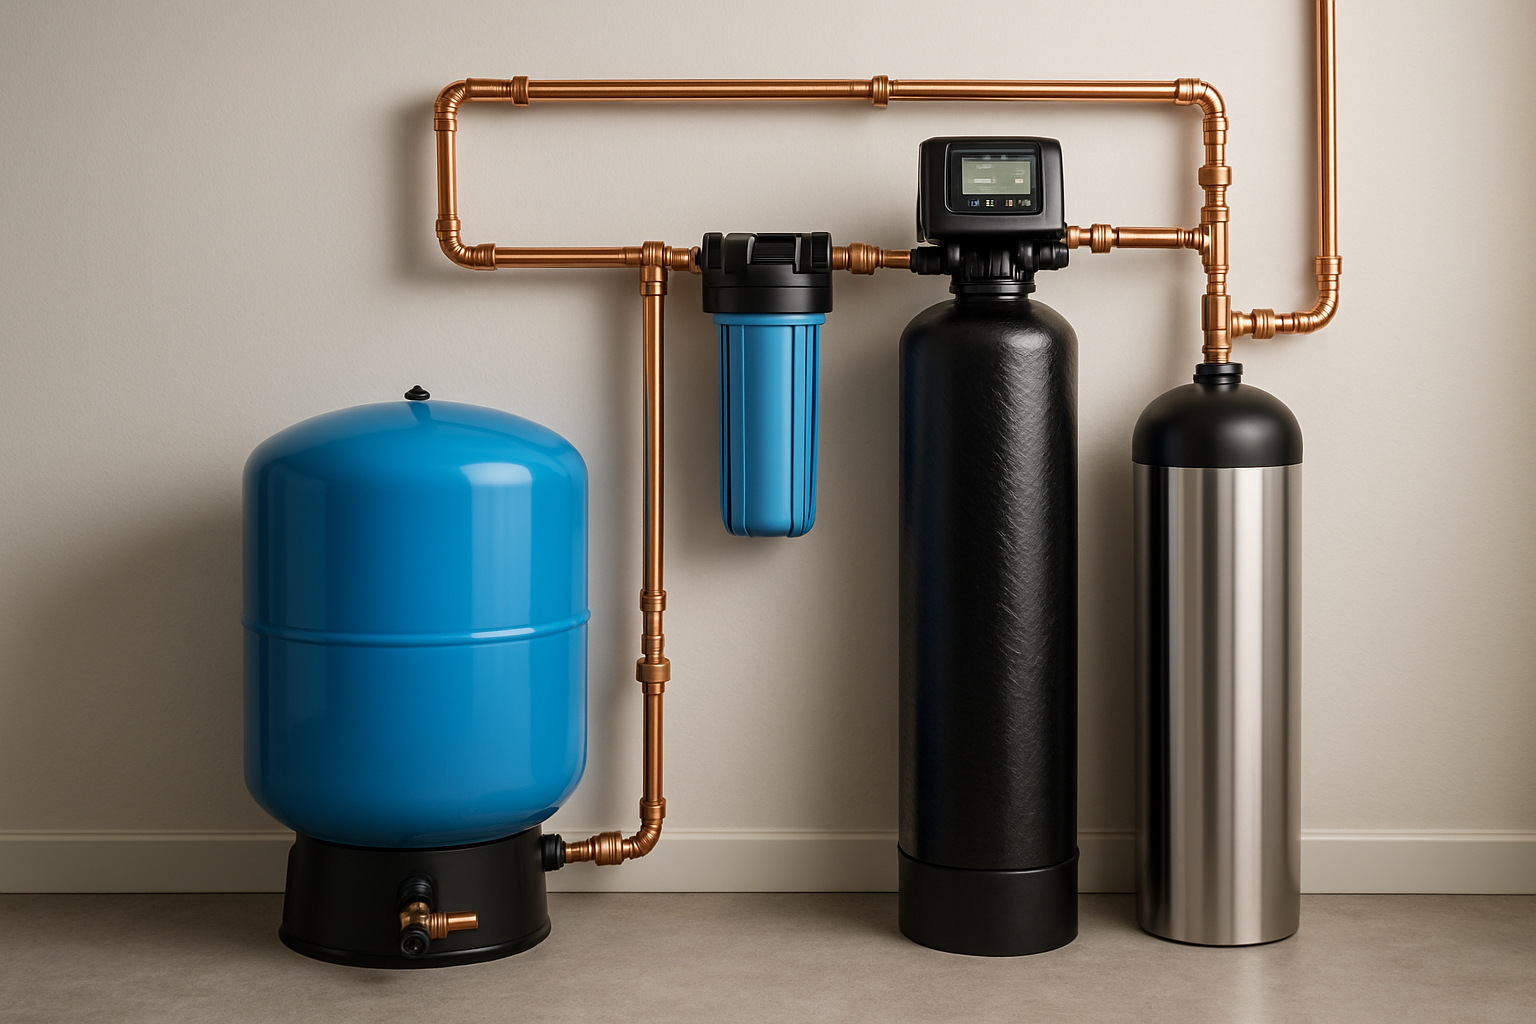
Proper Installation Sequence
From well to house:
- Well pump
- Pressure tank
- Sediment filter ← Install here
- Iron filter (if needed)
- Water softener (if needed)
- Carbon filter (if needed)
- UV sterilizer (if needed)
- House plumbing
Multi-Stage Filtration
For wells with heavy sediment, use staged filtration:
- First stage: 20-25 micron filter (catches large particles)
- Second stage: 5 micron filter (catches fine particles)
This extends the life of the finer filter significantly.
Installation Requirements
Tools and Materials Needed
- Filter housing with mounting bracket
- Filter cartridge (appropriate micron rating)
- Inlet/outlet fittings (match your plumbing)
- Shutoff valves (ball valves recommended)
- Bypass assembly (optional but recommended)
- Pipe fittings and connectors
- Teflon tape or pipe dope
- Pipe wrench
- Drill and mounting hardware
- Housing wrench (usually included with housing)
Installation Steps Overview
- Plan the location — After pressure tank, accessible, room for filter changes
- Shut off water — Turn off pump power and relieve pressure
- Install shutoff valves — Before and after the filter location
- Mount the bracket — Level, secure, at comfortable working height
- Cut into the water line — Create space for the housing
- Install fittings — Connect inlet and outlet
- Insert the filter cartridge — Remove any protective packaging
- Attach the housing — Hand-tighten, then a quarter turn more
- Open shutoffs slowly — Check for leaks
- Flush the system — Run water until clear (5-10 minutes)
Costs and Budget
Equipment Costs
| Item | Cost Range |
|---|---|
| Standard housing (2.5" x 10") | $20-$50 |
| Big Blue housing (4.5" x 20") | $50-$120 |
| Spin-down filter | $75-$200 |
| Shutoff valves (pair) | $20-$60 |
| Bypass kit | $30-$80 |
| Fittings and connectors | $15-$40 |
Cartridge Costs (Ongoing)
| Type | Cost | Change Frequency | Annual Cost |
|---|---|---|---|
| Spun poly (5 micron) | $8-$15 | Every 3-6 months | $20-$60 |
| Pleated (5 micron) | $20-$35 | Every 6-12 months | $20-$70 |
| String-wound | $10-$20 | Every 2-4 months | $30-$120 |
Professional Installation
- Basic single-stage installation: $150-$300
- Multi-stage with bypass: $250-$450
- Complete system (spin-down + cartridge): $350-$600
Maintenance and Cartridge Changes
When to Change the Filter
- Pressure drop: When pressure drops 5-10 PSI below normal
- Visible contamination: When the cartridge looks dirty (clear housing)
- Time-based: Every 3-6 months at minimum
- After events: After power outages, repairs, or well work
Never run a clogged filter! It restricts flow, damages pumps, and lets sediment bypass.
How to Change the Cartridge
- Close the inlet shutoff valve
- Press the pressure relief button (if equipped)
- Use the housing wrench to remove the sump
- Remove and discard the old cartridge
- Clean the inside of the housing
- Inspect and replace the O-ring if worn
- Insert the new cartridge
- Hand-tighten the housing, then 1/4 turn more
- Slowly open the inlet valve
- Check for leaks
- Run water until clear
Maintenance Tips
- Keep spare cartridges on hand
- Install a pressure gauge to monitor filter condition
- Note the date when you change the filter
- Lubricate the O-ring with food-grade silicone
- Never over-tighten the housing (causes cracking)
Frequently Asked Questions
What size sediment filter do I need for a well?
Most residential wells need a 4.5" x 20" (Big Blue) filter housing with a 5-micron cartridge. This size handles 10-15 GPM flow rates without significant pressure drop. For higher sediment loads, consider a 4.5" x 10" pre-filter (25-50 micron) followed by a 5-micron filter. Single 2.5" x 10" housings are too small for whole-house well applications—they'll cause excessive pressure drop and need constant changing.
How often should I change my well sediment filter?
Sediment filter cartridges should be replaced when pressure drops 5-10 PSI below normal, or every 3-6 months—whichever comes first. Wells with high sediment may need monthly changes. Clear housings let you see when the filter is dirty. Never run a clogged filter—it damages pumps, reduces flow to fixtures, and can actually let sediment bypass around the cartridge.
How much does sediment filter installation cost?
A basic whole-house sediment filter system costs $100-$300 for equipment (housing, mounting bracket, fittings, first cartridge) plus $150-$300 for professional installation. Total installed cost: $250-$600. Replacement cartridges cost $10-$40 each, with annual cartridge costs of $30-$100 depending on your water quality and filter type. DIY installation is possible for those comfortable with basic plumbing.
Where should a sediment filter be installed on a well?
Install sediment filters after the pressure tank but before any other treatment equipment (softeners, UV systems, carbon filters). This location protects downstream equipment from sediment damage. Install in an accessible location—you'll need to change cartridges regularly, sometimes monthly. A bypass valve allows maintenance without shutting off water to the house, which is especially important for larger families.
Can a sediment filter improve water taste?
Sediment filters primarily remove particles, not dissolved substances that affect taste. However, they can improve taste indirectly by removing organic matter that contributes to earthy or musty flavors, and by removing rust that creates metallic tastes. For significant taste improvement, add a carbon filter after the sediment filter—carbon removes chlorine, chemicals, and organic compounds that affect taste and odor.
Troubleshooting Common Problems
Filter Clogs Too Quickly
- Add a pre-filter (larger micron rating) before the main filter
- Consider a spin-down filter for heavy sand
- Investigate source: pump sand, degrading well casing, or aquifer problem
Pressure Drop Too High
- Use a larger housing (4.5" x 20" instead of 4.5" x 10")
- Change filter more frequently
- Use a less restrictive micron rating
Sediment Getting Through
- Use a finer micron rating
- Check that the cartridge is seated properly
- Inspect the housing for cracks or damage
- Replace the O-ring seal
Housing Leaks
- Check O-ring for damage or improper seating
- Don't over-tighten (causes cracking)
- Inspect housing for cracks
- Lubricate O-ring with silicone grease
Get Professional Filtration Help
We install and maintain whole-house sediment filtration systems for wells throughout San Diego County.
Call (760) 440-8520Free estimates | Serving San Diego, Riverside & San Bernardino Counties
Related: Water Testing | Discolored Well Water | Whole-House Filtration
Related Articles
Continue learning about well maintenance and troubleshooting