How to Drain a Pressure Tank: Complete Step-by-Step Guide
Need to drain your well pressure tank? Here's exactly how to do it safely, whether you're doing maintenance, replacing the tank, or winterizing your system.
📋 In This Guide
⚡ Quick Summary
- 1. Turn off pump power at breaker
- 2. Close inlet valve (if present)
- 3. Open a faucet to release pressure
- 4. Attach hose to drain valve
- 5. Open drain and let water flow out
- 6. Wait 5-15 minutes for complete drainage
- 7. Close drain, restore power
Time needed: 20-30 minutes
When Do You Need to Drain a Pressure Tank?
You don't need to drain your pressure tank as part of regular maintenance. Unlike a hot water heater that benefits from annual flushing, a well pressure tank operates as a sealed system that generally takes care of itself. However, there are several situations where draining becomes necessary:
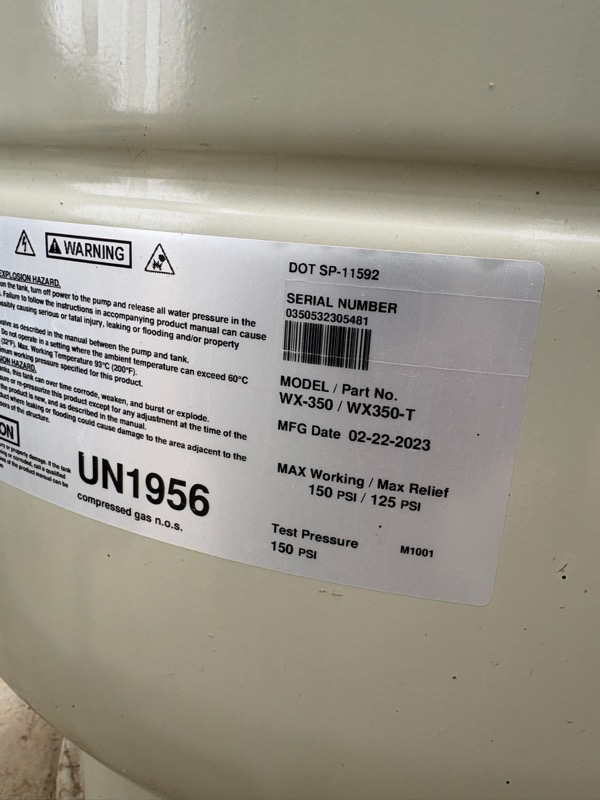
- Tank replacement: A full 40-gallon pressure tank weighs over 350 pounds. You must drain it completely before disconnecting plumbing and removing it.
- Checking air pre-charge: The air pressure reading on a tank with water in it will be inaccurate—the water pressure adds to the air reading, giving you a false number. The tank must be completely empty to check or adjust the pre-charge correctly.
- Waterlogged tank repair: If your pump is short-cycling (turning on and off every 30–60 seconds), the tank has likely lost its air charge. You need to drain all water out before you can add air back through the Schrader valve. Note: if the bladder has ruptured, adding air won't hold—the tank needs replacing.
- Winterizing: If your pressure tank sits in an unheated pump house, garage, or crawl space, you should drain it before extended freezing weather. Water expanding inside the tank can rupture the bladder or crack the steel shell. A burst pressure tank costs $400–$1,200 to replace, plus labor.
- Moving or relocating: Tank must be empty to move safely—both for weight reasons and to prevent water from sloshing and damaging internal components during transport.
- Sediment flush: Over time, sand, silt, or mineral deposits can accumulate at the bottom of the tank. If you're seeing gritty water or intermittent discoloration, draining and flushing the tank can help. Heavy sediment buildup can also interfere with the bladder's function.
Tools You'll Need
Required
- ✓ Garden hose
- ✓ Bucket or drain area
- ✓ Adjustable wrench or pliers
Optional but Helpful
- ○ Tire pressure gauge
- ○ Air compressor
- ○ Teflon tape
Step-by-Step: How to Drain Your Pressure Tank
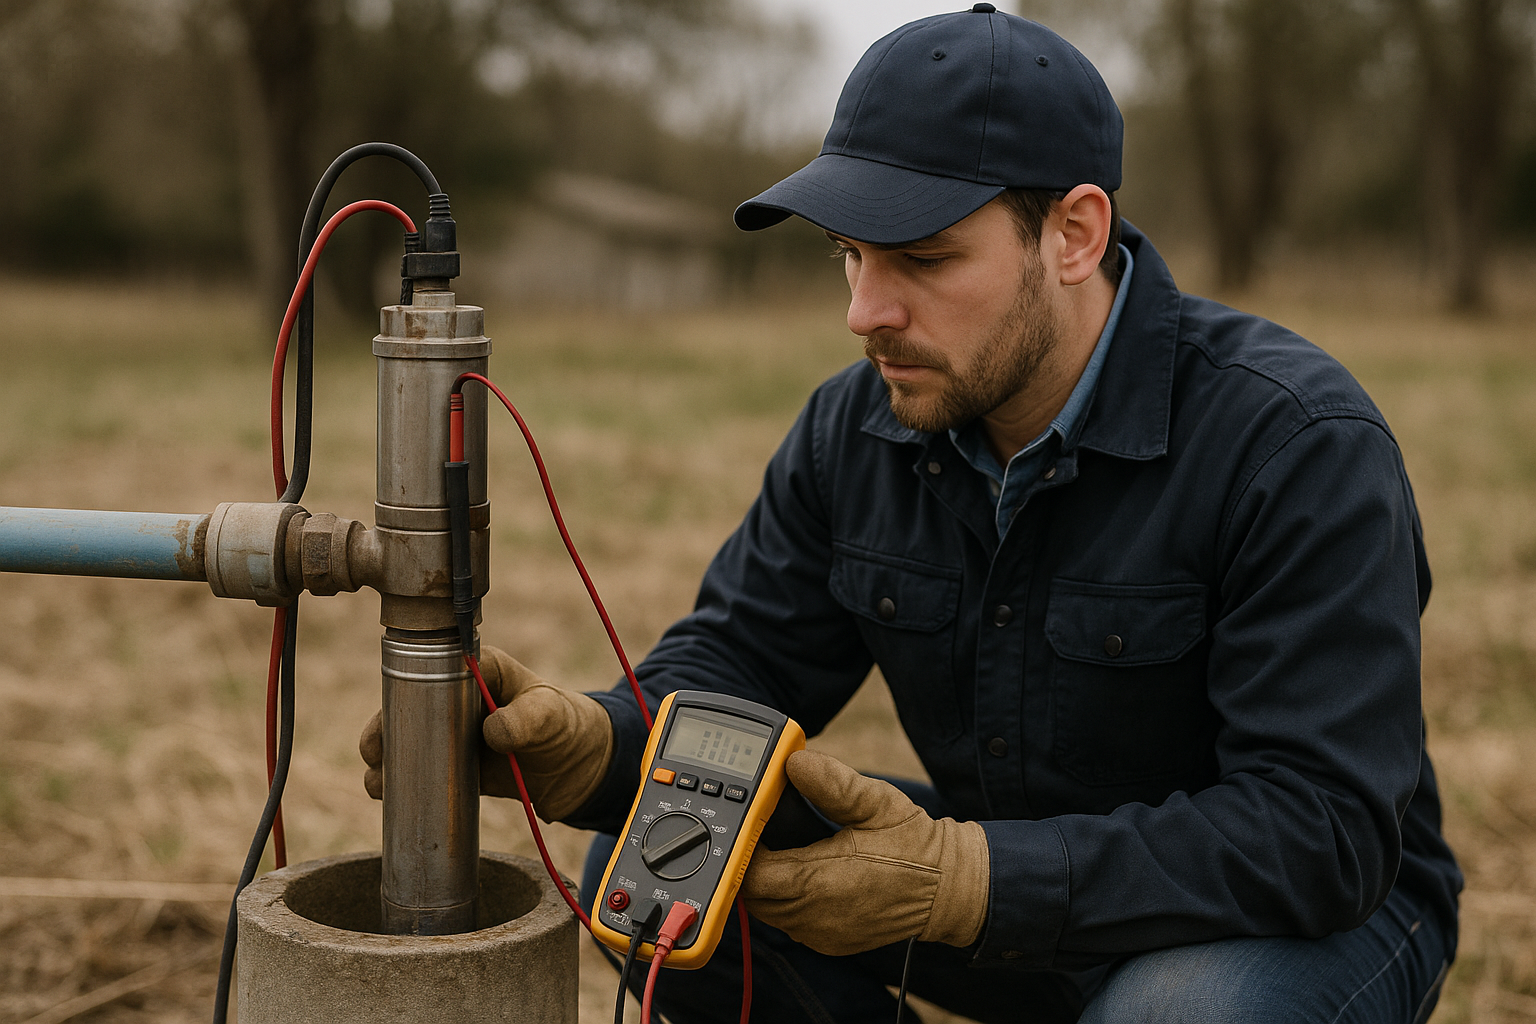
1 Turn Off the Power
Go to your electrical panel and turn off the breaker for your well pump. This is usually labeled "Well Pump" or "Well." This step is critical — never work on the pressure system with the pump active.
⚠️ Safety: Verify power is off by checking that the pump doesn't cycle when pressure drops.
2 Close the Inlet Valve (If Present)
If your system has a valve between the well line and pressure tank, close it. This isolates the tank and prevents water from flowing in while you drain.
Note: Not all systems have this valve. If yours doesn't, that's okay — turning off the pump serves the same purpose.
3 Release System Pressure
Open a faucet (preferably a hose bib or utility sink) and let it run until the water slows to a trickle. This releases the pressure in the system and makes draining safer.
You'll notice the water pressure drops quickly since the pump isn't refilling the tank.
4 Locate and Connect to the Drain Valve
Find the drain valve at the bottom of your pressure tank. It's typically a small valve with a hose bib fitting. Attach a garden hose and run it to a floor drain, outside, or into a bucket.
💡 Tip: If your tank doesn't have a dedicated drain valve, you may need to disconnect the outlet piping and drain through there.
5 Open the Drain Valve
Slowly open the drain valve. Water should start flowing through the hose. If it's under pressure, it may spray at first — that's normal.
6 Wait for Complete Drainage
Let the tank drain completely. Depending on tank size, this takes:
- • 20-gallon tank: 3-5 minutes
- • 40-gallon tank: 5-10 minutes
- • 80+ gallon tank: 10-20 minutes
The tank is fully drained when water stops flowing and you hear air coming through.
7 Close and Restore (When Done)
When you're finished with maintenance:
- Close the drain valve securely
- Remove the hose
- Open the inlet valve (if you closed it)
- Close any faucets you opened
- Turn the breaker back on
- Wait for the pump to refill the tank and build pressure
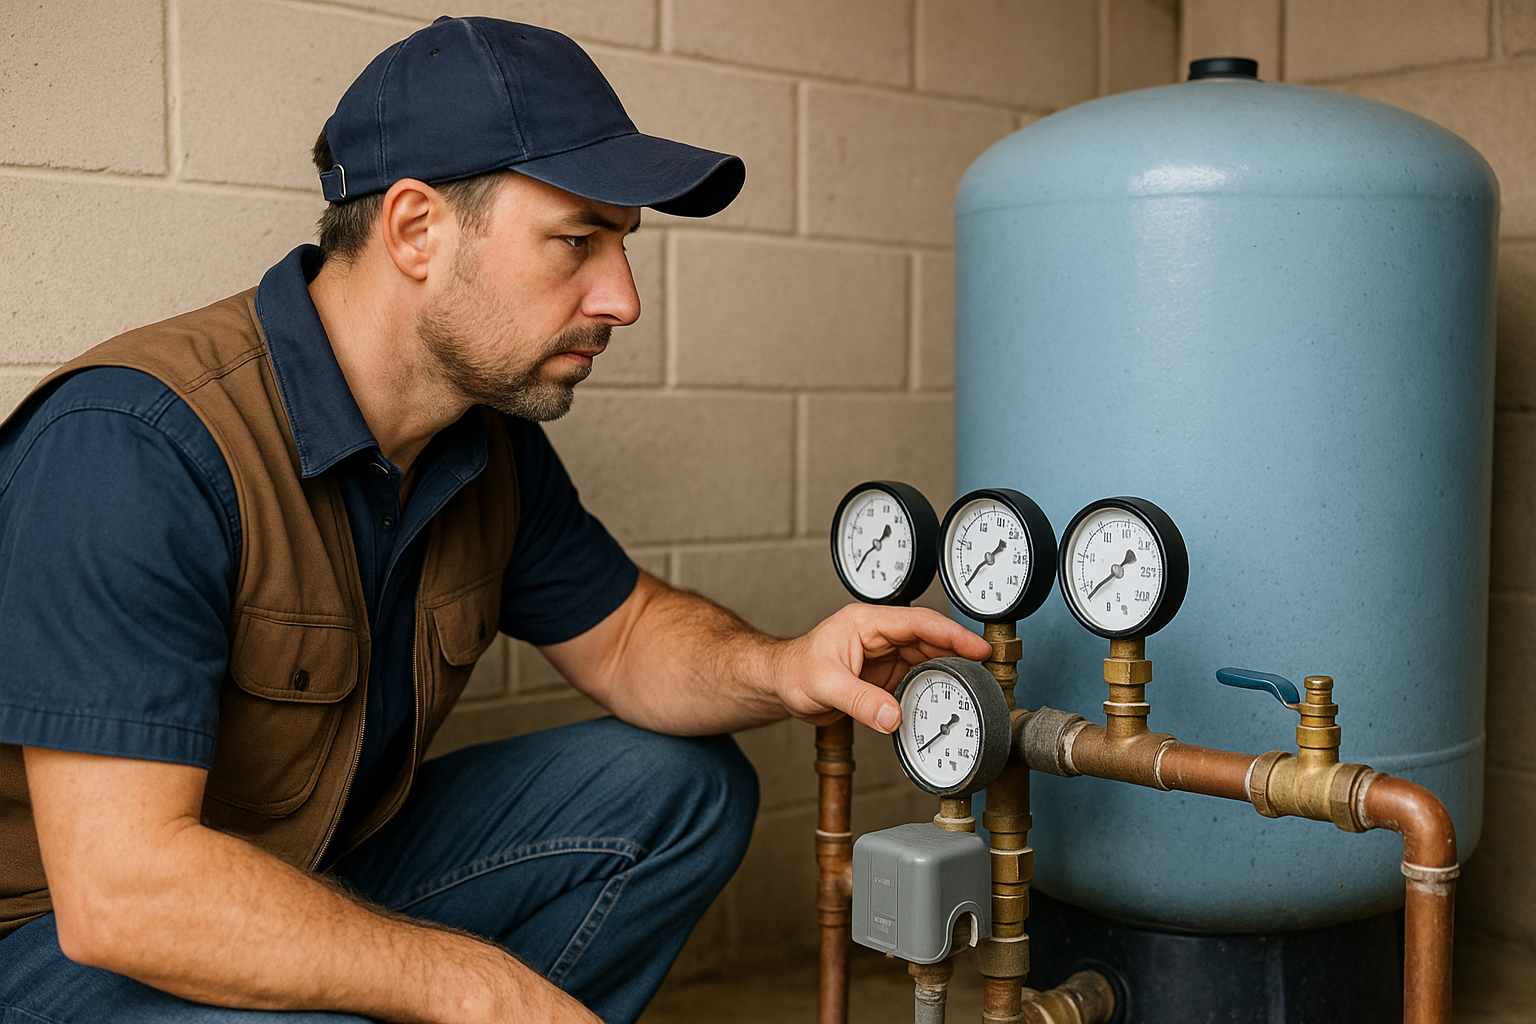
Checking Air Pre-Charge After Draining
The air pre-charge is the single most important setting in your pressure tank. It determines how much water the tank can store and deliver between pump cycles. An incorrect pre-charge is the #1 cause of short-cycling pumps and premature pump failure. If you drained the tank to check or adjust the air pressure, here's how to get it right:
- Locate the air valve. It looks exactly like a tire valve (Schrader valve) and is usually found on top of the tank. On some models it's on the side near the top. It may have a plastic cap covering it.
- Check with a tire pressure gauge. A standard automotive tire gauge works perfectly. Digital gauges are more accurate than the pencil-type stick gauges. Press firmly on the valve to get a reading—you should hear a brief hiss of air.
- Compare to your cut-in pressure. The pre-charge should be exactly 2 PSI below your pressure switch's cut-in (turn-on) setting:
- 20/40 switch → pre-charge should be 18 PSI
- 30/50 switch → pre-charge should be 28 PSI
- 40/60 switch → pre-charge should be 38 PSI
- Adjust as needed. To add air, use a standard air compressor with a Schrader valve adapter—the same fitting you'd use to fill a car tire. Add air in short bursts, checking the gauge between each burst. To release air, press the valve core briefly with a small screwdriver or the back of the gauge.
- Verify the setting. After adjusting, wait 30 seconds for the pressure to stabilize, then check once more. Getting within 1 PSI of your target is fine.
What Happens with Wrong Pre-Charge?
Pre-charge too high: The bladder can't fully expand, dramatically reducing the amount of water stored in the tank. Your pump will cycle more frequently because the tank delivers less water per cycle. For example, a 40-gallon tank with correct pre-charge might deliver 12 gallons per cycle. With pre-charge 10 PSI too high, that drops to 3–4 gallons—causing the pump to kick on four times as often.
Pre-charge too low: The bladder over-expands and presses against the tank shell on the air side. Over time, the bladder stretches and can rub against the tank wall, causing pinhole failures. You may also notice a "thumping" sound when the pump kicks on as the bladder snaps into position.
⚠️ Important: Only Check Pre-Charge on an Empty Tank
If you check the air pressure with water in the tank, you'll get a false reading (the water pressure will add to the air pressure reading). The tank must be completely drained for an accurate air pre-charge measurement. This is the most common mistake homeowners make—they check the valve with the system pressurized and get a reading of 40 PSI, assume everything's fine, when the actual air pre-charge might be only 10 PSI.
Common Mistakes to Avoid
❌ Don't
- • Leave pump power on while draining
- • Open drain valve too fast (pressure spray)
- • Check air pre-charge before tank is empty
- • Forget to close drain before restoring power
- • Over-pressurize when adding air
✓ Do
- • Turn off power first
- • Release pressure slowly
- • Drain completely before checking air
- • Use proper pre-charge pressure (2 PSI below cut-in)
- • Test for leaks after reassembly
When to Call a Professional
Draining a pressure tank is one of the more DIY-friendly well maintenance tasks. However, certain situations call for professional help:
- You can't locate the drain valve — older tanks or custom installations may not have one. A plumber can install a drain fitting or safely disconnect piping to drain the tank.
- The drain valve is corroded or stuck — forcing a corroded valve can snap it off, turning a controlled drain into a flood. A professional can use penetrating oil, heat, or replace the valve.
- You suspect the bladder has failed — if air comes out the drain valve (instead of just water), the bladder has ruptured and the tank needs replacement, not just draining.
- The tank needs to be replaced — removing a pressure tank involves disconnecting plumbing, managing the weight (a 40-gallon tank weighs 100+ lbs empty), and properly sizing and installing the replacement. Incorrect sizing leads to short-cycling and premature pump failure.
- You notice rust, corrosion, or bulging — any structural damage to the tank shell means the tank is compromised and could fail under pressure. Don't drain it yourself—a weakened tank under pressure is a safety hazard.
- Water smells bad or looks unusual after draining — if the water coming out of your tank is black, smells like sulfur, or contains heavy sediment, there may be a water quality issue that needs diagnosis beyond just a tank drain.
How Often Should You Check Your Pressure Tank?
While you don't need to drain the tank regularly, a quick health check every 6–12 months can prevent problems. Tap the tank with your knuckles from top to bottom. The top portion should sound hollow (that's the air), and the bottom should sound solid (that's the water). If the entire tank sounds solid, it's waterlogged and needs attention. Also check the pressure gauge—if it bounces rapidly when a faucet is running, the tank isn't providing proper drawdown.
Need Help With Your Pressure Tank?
Whether you need help draining your tank, adjusting the pre-charge, or replacing a waterlogged tank, we can help. Same-day service available in San Diego, Riverside, and San Bernardino counties.
We install Well-X-Trol (Amtrol) and Flexcon pressure tanks — industry-leading bladder tanks that outlast standard diaphragm models. Proper sizing with a quality tank can double your pump's lifespan.
Related Articles
Continue learning about well maintenance and troubleshooting
Low Water Pressure From Well: Complete Fix Guide
Diagnose and solve low pressure problems
Well Pressure Switch: Settings, Adjustment & Replacement
Everything about pressure switches
Pressure Tank Maintenance: Complete Guide
Keep your pressure tank working properly