How to Shock Chlorinate a Well: Step-by-Step Guide
📋 In This Guide
What Is Shock Chlorination?
Shock chlorination is a one-time disinfection treatment that introduces a high concentration of chlorine into your well system to kill coliform bacteria, E. coli, iron bacteria, and sulfur-reducing bacteria. Unlike continuous chlorination systems that inject small amounts of chlorine on an ongoing basis, shock chlorination is a single powerful dose designed to sanitize the entire well — from the bottom of the borehole through the casing, pressure tank, and household plumbing.
The process works because chlorine is a powerful oxidizer. At concentrations of 50–200 parts per million (ppm), it destroys bacterial cell walls on contact. For comparison, municipal water systems typically maintain chlorine residuals of just 0.2–4 ppm. Shock chlorination delivers dramatically higher concentrations to ensure bacteria deep within biofilms and crevices in the well casing are reached and destroyed.
In Southern California, shock chlorination is one of the most common well maintenance procedures we perform. Wells in rural San Diego County, Riverside County, and the Inland Empire are particularly susceptible to bacterial contamination due to warm temperatures, shallow water tables in some areas, and the prevalence of older wells with aging seals and casings.
When to Shock Chlorinate
Shock Chlorination Is Needed When:
- Bacteria test comes back positive — Total coliform or E. coli detected in a water sample. This is the most common reason homeowners shock their wells. California's Title 22 water quality standards require absence of total coliform in drinking water.
- After well repair or pump replacement — Any time the well is opened, tools or components introduced into the well can carry surface bacteria down into the aquifer. Licensed well contractors in California are required to disinfect after service work.
- After flooding or surface contamination — Heavy rains can drive surface water containing bacteria, pesticides, and organic matter into the well through damaged seals, improperly graded wellheads, or cracked casings.
- When a new well is drilled — Drilling introduces lubricants, cuttings, and surface organisms. All new wells should be shock chlorinated before the water is used for drinking.
- If water has odor or slime buildup — A rotten egg smell (hydrogen sulfide), musty odor, or slimy orange/brown deposits in toilet tanks are signs of iron bacteria or sulfur-reducing bacteria.
- As annual preventive maintenance — Some well owners, particularly those with shallow wells or a history of contamination, choose to shock annually even without a positive test.
- After an extended period of non-use — If a vacation home or seasonal property has been sitting unused for months, stagnant water in the system can breed bacteria.
What Shock Chlorination Does NOT Do:
- Fix the source of contamination — If bacteria is entering through a cracked casing, damaged well cap, or inadequate surface seal, chlorination will temporarily kill the bacteria but won't stop it from returning. You must identify and repair the entry point.
- Provide ongoing disinfection — This is a one-time treatment. If you need continuous protection, you'll need a UV sterilizer, chlorine injection system, or ozone treatment.
- Remove chemical contaminants — Chlorine does not remove nitrates, arsenic, heavy metals, PFAS, or volatile organic compounds. These require separate treatment systems like reverse osmosis or activated carbon filtration.
- Clean a severely fouled well — Wells with heavy mineral buildup, encrustation, or years of iron bacteria biofilm may need professional rehabilitation (mechanical brushing, chemical treatment with acid and surfactants) rather than simple shock chlorination.
Supplies Needed
Required Supplies
- Unscented household bleach (8.25% sodium hypochlorite) — Standard Clorox Regular Bleach or equivalent. Check the label — some brands have reduced their concentration to 6%. Adjust quantities accordingly if using a lower-concentration product.
- Clean 5-gallon bucket — For mixing the bleach solution before pouring into the well. Never pour concentrated bleach directly into the well.
- Garden hose long enough to reach into the well — You'll use this to recirculate chlorinated water back into the well and wash down the inside of the casing.
- Chemical-resistant rubber gloves — Standard dishwashing gloves work, but nitrile or PVC chemical gloves are better for handling concentrated bleach.
- Safety glasses or splash goggles — Bleach in your eyes is an emergency room visit. Don't skip this.
Helpful Extras
- Funnel — Makes pouring into narrow well casings easier and reduces splashing
- Long-handled brush — A toilet brush or bottle brush on an extension pole works for scrubbing the inside of the casing above the water line, where biofilms accumulate
- Chlorine test strips — Available at pool supply stores. Use these to verify chlorine has reached all fixtures and to confirm it's fully flushed before drinking the water again
- Wrench set — You'll need to remove the well cap, which may require a socket wrench or Allen key depending on the cap style
- Flashlight — Useful for inspecting the well casing condition while the cap is off
Choosing the Right Chlorine Product
Not all bleach products are created equal for well disinfection:
- Best choice: Unscented regular household bleach (Clorox Regular, store brand equivalent) at 8.25% sodium hypochlorite. This is what most county health departments recommend.
- Also acceptable: Calcium hypochlorite granules (pool shock, typically 65–73% available chlorine). Use approximately 1 ounce per 100 gallons of water. Pre-dissolve in a bucket of water before adding to the well — undissolved granules can settle on the pump and cause corrosion.
- Avoid entirely: Scented bleach (contains fragrances that contaminate water), splashless bleach (thickened formula with lower chlorine concentration), color-safe bleach (contains hydrogen peroxide instead of sodium hypochlorite — won't disinfect), and any bleach with added cleaners or surfactants.
Calculate Chlorine Amount
The Basic Formula
Use 3 pints of household bleach (8.25%) per 100 gallons of water in the well. This delivers a chlorine concentration of approximately 200 ppm — strong enough to penetrate biofilms and kill bacteria in casing crevices, but not so strong that it takes an unreasonably long time to flush.
Estimate the Water Volume in Your Well
To calculate how much water is in your well, you need two pieces of information: the casing diameter and the depth of standing water (total well depth minus the static water level).
Water volume = (Depth of water in feet) × (gallons per foot based on casing diameter)
| Casing Diameter | Gallons per Foot | 100 ft of Water = |
|---|---|---|
| 4 inch | 0.65 gallons | 65 gallons |
| 5 inch | 1.0 gallons | 100 gallons |
| 6 inch | 1.5 gallons | 150 gallons |
| 8 inch | 2.6 gallons | 260 gallons |
| 10 inch | 4.1 gallons | 410 gallons |
| 12 inch | 5.9 gallons | 590 gallons |
Don't forget to account for your pressure tank and hot water heater — these also need to be chlorinated. A standard 80-gallon pressure tank holds about 30 gallons of water, and most residential water heaters hold 40–80 gallons. Add these volumes to your calculation.
Example Calculation
Well: 6-inch casing, 200 ft deep, static water level at 100 ft
Water depth: 200 − 100 = 100 feet of water
Well water volume: 100 ft × 1.5 gal/ft = 150 gallons
Pressure tank: ~30 gallons
Water heater: ~50 gallons
Total system volume: 150 + 30 + 50 = 230 gallons
Bleach needed: (230 ÷ 100) × 3 pints = 6.9 pints (round up to 7 pints, or about 3.5 quarts)
Don't Know Your Well Specs?
If you're not sure about your well's depth, casing diameter, or static water level, check your well completion report. In California, every well drilled since 1949 has a completion report filed with the Department of Water Resources. You can search for yours at the DWR Well Completion Report Map. Your county environmental health department may also have records. If all else fails, a well contractor can measure these for you.
When in Doubt — Use More
Erring on the side of too much chlorine is always better than too little. Extra chlorine won't damage your well, pump, or plumbing — it will simply take longer to flush out. Insufficient chlorine, on the other hand, means you'll go through the entire process and potentially not kill all the bacteria, wasting your time and requiring a repeat treatment.
Step-by-Step Process
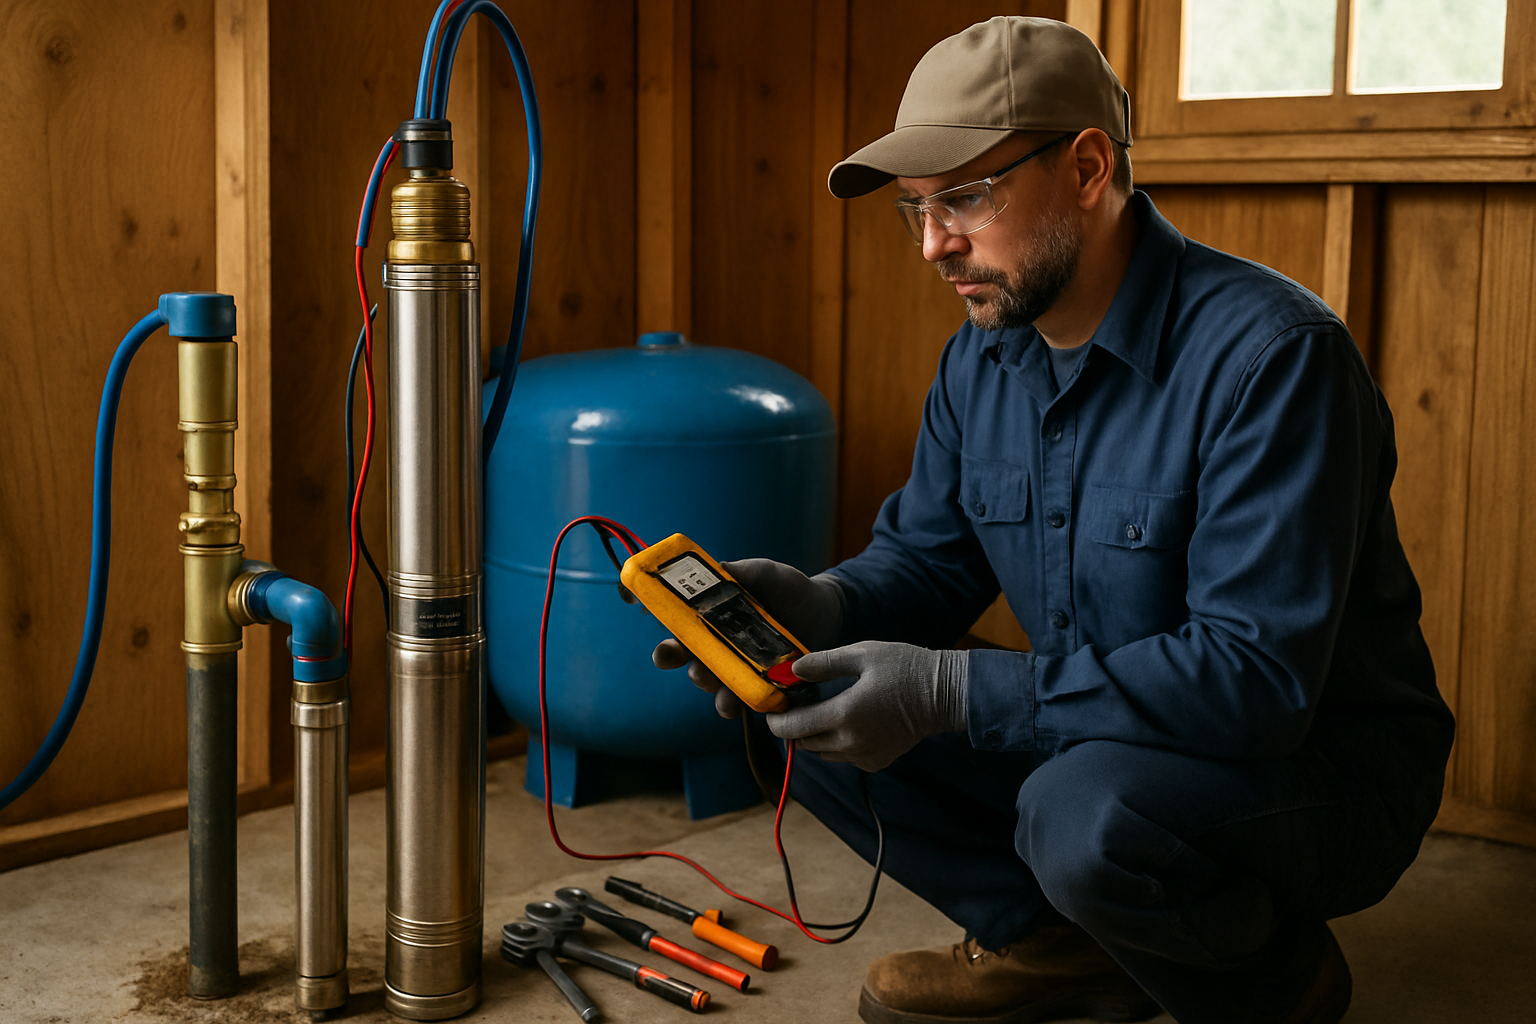
Step 1: Prepare Your System
- Turn off power to the well pump at the circuit breaker. Label the breaker so no one turns it back on accidentally.
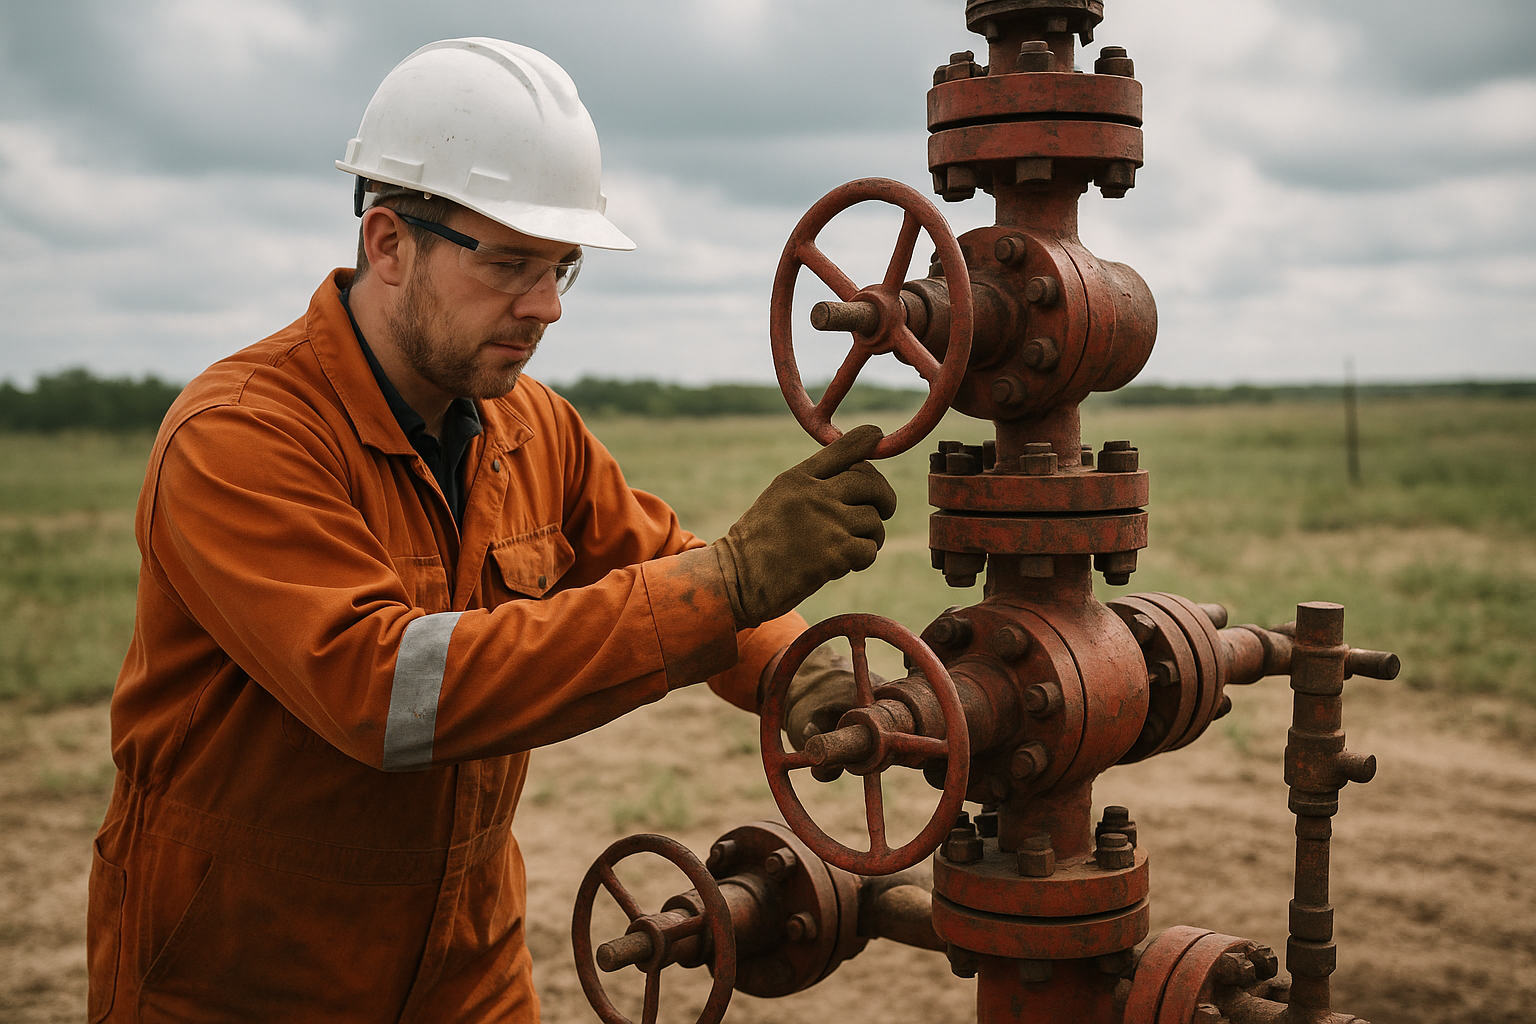
- Remove the well cap. Most modern sanitary well caps are secured with bolts — you'll need a wrench. Older wells may have a simple friction-fit cap. While the cap is off, inspect it for cracks, missing gaskets, or insect/rodent entry points. A damaged cap is often the reason bacteria got in.
- Bypass all water treatment equipment. Put your water softener in bypass mode. Disconnect or bypass carbon filters, UV systems, and any other treatment. High-concentration chlorine will destroy carbon filter media and can damage UV sleeves.
- Turn off your water heater (electric: flip breaker; gas: turn to "pilot" or "vacation"). Heating highly chlorinated water creates corrosive conditions and isn't necessary for the treatment to work.
- Calculate how much bleach you need based on the formula above.
Step 2: Add Chlorine to the Well
- Mix the calculated bleach with 3–5 gallons of clean water in your bucket. This diluted solution is easier to handle and splashes less than concentrated bleach.
- Pour the solution directly into the well casing. Use a funnel if the opening is narrow. Pour slowly to avoid splashing.
- Scrub the inside of the casing above the water line with a long-handled brush if accessible. This area often harbors biofilm that won't be reached by the chlorinated water below.
Step 3: Recirculate the Chlorinated Water
- Turn the pump power back on.
- Attach a garden hose to an outdoor spigot and feed the other end back into the well opening.
- Turn on the spigot and recirculate for 30 minutes to 1 hour. This is a critical step that many people rush. The recirculation pulls chlorinated water from the well, pumps it through the system, and feeds it back down the casing — thoroughly mixing the chlorine throughout the entire water column. Use the hose to spray down the inside walls of the casing as well.
- Check for chlorine smell at the hose. If you can smell a strong chlorine odor, you know the concentration is adequate throughout the system.
Step 4: Run Chlorinated Water Through All Plumbing
- Remove the hose from the well.
- Open each cold water faucet in the house one at a time. Run until you smell chlorine, then close it. Start with the faucet closest to the pressure tank and work outward.
- Open each hot water faucet until you smell chlorine, then close it. This fills the water heater with chlorinated water.
- Flush each toilet once.
- Run the washing machine through a short rinse cycle to chlorinate those supply lines.
- Run any outdoor spigots and hose bibs until chlorine is detected.
- Close all faucets once chlorine is present at every fixture.
Step 5: Wait (Contact Time)
- Replace the well cap.
- Let the chlorinated water sit for 12–24 hours. Overnight is ideal — start in the afternoon and flush the next morning. Longer contact time is better, especially for iron bacteria.
- Do not use any water during this period. Plan ahead — fill containers with clean water for drinking and cooking before you start. Many homeowners plan this around a day trip away from home.
Step 6: Flush the Entire System
- Connect a hose to an outdoor spigot and direct it away from landscaping, gardens, septic system, and any waterways.
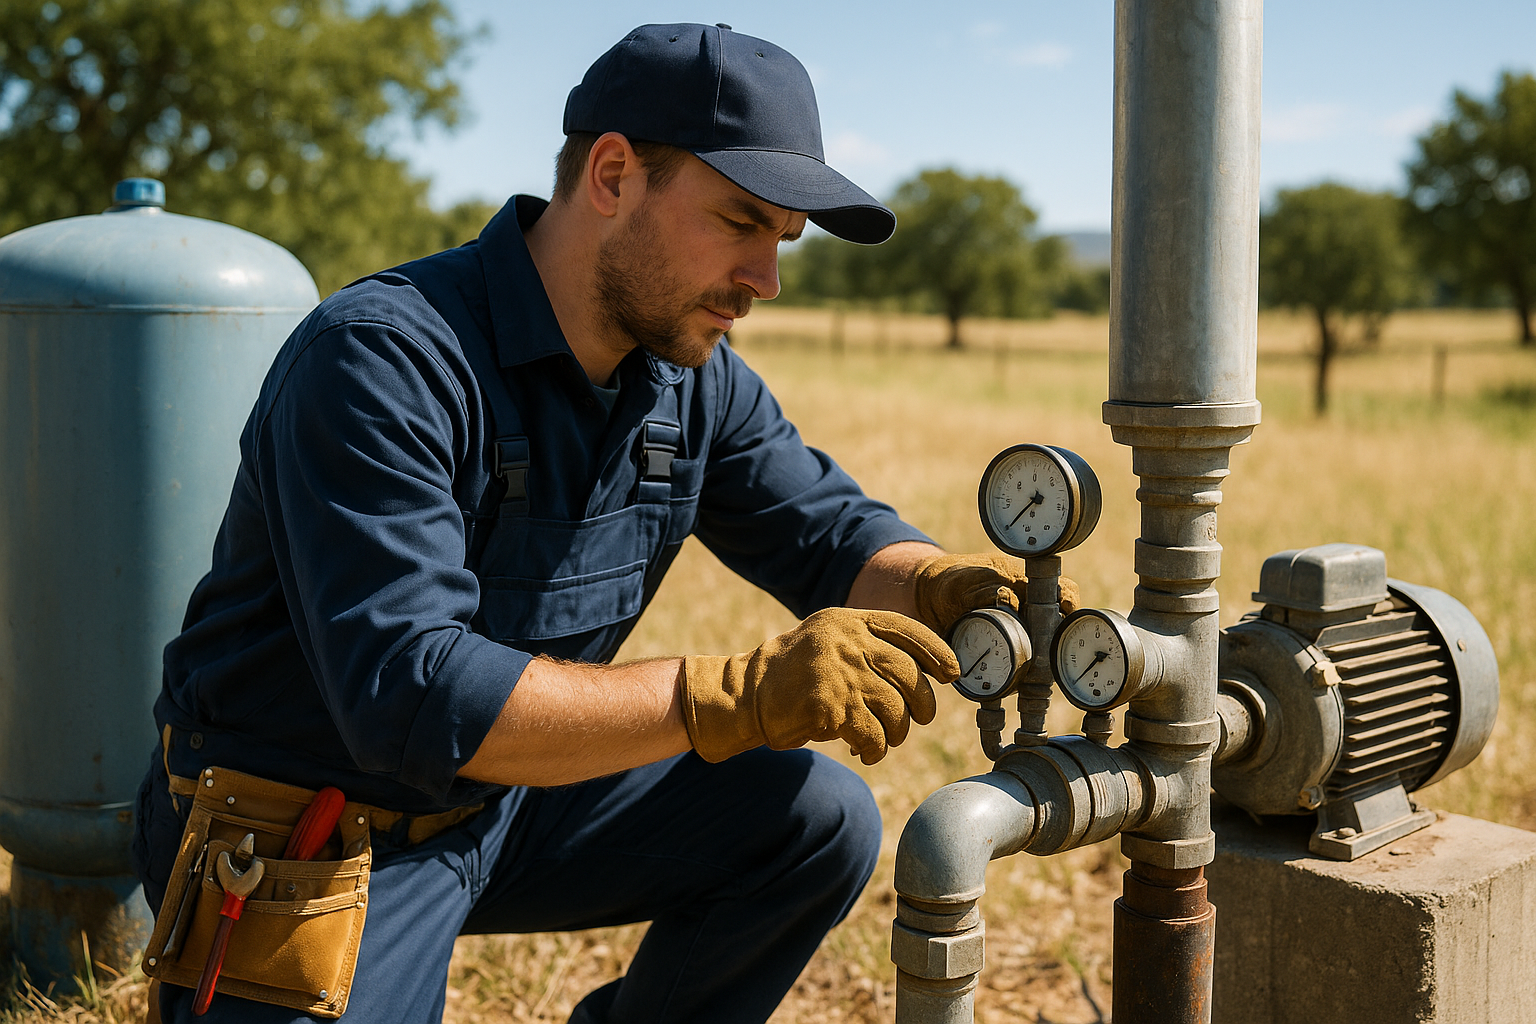
- Run the water until the chlorine smell is completely gone. This may take 1–4 hours depending on your well's flow rate and how much chlorine you used. A 10 GPM well will flush faster than a 3 GPM well.
- Use chlorine test strips to verify — your nose may adapt to the smell before the chlorine is actually gone. You want 0 ppm chlorine before reconnecting treatment equipment.
- Then run each indoor faucet (cold and hot) until no chlorine smell remains.
- Flush the water heater by running hot water at a faucet until chlorine-free.
- Reconnect water treatment equipment (softener, filters, UV) and return them to normal operation.
- Turn your water heater back to normal operating temperature.
Safety Precautions
Personal Safety
- Wear chemical-resistant gloves and splash-proof goggles at all times when handling bleach. Concentrated bleach causes chemical burns on skin and can permanently damage eyes.
- Work in a well-ventilated area. If your wellhead is in an enclosed pump house, open doors and windows before working. Chlorine gas is heavier than air and can accumulate in low-lying enclosed spaces.
- Never mix chlorine with other chemicals — especially ammonia-based products, acids, or hydrogen peroxide. These combinations produce toxic chlorine gas or chloramine vapor.
- Keep children and pets away from the work area and away from any water that's being flushed during the process.
- Have fresh water available in case of skin or eye contact. Flush affected areas with clean water for at least 15 minutes.
Environmental Safety
- Never discharge chlorinated water into streams, ponds, or storm drains. Chlorine is highly toxic to fish and aquatic organisms. In California, discharging chlorinated water to surface waters can result in fines from the Regional Water Quality Control Board.
- Direct flush water away from landscaping and gardens. Concentrated chlorine will kill grass, plants, and soil microorganisms. If possible, discharge onto a gravel pad, dry wash area, or designated drainage area.
- Don't flush large volumes to your septic system at once. High chlorine concentrations kill the beneficial bacteria your septic system needs to function. Flush primarily through an outdoor spigot rather than indoor drains.
System Safety
- Always bypass water softeners and carbon filters. Chlorine destroys activated carbon media (requiring expensive replacement) and can damage softener resin.
- Turn off the water heater before filling it with highly chlorinated water. Heating concentrated chlorine solutions accelerates corrosion of the tank's anode rod and heating elements.
- Do not drink, cook with, or bathe in the water until the system is completely flushed and tested chlorine-free.
After Chlorination
Retest Your Water
Wait 7–14 days after flushing before collecting a follow-up water sample. Testing too soon can give a false negative — residual chlorine may still be suppressing bacterial growth even though it's below detectable smell levels. When you do test, collect the sample from an untreated tap (before any filtration) following proper sterile sampling procedures.
- Test for total coliform and E. coli at minimum
- If the original contamination was iron bacteria, also request a heterotrophic plate count (HPC) or iron bacteria culture
- San Diego County residents can get water testing through the County Department of Environmental Health or through certified private labs
If Bacteria Returns After Treatment
A single positive test after shock chlorination doesn't necessarily mean the treatment failed — but repeat positives indicate a persistent contamination pathway that must be addressed:
- Inspect the well cap and sanitary seal. Cracked, loose, or missing caps are the #1 source of bacterial entry. A proper sanitary well cap should be vermin-proof and watertight.
- Check the surface seal (grout). California requires at least 50 feet of annular seal around the casing. Older wells may have inadequate or deteriorated seals that allow surface water to migrate down the outside of the casing.
- Look for casing damage. A well camera inspection can reveal cracks, corrosion holes, or failed joints that allow contaminated groundwater from shallow zones to enter.
- Evaluate the wellhead grading. The ground around the wellhead should slope away from the casing so rainwater drains away rather than pooling around the well.
- Consider continuous disinfection. If the contamination source can't be eliminated (e.g., naturally occurring bacteria in the aquifer), install a UV sterilizer, chlorine injection system, or ozone treatment as a permanent solution.
Ongoing Maintenance
If your well had a positive bacteria test, consider these ongoing steps:
- Annual water testing for coliform bacteria at minimum — more frequently if you've had past contamination
- Annual visual inspection of the wellhead, cap, and surrounding area
- Preventive shock chlorination every 1–2 years, especially for shallow wells or wells in areas with high water tables
- Keep records of all water tests, maintenance, and treatments — this documentation is valuable if you ever sell the property
Common Mistakes to Avoid
After performing hundreds of shock chlorination treatments across San Diego and Riverside counties, here are the mistakes we see homeowners make most often:
1. Not Recirculating Long Enough
Simply pouring bleach into the well and hoping it mixes is not enough. Without recirculating the water back into the well for at least 30 minutes, the chlorine sits on top of the water column and doesn't reach bacteria deeper in the well. This is the single most common reason shock chlorination fails.
2. Using the Wrong Bleach
Splashless bleach and scented bleach are increasingly common on store shelves. Splashless formulas use a thickening agent that reduces the effective chlorine concentration, and scented products introduce fragrance chemicals into your drinking water supply. Always check the label for "sodium hypochlorite 8.25%" and "unscented."
3. Skipping the Water Heater
Your water heater holds 40–80 gallons of water that bacteria can thrive in — especially at the bottom where sediment collects and temperatures can be in the bacteria-friendly range. If you don't run chlorinated water through the hot side, the water heater becomes a reservoir that recontaminates your "clean" water.
4. Not Flushing Completely
Residual chlorine at low levels can mask a ongoing bacteria problem by suppressing growth just enough to produce a false-negative test result. Flush until chlorine test strips read 0 ppm, then wait a full 1–2 weeks before retesting.
5. Ignoring the Root Cause
Shock chlorination treats the symptom, not the disease. If bacteria entered through a damaged well cap, surface seal failure, or casing breach, chlorination will provide temporary relief but the problem will return within weeks to months. Always investigate why bacteria got in before assuming chlorination alone solved the problem.
Special Case: Iron Bacteria and Biofilm
Iron bacteria deserve special mention because they're one of the most persistent and frustrating well contamination issues in Southern California. These organisms feed on dissolved iron and manganese in groundwater, producing a slimy orange, brown, or reddish biofilm that coats the inside of well casings, pipes, pressure tanks, and toilet tanks.
Why Iron Bacteria Are Harder to Kill
Iron bacteria create a protective biofilm — a slimy matrix that shields the bacteria underneath from chlorine. Standard shock chlorination concentrations may kill bacteria on the surface of the biofilm but fail to penetrate deep enough to eliminate the colony. This is why iron bacteria often return within weeks of treatment.
Enhanced Treatment for Iron Bacteria
- Use a higher chlorine concentration — 500–1,000 ppm rather than the standard 200 ppm. This means roughly doubling or tripling the bleach amount.
- Extend contact time to 24–48 hours — longer contact gives the chlorine more time to penetrate biofilm layers.
- Physically agitate — surging the well (rapidly turning the pump on and off) during recirculation helps break up biofilm. Professional well contractors use specialized surge blocks for this.
- Consider acid treatment first — in severe cases, treating with phosphoric or hydrochloric acid before chlorination breaks down the mineral deposits that iron bacteria use as a scaffold. This should only be done by a licensed professional.
- Follow up with ongoing prevention — after successful treatment, periodic chlorination (every 6–12 months) and possibly a continuous chlorine injection system may be needed to prevent recolonization.
We use Hach and LaMotte professional water testing equipment for field analysis, with comprehensive lab testing through certified California laboratories.
Frequently Asked Questions
How much bleach do I need to shock my well?
Use 3 pints of unscented household bleach (8.25% sodium hypochlorite) per 100 gallons of water in the well. For a typical San Diego County residential well with a 6-inch casing and 100 feet of standing water, that's about 150 gallons of well water plus 30–80 gallons in your pressure tank and water heater — so roughly 6–8 pints of bleach total. When in doubt, use more rather than less.
How long does the entire shock chlorination process take?
Plan for the well to be out of service for 24–48 hours total. The active work (prep, chlorine addition, recirculation, running faucets) takes 2–4 hours. Then you wait 12–24 hours of contact time. Flushing takes another 1–4 hours depending on your well's flow rate. Start in the afternoon and plan to flush the following morning.
Can I shock chlorinate my well myself?
Yes, shock chlorination is a manageable DIY project for most homeowners, as long as you follow safety precautions and the proper procedure. However, consider calling a professional if: bacteria keeps returning after treatment, you have iron bacteria (which requires enhanced treatment), you're not sure about your well's specifications, or you're uncomfortable working around electrical equipment and open well casings.
How often should I shock chlorinate?
Only when needed — after a positive bacteria test, after any work on the well, after flooding, or annually as preventive maintenance in high-risk situations. There's no harm in occasional preventive treatment, but unnecessary chlorination doesn't provide ongoing protection and generates chlorinated water you need to dispose of properly.
Will chlorine damage my well or pump?
At shock chlorination concentrations, chlorine will not damage your well casing (steel or PVC), submersible pump, drop pipe, or household plumbing. However, it will damage water softener resin, destroy activated carbon filter media, and can degrade UV sterilizer sleeves — always bypass these components before treatment.
Is it safe to water my garden after flushing?
The initial flush water containing high chlorine concentrations should be directed away from gardens, lawns, and landscaping. Once chlorine levels drop below 1–2 ppm (barely detectable by smell), the water is safe for most landscaping. However, sensitive plants and vegetable gardens may be affected even at low levels. Use test strips to confirm levels before irrigating.
What if I have a shallow well?
Shallow wells (less than 50 feet deep) are more susceptible to contamination and may need more frequent treatment. They're also at higher risk for repeat contamination because they draw from aquifers more influenced by surface conditions. If your shallow well repeatedly tests positive for bacteria, seriously consider installing a continuous disinfection system rather than relying on periodic shock treatment.
Can I shock my well in freezing weather?
This is rarely an issue in Southern California, but if you're treating a well in the mountain areas (Julian, Palomar Mountain, Running Springs) during winter, be aware that chlorine's disinfecting power decreases in cold water. Allow for a longer contact time — 24–48 hours rather than the standard 12–24 — and consider using a slightly higher concentration.
Need Professional Well Disinfection?
See our well maintenance services including shock chlorination.
Related Articles
Continue learning about well maintenance and troubleshooting