By SCWS Team | March 10, 2026
📋 In This Guide
- What Is a Well Cap vs. Sanitary Seal?
- Why Well Caps and Sanitary Seals Matter
- Types of Well Caps and Seals
- California Well Standards Requirements
- Well Cap Inspection Checklist
- Signs of a Failed or Damaged Well Cap
- Well Cap Replacement Costs
- DIY vs. Professional Replacement
- Well Cap Requirements for Home Sales
- How Well Caps Affect Water Quality
- Well Cap Materials Comparison
- Frequently Asked Questions
15 min read
Well Caps & Sanitary Seals: Inspection, Replacement & California...
Your well cap might be the most underappreciated component of your entire water system. It's just a simple cover on top of your well casing, right? Wrong. That "simple" cap is the primary barrier standing between your family's drinking water and a world of contamination—insects crawling down your well, rodents nesting in your casing, surface water carrying bacteria and pesticides washing straight into your aquifer, and debris clogging your pump. A cracked, corroded, or improperly sealed well cap is an open invitation for contamination, and the consequences can range from unpleasant (cloudy water, odd tastes) to dangerous (bacterial contamination, illness). For California well owners, the stakes are even higher: our state has specific requirements for sanitary well seals and vermin-proof caps designed to protect groundwater quality and public health. Yet many older wells still have inadequate caps that don't meet current standards, putting water quality at risk and creating compliance issues during property transfers. This comprehensive guide covers everything you need to know about well caps and sanitary seals—the differences between them, California's requirements under Bulletins 74-81 and 74-90, inspection procedures, replacement costs, materials comparison, and how proper sealing protects your water quality.
🚨 California Well Cap Fact: An estimated 30-40% of older California wells lack proper sanitary seals and vermin-proof caps, leaving them vulnerable to surface water contamination and failing to meet current state well construction standards.
What Is a Well Cap vs. Sanitary Seal?
These terms are often used interchangeably, but they refer to different—though related—components of your well's sanitary protection system. Understanding the difference is crucial, especially in California where regulations distinguish between them.
Well Cap (Top Seal)
A well cap is the removable cover that sits on top of your well casing, typically above ground level. Think of it as a "lid" for your well. Its primary functions include:
- Physical barrier: Prevents debris, leaves, dirt, and surface water from falling directly into the well
- Pest exclusion: Keeps out insects, rodents, snakes, and other animals
- Ventilation: Allows air circulation while screening out contaminants (screened vents)
- Access point: Provides entry for well maintenance, repairs, and inspections
- Weather protection: Shields the well opening from rain, snow, and UV damage
Well caps are designed to be removed when you need to access the well for pump service, water testing, or inspections. They're held in place by various mechanisms: set screws that tighten against the casing, compression fittings, bolted flanges, or simply friction fit (though friction-only caps don't meet California standards).
Sanitary Seal (Annular Seal)
A sanitary seal—also called an annular seal or well seal—is a permanent, watertight seal installed at or below ground level where your well casing penetrates the earth's surface. This is a much more robust contamination barrier than a simple cap. The sanitary seal includes:
- Surface seal: A watertight fitting where the casing exits the ground, preventing surface water infiltration
- Annular space grouting: The space between your well casing and the drilled hole is filled with cement grout or bentonite clay extending deep into the ground (typically 50+ feet in California)
- Vermin-proof design: Completely sealed against rodent and insect entry
- Flood protection: Prevents floodwater from entering the well along the outside of the casing
- Isolation barrier: Prevents contaminants from near-surface soil and groundwater from migrating down the outside of your casing into deeper, cleaner aquifer zones
The sanitary seal is installed during well construction and is not meant to be removed. It's the most critical contamination prevention component of your well, creating a protected "column" from deep in the aquifer all the way to the surface. Many older California wells (pre-1990s) were built before modern sanitary seal requirements and may have only basic grouting or no seal at all.
Why Both Matter
A complete well protection system needs both a proper sanitary seal (below ground) and a vermin-proof well cap (above ground). The sanitary seal prevents contamination from migrating down the outside of your casing through soil and shallow groundwater. The well cap prevents direct entry of surface contaminants from above. Think of them as complementary layers of protection—neither alone is sufficient, but together they create a robust barrier against contamination.
Why Well Caps and Sanitary Seals Matter
Well caps and sanitary seals aren't regulatory red tape—they're essential public health infrastructure. Here's what they protect you from:
Surface Water Intrusion
Surface water is the number one contamination source for private wells. Rain, irrigation runoff, and floodwater can carry an ugly cocktail of contaminants: bacteria from septic systems and animal waste, pesticides and fertilizers from agricultural areas and lawns, petroleum products from roads and driveways, nitrates from fertilizers, and suspended sediment that clogs your system. Without a proper seal, this contaminated surface water can flow down the outside of your well casing or pour directly through a damaged cap, completely bypassing your aquifer's natural filtration.
In San Diego County, where many wells are located in rural areas with septic systems, livestock, and agricultural operations, surface water contamination is a constant threat. A single heavy rain after months of drought can wash accumulated surface contaminants straight into an improperly sealed well.
Insect and Rodent Entry
You might be shocked at what can get into an improperly capped well. Insects—including ants, beetles, spiders, wasps, and mosquitoes—are attracted to the cool, damp environment inside well casings. They enter through gaps, unscreened vents, or damaged caps and can die in your water supply, decomposing and adding organic matter that feeds bacterial growth.
Rodents (mice, rats, ground squirrels) are even more problematic. They can squeeze through surprisingly small openings and have been known to nest inside well casings, especially in abandoned or unused wells. Rodent droppings, urine, and decomposing bodies introduce dangerous pathogens including Leptospira (leptospirosis), Salmonella, Hantavirus, and coliform bacteria. This is why California standards specifically require "vermin-proof" caps with properly screened vents (#16 mesh or finer).
Bacterial Contamination
Coliform bacteria—the indicator organisms used to test for fecal contamination—frequently enter wells through failed caps and seals. While most coliform bacteria aren't directly harmful, their presence indicates that pathways exist for more dangerous organisms (E. coli, Giardia, Cryptosporidium) to enter your well. A single coliform detection can trigger mandatory resampling, disinfection requirements, and potential boil water advisories.
Surface-derived bacterial contamination typically appears after heavy rains or flooding and may resolve temporarily, only to return with the next storm. This "intermittent contamination" pattern is a telltale sign of an inadequate cap or seal allowing surface water intrusion.
Debris and Sediment
Even "clean" debris causes problems. Leaves, twigs, dirt, pebbles, and dust entering through a damaged cap accumulate in your well, creating several issues:
- Pump damage: Sediment accelerates wear on pump impellers and seals
- Pressure tank problems: Debris clogs the air-to-water interface in pressure tanks
- Clogged filters and fixtures: Increased sediment overwhelms filtration systems
- Bacterial growth substrate: Organic debris provides nutrients for bacteria
- Reduced well capacity: Accumulated debris in the well screen or bottom reduces available water
Cross-Contamination from Near-Surface Aquifers
Many California wells draw water from deep aquifers (100-500+ feet) that are naturally protected from surface contamination by thick layers of impermeable soil and rock. However, near-surface groundwater—in the top 50-100 feet—is often contaminated with nitrates, bacteria, and other pollutants from surface activities.
Without a proper annular seal, contaminated shallow groundwater can migrate down the outside of your well casing, mixing with the clean deep water you're trying to access. This is called "cross-contamination" and it can turn a pristine deep aquifer well into a contaminated nightmare. The sanitary seal prevents this by creating a watertight, grouted barrier extending deep enough to isolate your well casing from shallow contaminated zones.
⚠️ Real Cost of Contamination
Well contamination from a failed cap or seal can cost $3,000-$10,000+ to remediate. Costs include: shock chlorination or well rehabilitation ($500-$2,000), replacement of contaminated pressure tank and filters ($300-$800), extensive water testing ($200-$500), installation of UV disinfection or other treatment ($1,000-$3,000+), lost water access during treatment, and potential health impacts. A $200-$500 well cap or seal upgrade is cheap insurance.
Types of Well Caps and Seals
Not all well caps are created equal. Understanding the different types helps you choose the right protection for your well and ensure compliance with California standards.
1. Vermin-Proof Well Caps
Description: Standard sanitary well caps designed to prevent entry of insects, rodents, and surface water while allowing necessary ventilation and access.
Key features: Screened vents (typically two vents with #16 or finer corrosion-resistant mesh), rubber gasket seal against casing, secure fastening mechanism (set screws or compression fit), sealed penetrations for electrical wires or drop pipes, and durable weather-resistant construction.
Materials: Available in aluminum (most common, lightweight, corrosion-resistant), stainless steel (premium, longest life), cast iron (heavy-duty but prone to rust), and thermoplastic/ABS (economical but less durable).
Common sizes: 4-inch, 5-inch, 6-inch, and 8-inch nominal (to fit corresponding casing sizes)
Best for: Any well in California—this is the minimum standard for compliance. Essential for wells in areas with rodent activity, insect problems, or surface water flooding risks.
Pros: Meets California vermin-proof requirements, prevents most surface contamination, allows proper ventilation, relatively easy to install, available at well supply stores.
Cons: Still vulnerable to very determined animals if not properly secured, gaskets deteriorate over time (10-15 years), vent screens can clog with dust and need cleaning.
Cost: $50-$150 for basic models; $100-$200 for premium stainless steel
2. Sanitary Well Caps (Above-Ground Sanitary Seals)
Description: Premium well caps with enhanced sealing features that approach the protection level of true sanitary seals while remaining removable for well access.
Key features: Extra-thick gasket seals, double O-ring seals, compression fittings that tighten for watertight seal, lockable to prevent tampering, heavy-duty construction, oversized screened vents, and weather-protected vent design that prevents rain entry.
Best for: Wells in flood-prone areas, wells serving public or commercial properties, high-value properties where contamination risk must be minimized, and situations where a below-ground sanitary seal is difficult or cost-prohibitive.
Pros: Superior contamination protection compared to basic caps, lockable security feature, better longevity, easier to install than below-ground seals, meets most regulatory requirements.
Cons: More expensive than basic caps, doesn't provide the annular seal protection of true sanitary seals, still doesn't prevent migration of contaminated shallow groundwater down the outside of the casing.
Cost: $150-$300 for cap; $250-$500 installed
3. Below-Ground Sanitary Seals (True Annular Seals)
Description: Permanent, watertight sealing systems installed at or below ground level, incorporating surface seals and deep annular grouting to completely isolate the well casing from surface and shallow groundwater contamination.
Components: Surface seal (typically a metal or concrete vault at ground level), watertight casing-to-seal connection, cement grout or bentonite clay filling the annular space between the casing and borehole wall, grouting extending minimum 50 feet deep (or to competent bedrock/impermeable formation), and protective concrete pad or vault.
Installation: Requires excavation around the well casing to below ground level, installation of the sanitary seal unit, grouting the annular space from depth to surface, and backfilling and finishing with a concrete pad.
Best for: All new wells (required by California law), existing wells with chronic contamination issues, wells in high-risk areas (flood zones, near septic systems or animal operations), wells being upgraded for property transfers, and wells serving multiple residences or commercial properties.
Pros: Maximum contamination protection, prevents cross-contamination from shallow aquifers, meets all California sanitary seal requirements, dramatically reduces surface water intrusion risk, can last 50+ years, increases property value.
Cons: Most expensive option, requires professional installation, needs excavation and site work, makes well access slightly more difficult (though access hatches are incorporated), permanent installation.
Cost: $500-$1,500 for materials; $800-$2,500+ total installed (varies with depth, soil conditions, and accessibility)
4. Pitless Adapters
Description: An underground connection device that allows your well's water line to exit the casing below the frost line while maintaining a sanitary seal. The entire well head is buried, with only a flush-mount cover visible at ground level.
How it works: The pitless adapter is installed through a hole in the well casing below ground. The water line connects to the adapter and exits horizontally underground to your house. The well pump hangs inside the casing as usual. An access port at ground level allows pump removal without excavation.
Best for: Cold climates where frost protection is critical (less common in San Diego County but used in mountain areas), situations where an above-ground well head is undesirable (aesthetic reasons), and new well installations in areas requiring below-ground well equipment.
Pros: Excellent sanitary protection (entire system below ground), frost protection, aesthetically invisible, protects equipment from weather and vandalism, required in some jurisdictions.
Cons: More complex and expensive than standard caps, requires trenching for horizontal water line, makes pump service more difficult, potential leak point if improperly installed, not suitable for all well configurations.
Cost: $200-$400 for adapter; $500-$1,000+ installed (including trenching)
5. Expandable Well Plugs (Well Abandonment Seals)
Description: Specialized sealing devices used to permanently seal abandoned, unused, or decommissioned wells to prevent them from becoming contamination pathways or safety hazards.
How they work: An expandable rubber plug is lowered into the well casing to a specific depth and then expanded (mechanically or with compressed air) to create a watertight seal. The space above the plug is then filled with cement grout to the surface.
Best for: Abandoned wells no longer in use, damaged wells beyond economical repair, wells replaced by newer systems, wells that are safety hazards, and compliance with California well destruction regulations.
Regulatory note: California law requires proper abandonment (destruction) of unused wells. Simply capping an abandoned well is not compliant—it must be properly sealed and grouted by a licensed well driller to prevent it from serving as a conduit for contamination between aquifers.
Pros: Permanent contamination prevention, eliminates safety hazard of open well, prevents cross-contamination between aquifers, brings property into compliance with abandonment regulations.
Cons: Well cannot be reactivated (permanent), requires professional installation, must be done by licensed driller, requires reporting to county and state.
Cost: $100-$300 for plug; $500-$2,000+ for complete abandonment (includes grouting, filling, and reporting)
Well Cap & Seal Comparison Table
| Type | Protection Level | Installation | Typical Cost | CA Compliance |
|---|---|---|---|---|
| Basic Vermin-Proof Cap | Good - Minimum standard | Easy DIY | $150-$350 | ✓ Meets minimum |
| Sanitary Well Cap | Better - Enhanced seal | Easy-Moderate DIY | $250-$500 | ✓ Exceeds minimum |
| Below-Ground Seal | Best - Maximum protection | Professional required | $800-$2,500+ | ✓ Full compliance |
| Pitless Adapter | Excellent - Below ground | Professional required | $500-$1,000+ | ✓ Full compliance |
| Expandable Plug | Complete - Permanent seal | Professional required | $500-$2,000+ | ✓ Abandonment use |
California Well Standards Requirements (Bulletins 74-81 & 74-90)
California has some of the nation's strictest well construction standards, codified primarily in Department of Water Resources Bulletin 74-81 (Water Well Standards: State of California) and Bulletin 74-90 (California Well Standards). These aren't just guidelines—they're legally enforceable requirements that affect well construction, sealing, and maintenance throughout the state.
Sanitary Seal Requirements
California regulations specify that all water wells must have adequate sanitary protection. Key requirements include:
- Annular seal depth: Minimum 50 feet from ground surface (or to competent impermeable formation if shallower), though 75-100 feet is recommended in areas with contamination risks
- Seal material: Neat cement grout, sand-cement grout, or high-solids bentonite grout approved for potable water wells
- Surface completion: The annular seal must extend to ground surface with a watertight connection
- Casing height: Well casing must extend at least 12 inches above ground surface (or above the highest known flood level)
- Surface seal: A sanitary well seal or approved well cap must be installed at the top of the casing
- Concrete pad: A concrete or grout surface pad sloping away from the casing is required (minimum 4 inches thick, extending 2 feet from the casing)
Well Cap Specifications
- Vermin-proof: Must exclude insects, rodents, and other animals
- Watertight: Designed to prevent surface water entry
- Screened vents: Vent openings must be screened with corrosion-resistant material (#16 mesh or finer)
- Secured: Cap must be firmly attached to the casing (set screws, compression fittings, or bolted—not just friction fit)
- Sealed penetrations: All penetrations for electrical wiring, drop pipes, or other equipment must be sealed to prevent entry of contaminants
- Lockable: For public water supply wells, caps must be lockable to prevent tampering
When Upgrades Are Required
Even if your well was legally compliant when built, you may be required to upgrade to current standards in these situations:
- Property transfers: Many counties require well inspections and compliance upgrades before property sales
- Refinancing: Lenders increasingly require well compliance certifications
- Contamination events: If your well tests positive for coliform bacteria or other contamination, county health departments may require seal upgrades as part of the corrective action
- Enforcement actions: County environmental health inspections can identify deficiencies and issue correction orders
- Proximity to contamination sources: Wells near septic systems, animal operations, or known contamination sites may be subject to enhanced sealing requirements
- Permit renewals: Agricultural or commercial wells requiring operating permits may need upgrades at renewal
County-Specific Requirements
While Bulletins 74-81 and 74-90 establish statewide standards, individual counties can impose additional requirements. In San Diego County:
- San Diego County Department of Environmental Health oversees private well standards
- Well construction permits are required for new wells, modifications, and destruction
- Annual sampling may be required for wells serving multiple residences or public facilities
- Property transfer inspections are common and often identify sealing deficiencies
- Minimum separation distances from septic systems, animal facilities, and other contamination sources are enforced
📖 Where to Find California Standards
Bulletin 74-81 and 74-90 are available free from the California Department of Water Resources website (water.ca.gov). Your county environmental health department can provide local requirements and interpretation. For San Diego County: sandiegocounty.gov/deh
Penalties for Non-Compliance
Failing to meet well sealing standards can result in:
- Property transfer delays or failures (deal cancellations if buyers' lenders won't approve)
- County enforcement actions requiring mandatory upgrades with deadlines
- Fines for code violations (typically $100-$500/day until corrected)
- Well use restrictions (prohibition of use until compliance achieved)
- Liability for contamination events affecting neighboring properties
- Increased insurance costs or coverage denials
The good news: compliance upgrades are usually straightforward and cost-effective compared to the consequences of non-compliance. A $300-$800 sanitary seal upgrade is far cheaper than a failed real estate transaction or a contamination remediation project.
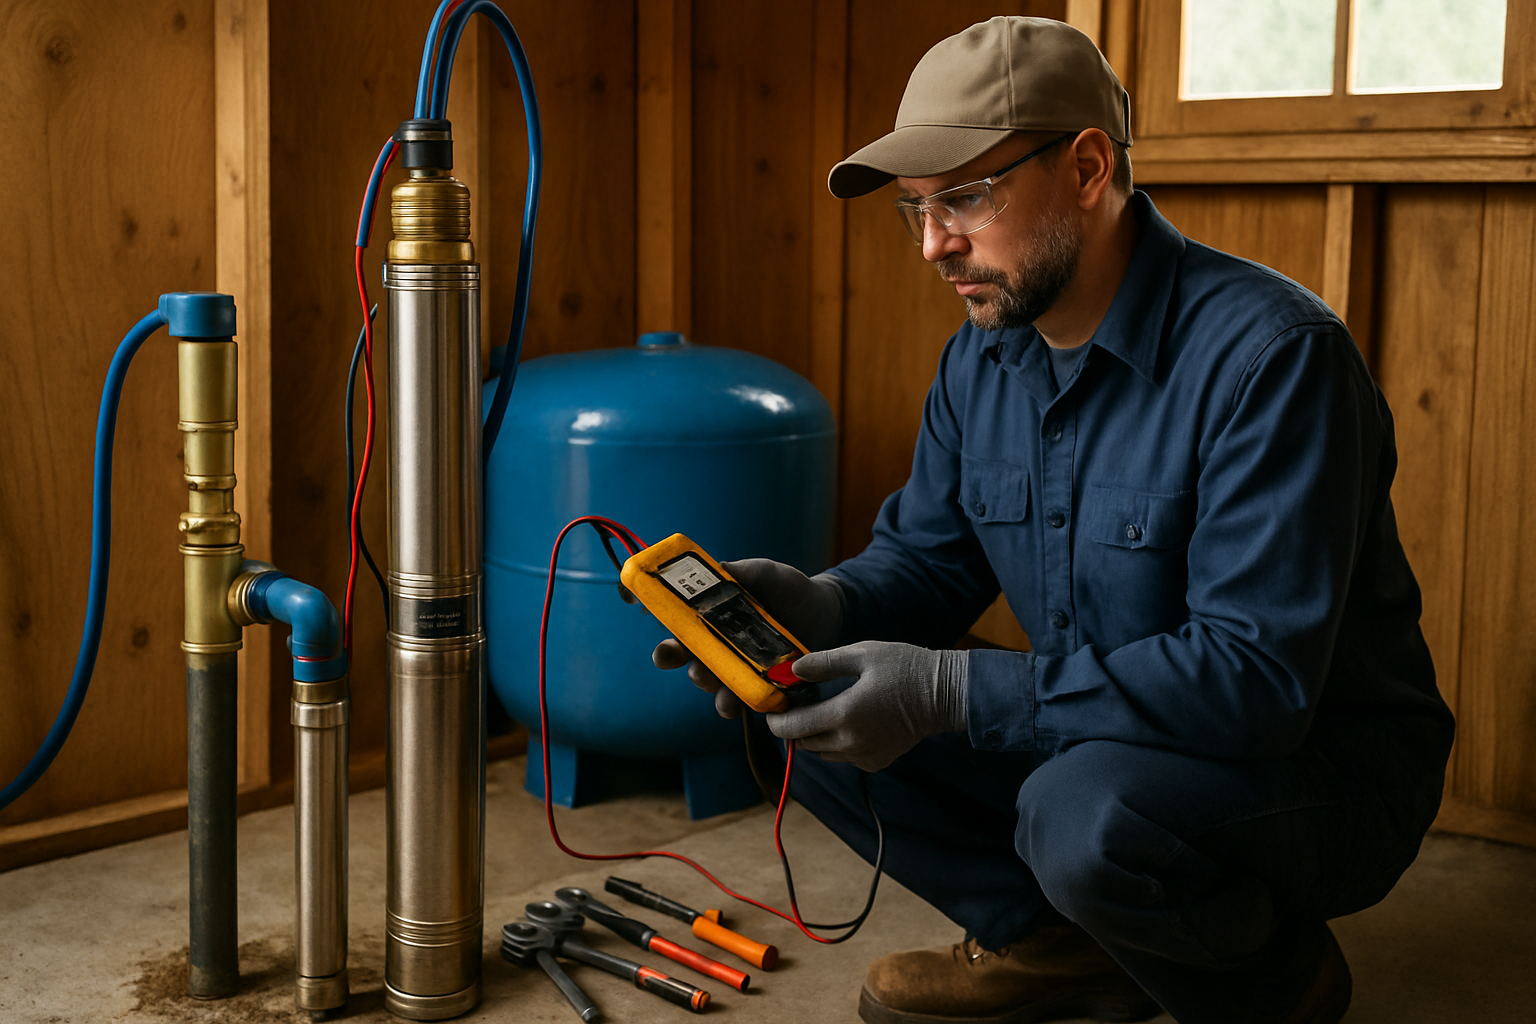
Well Cap Inspection Checklist
Regular well cap inspection is the cornerstone of preventive well maintenance. Inspect your well cap at least annually—preferably in early spring before heavy water use season—and after any severe weather, flooding, or seismic events.
Use this comprehensive checklist, and record findings in your well maintenance log:
Visual Inspection (External)
- ✓ Cap condition: Look for cracks, splits, warping, or holes in the cap body
- ✓ Corrosion: Check metal caps for rust, especially around fasteners and vent screens
- ✓ Vent screens: Ensure screens are intact, not rusted through, and mesh is not clogged with debris
- ✓ Gasket integrity: Examine the rubber gasket around the cap edge—should be pliable, not cracked or brittle
- ✓ Secure attachment: Try to wiggle the cap—it shouldn't move or lift. Tighten set screws if loose
- ✓ Penetration seals: Check where wires or pipes enter the cap—seals should be tight with no gaps
- ✓ Surface drainage: Ensure water drains away from the cap (check concrete pad slope)
- ✓ Standing water: No water should be pooling on top of the cap or around the casing base
- ✓ Vegetation: Remove any vegetation growing near the casing (roots can damage seals)
- ✓ Animal evidence: Look for rodent droppings, nests, or gnaw marks near the well
Functional Tests
- ✓ Removal test: Remove the cap (using proper tools)—it should come off with moderate effort, not too tight or too loose
- ✓ Gasket compression: When reinstalling, the gasket should compress evenly all around (indicates good seal)
- ✓ Fastener function: Set screws or bolts should tighten smoothly without stripping
- ✓ Ventilation: Air should flow through vent screens (hold a piece of tissue near vent—it should flutter)
Interior Inspection (With Cap Removed)
Safety note: Never lean over an open well. Use a flashlight to inspect from above.
- ✓ Casing top condition: Check for cracks, corrosion, or damage to the casing rim where the cap seals
- ✓ Interior debris: Shine a light down the casing—shouldn't see leaves, insects, or other debris
- ✓ Water level: Note static water level (use a water level sounder or drop a weighted string)
- ✓ Odors: Sniff for unusual odors (septic smell, petroleum, chemical odors indicate contamination)
- ✓ Condensation pattern: Excessive condensation on casing interior may indicate seal problems
- ✓ Evidence of pests: Look for dead insects, spider webs, rodent evidence inside casing
Sanitary Seal Inspection (If Accessible)
- ✓ Concrete pad: Check for cracks, settling, or erosion around the well casing
- ✓ Annular space: Look for gaps between the casing and surrounding concrete/grout
- ✓ Casing height: Verify casing extends at least 12 inches above ground (or above known flood level)
- ✓ Surface seal integrity: For below-ground seals with access ports, inspect for cracks or gaps
- ✓ Drainage: Confirm concrete pad slopes away from casing (prevents water pooling)
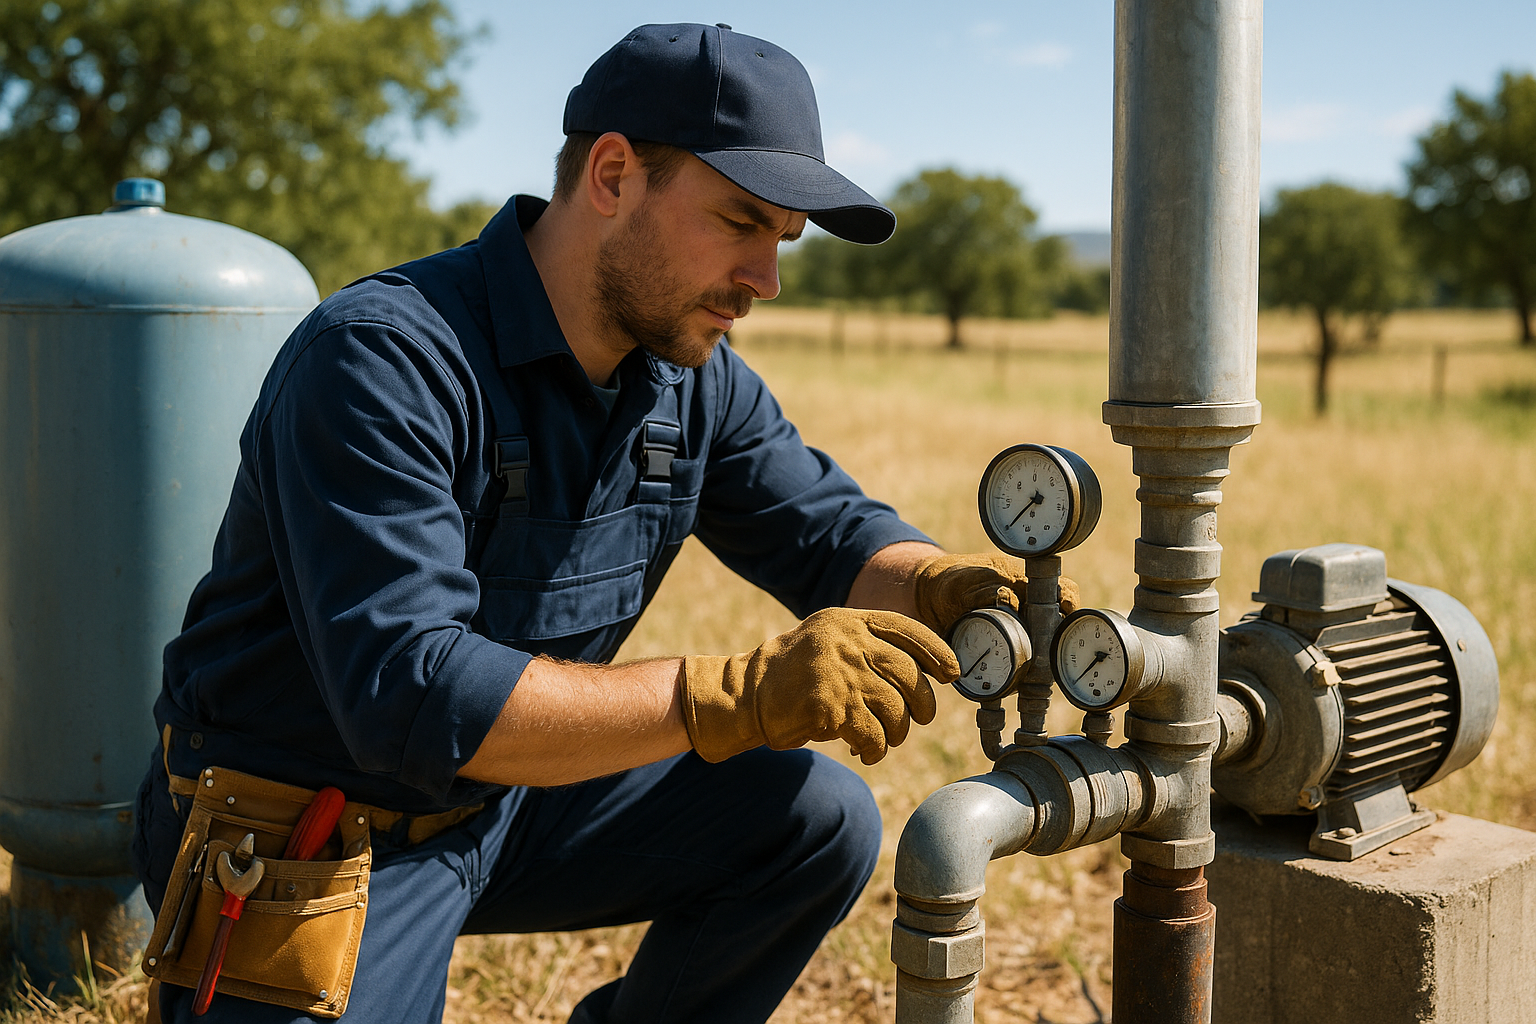
When to Call a Professional
Schedule a professional well inspection if you notice:
- Any structural damage to the cap or casing
- Evidence of pest entry into the well
- Gaps or damage to the sanitary seal or concrete pad
- Significant corrosion or deterioration
- Changes in water quality, taste, or odor
- Water testing shows bacterial contamination
- You're unsure whether your well has an adequate sanitary seal
- Your well is more than 20 years old and has never had the seal inspected
Signs of a Failed or Damaged Well Cap
Don't wait for obvious contamination to replace your well cap. These warning signs indicate your cap is failing and should be replaced immediately:
Physical Damage
- Cracks or splits: Any visible crack in the cap body compromises the seal, especially in plastic caps exposed to UV
- Holes or gaps: Rust-through holes in metal caps, broken vent screens, or gaps around penetrations
- Warping: Plastic caps warped from sun exposure won't seal properly against the casing
- Loose fit: Cap wobbles, lifts easily, or can be removed without tools (major red flag)
- Missing components: Vent screens missing, gaskets deteriorated or missing, fasteners broken
- Impact damage: Dents, crush damage, or deformation from impacts (falling branches, equipment, etc.)
Corrosion and Deterioration
- Rust-through: Holes rusted completely through metal caps (common in steel and cast iron)
- Severe corrosion: Heavy rust, especially around fasteners, vent openings, and edges
- Brittle gaskets: Rubber gasket cracked, hardened, or compressed flat (no longer seals)
- Paint failure: Extensive paint flaking exposing bare metal to moisture and corrosion
- Fastener seizure: Set screws or bolts rusted in place (can't be tightened or loosened)
Evidence of Contamination Entry
- Dead insects: Dead bugs floating in your water or visible inside the well casing
- Rodent evidence: Droppings on or near the cap, gnaw marks, nesting material
- Debris accumulation: Leaves, dirt, or other debris visible inside the well
- Mud staining: Mud or sediment stains on the inside of the cap or casing top indicate surface water entry
- Water discoloration after rain: Water turns cloudy or brown after storms (classic sign of surface water intrusion)
Water Quality Changes
- Bacterial contamination: Positive coliform bacteria tests, especially after rain
- Taste or odor changes: New musty, earthy, or septic odors
- Cloudiness or turbidity: Water suddenly becomes cloudy or has visible particles
- Color changes: Brown, yellow, or reddish tints appearing in water
- Sediment increase: More sediment in toilet tanks, washing machines, or filters
Age-Related Failure
- Aluminum caps: Replace after 15-20 years even if they look okay
- Steel caps: Replace after 10-15 years (sooner in coastal areas with salt air)
- Plastic/thermoplastic caps: Replace after 10-15 years (UV degradation weakens them)
- Stainless steel: Can last 25+ years but gaskets still need replacement every 10-15 years
- Unknown age: If you don't know when your cap was installed and it's visibly weathered, replace it
🚨 Immediate Replacement Needed
If you discover any of these conditions, replace your well cap immediately—don't wait: large cracks or holes in the cap, cap that lifts off without tools, completely missing or damaged vent screens, evidence of rodent entry into the well, positive bacterial contamination tests, or visible surface water entering the well. These conditions represent immediate contamination risks.
Well Cap Replacement Costs
Well cap replacement is one of the most cost-effective investments you can make in your well system. Here's what to expect:
Basic Well Cap Replacement
DIY Cost: $50-$150 for cap + your time (1 hour)
Professional Installation: $150-$350 total (including cap and labor)
What's included: Standard vermin-proof well cap with screened vents, gasket, fasteners
Best for: Straightforward cap-for-cap replacement on standard 4-6 inch casings with easy access
Premium Sanitary Well Cap
DIY Cost: $150-$300 for premium cap
Professional Installation: $250-$500 total
What's included: Heavy-duty cap with enhanced sealing, lockable design, stainless steel construction or premium aluminum
Best for: High-value properties, flood-prone areas, or maximum contamination protection without full sanitary seal installation
Below-Ground Sanitary Seal Installation
Materials: $300-$800
Labor & Installation: $500-$1,700
Total Cost: $800-$2,500+ (depending on depth, soil conditions, accessibility)
What's included: Excavation around casing, sanitary seal unit installation, annular space grouting (50+ feet deep), backfilling, concrete pad finishing
Best for: Compliance with California standards, chronic contamination issues, property transfers requiring upgrades, new well completions
Pitless Adapter Installation
Materials: $200-$400
Labor & Installation: $300-$800
Total Cost: $500-$1,200+ (more if extensive trenching needed)
What's included: Pitless adapter unit, casing penetration, horizontal water line trenching, backfilling, surface finishing
Best for: New well installations, situations requiring below-ground wellhead, aesthetic or frost protection requirements
Well Abandonment/Sealing
Materials: $100-$300 (plug, grout)
Labor & Installation: $400-$1,700
Total Cost: $500-$2,000+ (varies with well depth and diameter)
What's included: Expandable plug installation, cement grouting from plug to surface, surface sealing, required regulatory reporting
Best for: Abandoned wells, damaged wells beyond repair, compliance with destruction regulations
Cost Factors That Increase Price
- Difficult access: Wells in tight spaces, behind fences, or on steep terrain (+$100-$300)
- Larger casing sizes: 8-inch and larger caps cost 20-50% more than standard 4-6 inch
- Corroded or stuck caps: Removing severely corroded caps may require cutting (+$50-$200)
- Casing damage: If casing top is damaged, repair or casing extension needed (+$200-$800)
- Deep wells: Sanitary seal grouting for very deep wells (300+ feet) increases grout costs
- Hard soil conditions: Rocky or hard-packed soil increases excavation labor
- Permit fees: Some jurisdictions charge permit fees for sanitary seal installation ($50-$200)
- Water testing: Post-installation testing recommended to verify improvement ($75-$150)
Cost Comparison: Cap vs. Contamination
| Scenario | Preventive Cost | Contamination Cost | Savings |
|---|---|---|---|
| Basic cap replacement | $150-$350 | $2,000-$5,000+ | $1,650-$4,650 |
| Sanitary seal upgrade | $800-$2,500 | $5,000-$15,000+ | $4,200-$12,500 |
| Annual inspection | $0-$200/year | $3,000-$10,000 | $2,800-$9,800 |
*Contamination costs include: well disinfection ($500-$2,000), water testing ($200-$500), treatment system installation ($1,000-$5,000+), well rehabilitation if needed ($2,000-$10,000), and potential health impacts (variable).
DIY vs. Professional Replacement
Simple well cap replacement can be a DIY project for handy homeowners, but certain situations demand professional expertise.
When DIY Makes Sense
Consider DIY cap replacement if:
- Your well casing is above ground and easily accessible
- You're replacing a standard cap with a similar standard cap (not installing a sanitary seal)
- The existing cap is not severely corroded or stuck
- You have basic tools (wrench, screwdriver, wire brush)
- You know your casing size or can accurately measure it
- You're comfortable working around your well equipment
- Your well is a simple residential well with standard configuration
DIY Well Cap Replacement Steps
- Determine cap size: Measure casing outer diameter or check existing cap markings. Common sizes: 4", 5", 6", 8"
- Purchase correct cap: Buy a vermin-proof cap with screened vents from a well supply retailer (not a generic hardware store cap)
- Turn off power: Shut off power to well pump at breaker before removing cap
- Remove old cap: Loosen set screws or bolts. If stuck from corrosion, apply penetrating oil and let sit 30 minutes. Use proper tools to avoid damaging casing
- Clean casing top: Wire brush the top rim of the casing to remove rust, scale, and old gasket material. Casing rim must be clean and smooth for new gasket to seal
- Inspect casing: Check for cracks, severe corrosion, or damage. If found, call a professional
- Install new cap: Place cap on casing, ensuring gasket seats evenly all around. Don't overtighten set screws (can crack cap or compress gasket too much)
- Verify seal: Cap should sit flush with no gaps visible between gasket and casing
- Test: Try to wiggle or lift cap—it should be firmly attached and not move
- Restore power: Turn breaker back on and test well pump operation
- Document: Record cap replacement date, type, and size in your well maintenance log
Tools Needed for DIY
- Adjustable wrench or socket set (for set screws/bolts)
- Wire brush (for cleaning casing rim)
- Screwdriver (for some cap types)
- Tape measure or calipers (to measure casing diameter)
- Flashlight (to inspect inside casing)
- Penetrating oil (if removing corroded cap)
- Safety gloves
- Optional: Camera or phone to document before/after
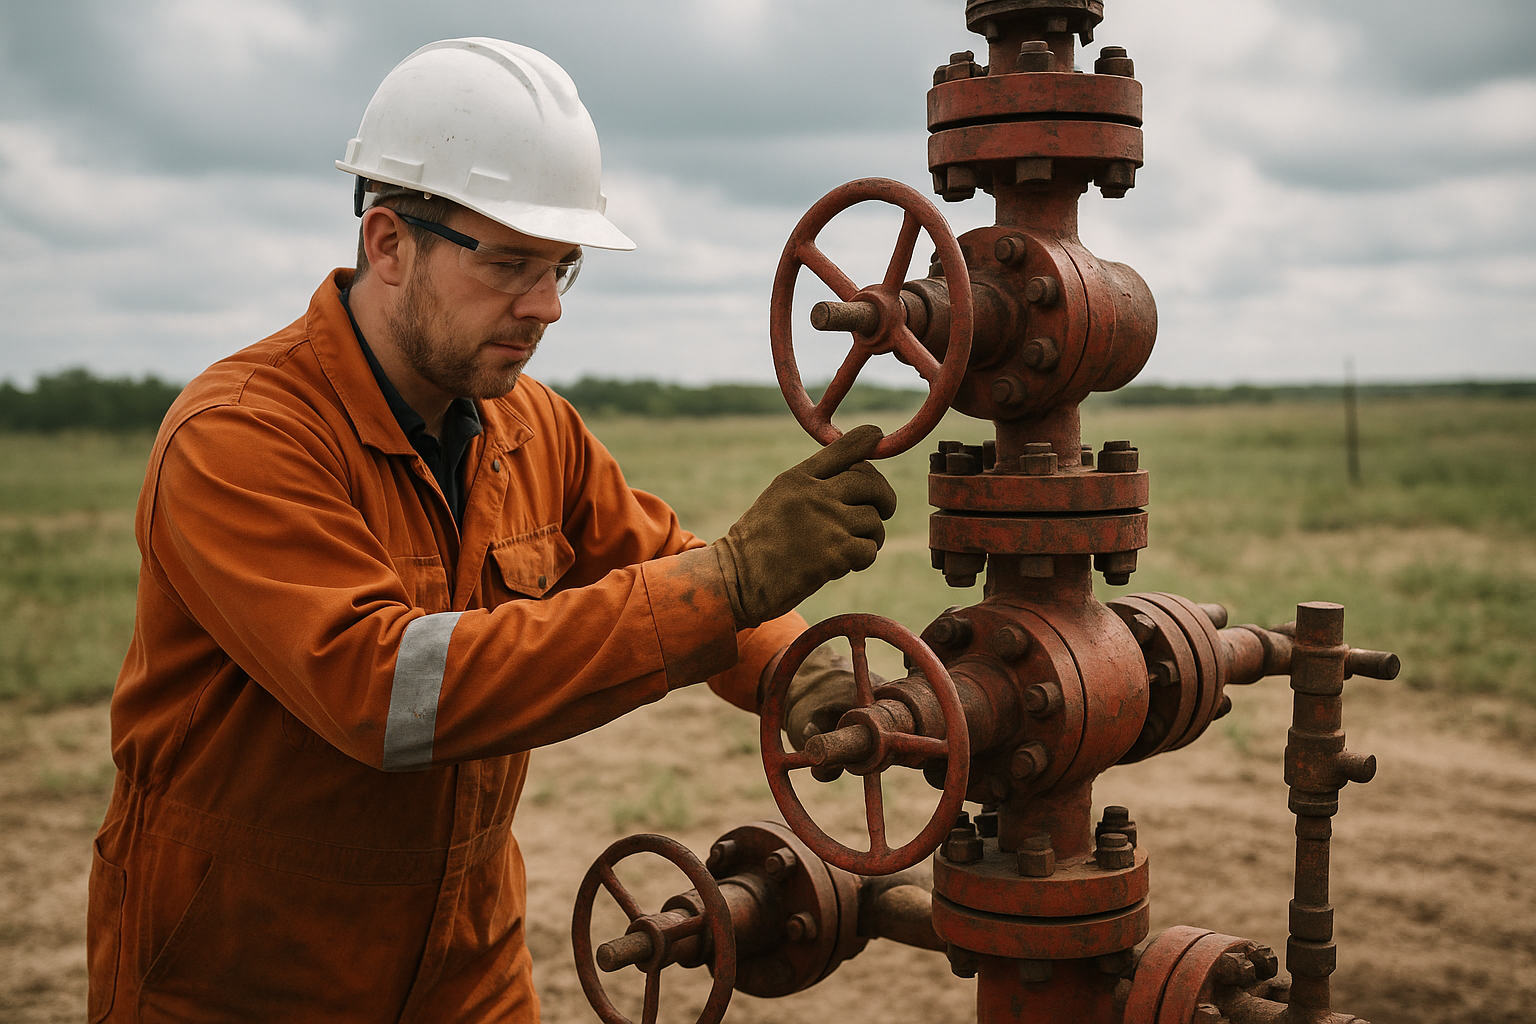
When to Hire a Professional
Professional installation is strongly recommended for:
- Sanitary seal installation: This requires excavation, grouting, and specialized equipment—not a DIY job
- Severely corroded or stuck caps: Pros have extraction tools and experience to avoid casing damage
- Casing damage or irregularities: Cracked, bent, or non-standard casings need expert assessment
- Compliance requirements: If upgrading for property transfer or regulatory compliance, professional certification may be required
- Pitless adapter installation: Requires cutting into casing and precise fitting—hire a licensed well driller
- Contamination concerns: If your well has tested positive for bacteria, professional disinfection and cap replacement ensures proper remediation
- Uncertainty: If you're not confident in your ability or don't have the right tools, professional installation ($100-$200) is cheap peace of mind
- Commercial or shared wells: Wells serving businesses or multiple residences should have professional installation and documentation
What Professionals Provide
Hiring a licensed well contractor for cap or seal replacement includes:
- Proper cap sizing and selection for your specific well
- Inspection of casing condition and identification of other issues
- Safe removal of damaged or stuck caps without casing damage
- Professional-grade caps and materials (often better than retail options)
- Warranty on parts and labor (typically 1 year)
- Documentation for property records and compliance
- Water quality recommendations and testing coordination
- Regulatory knowledge for permit requirements and compliance
💡 Pro Tip
Even if you DIY the cap replacement, consider having your well professionally inspected first, especially if your well is over 15 years old or you don't know its history. A professional can identify seal deficiencies, casing issues, or contamination risks that a new cap alone won't fix. The inspection ($100-$200) can save thousands in avoided problems.
Well Cap Requirements for Home Sales and Inspections
If you're selling a property with a private well in California, well cap and seal compliance will almost certainly come up. Here's what you need to know:
Pre-Sale Well Inspections
Many California counties—including San Diego County—require or strongly encourage well inspections before property transfers. While not always mandatory for all sales, inspections are often triggered by:
- Lender requirements (most mortgage lenders require well inspections and water testing)
- Buyer contractual contingencies
- County health department recommendations
- FHA/VA loan requirements (mandatory well inspections)
- Buyer's home inspector recommendations
These inspections typically evaluate:
- Well cap condition and vermin-proof design
- Sanitary seal presence and integrity
- Casing condition and height above ground
- Concrete pad condition and drainage
- Separation distances from septic systems and contamination sources
- Overall well construction compliance with current standards
Common Deficiencies Found
The most common well cap/seal issues that delay or derail property sales:
- Inadequate well cap: Non-vermin-proof caps (no screens, gaps, loose fit)
- Missing or inadequate sanitary seal: Older wells with no grouted annular seal
- Damaged caps: Cracked, corroded, or non-functional caps
- Insufficient casing height: Casing less than 12 inches above ground
- Poor drainage: Missing or damaged concrete pad, water pooling around well
- Bacterial contamination: Water testing reveals coliform bacteria (often traced to cap/seal issues)
Who Pays for Upgrades?
Negotiable, but typically:
- Seller responsibility: Most real estate contracts require sellers to deliver a property with a functional well meeting minimum standards. Cap replacement and basic seal repairs usually fall on sellers.
- Buyer concessions: Buyers may negotiate credits or price reductions for more extensive upgrades (e.g., full sanitary seal installation)
- Deal-breakers: Serious contamination issues or unsafe well conditions can kill deals if buyers won't accept the risk
Timeline for Compliance
If deficiencies are identified:
- Simple cap replacement: Can be done in 1-2 days once parts are obtained
- Sanitary seal installation: Requires 3-7 days (permitting, excavation, installation, curing time for concrete/grout)
- Water testing post-repair: 2-4 weeks to collect sample, lab analysis, and receive results
- Re-inspection: 1-2 weeks for county re-inspection after corrections
Pro tip for sellers: Have your well inspected and tested 2-3 months before listing. This gives you time to address any issues without delaying your sale. A recent clean well inspection report is a valuable marketing tool.
What Buyers Should Look For
If you're buying a property with a private well:
- Require a professional well inspection as a contract contingency
- Insist on comprehensive water testing (bacteria, nitrates, arsenic, hardness, pH—see our well water testing guide)
- Ask for well construction records, permits, and maintenance history
- Verify the well cap is vermin-proof and in good condition
- Ask whether the well has a sanitary seal (and request documentation)
- Check casing height and condition
- Ensure the well is properly located relative to septic systems (minimum 50-100 feet separation)
- Budget for potential upgrades—even if seller addresses immediate issues, you may want to upgrade for long-term protection
How Well Caps Affect Water Quality
A damaged well cap doesn't just let in debris—it can fundamentally compromise your water quality. Here's how contamination enters and what it means for your health:
Contamination Pathways
1. Direct Entry (Failed Cap)
When your well cap is cracked, loose, or has unscreened openings, contaminants fall or flow directly into your well:
- Surface water runoff: Rain or irrigation water carrying bacteria, pesticides, fertilizers, and petroleum products flows over your well cap and drips inside
- Airborne contamination: Dust, pollen, mold spores, and particulates settle into the well
- Insects and animals: Live or dead pests introduce pathogens and organic matter that feeds bacterial growth
- Debris accumulation: Leaves, twigs, dirt, and other organic matter decompose in your well, creating a nutrient source for bacteria
2. Annular Space Migration (Failed Seal)
Without a proper sanitary seal, contaminated near-surface groundwater migrates down the outside of your well casing:
- Preferential flow path: The space between your casing and the borehole wall (annular space) acts as a shortcut, allowing contaminated shallow groundwater to bypass natural soil filtration and reach your deep aquifer
- Septic system leakage: Effluent from nearby septic drain fields can migrate through soil and down your well's annular space
- Agricultural runoff: Nitrates, pesticides, and fertilizers from surface applications percolate into shallow groundwater and follow the casing downward
- Flood intrusion: During flooding, highly contaminated surface water saturates soil around your well and enters through the annular space
Specific Contaminants Linked to Cap/Seal Failure
Coliform Bacteria
The most common water quality issue from failed caps. Coliform bacteria are surface-dwelling organisms found in soil, vegetation, and animal waste. Their presence indicates that surface contamination pathways exist. While most coliform aren't directly harmful, they signal that dangerous pathogens (E. coli, Giardia, Cryptosporidium) could enter the same way.
Source: Surface water, animal waste, insects, decomposing organic matter
Nitrates
Failed sanitary seals allow nitrate-contaminated shallow groundwater (from septic systems, fertilizers, animal waste) to migrate into your well. Nitrates are particularly dangerous for infants, causing "blue baby syndrome" (methemoglobinemia). The EPA maximum contaminant level is 10 mg/L.
Source: Septic systems, agricultural fertilizers, animal operations, lawn fertilizers
Pesticides and Herbicides
Agricultural chemicals applied to surface soil can wash into wells through failed caps or migrate down unsealed annular spaces. Many pesticides are carcinogenic or endocrine disruptors at very low concentrations.
Source: Agricultural spraying, lawn treatments, runoff from treated areas
Turbidity (Cloudiness)
Surface water intrusion brings suspended sediment, causing cloudy or discolored water. Beyond aesthetics, turbidity interferes with disinfection (bacteria hide in particles) and indicates surface contamination pathways are active.
Source: Surface runoff, soil erosion around well, flood events
Volatile Organic Compounds (VOCs)
Petroleum products, solvents, and chemicals from nearby roads, driveways, or storage areas can infiltrate wells lacking proper seals. Many VOCs are toxic or carcinogenic.
Source: Gasoline/diesel spills, solvent storage, underground tanks, road runoff
Recognizing Contamination from Cap/Seal Issues
These water quality changes suggest cap or seal problems:
- Post-rain contamination: Water quality degrades after storms (classic sign of surface water entry)
- Seasonal patterns: Contamination appears during wet seasons and resolves during dry periods
- Intermittent bacteria detections: Positive coliform tests followed by negative tests without treatment (contamination coming and going with weather)
- Sudden cloudiness: Clear water turns cloudy or discolored after rain or flooding
- Taste/odor changes: Musty, earthy, or septic odors appear after wet weather
- Increased sediment: More sediment accumulation in fixtures and filters following storms
Water Quality Improvements After Cap/Seal Upgrade
Property owners typically see these improvements within 2-4 weeks of installing a proper cap or sanitary seal:
- Elimination of coliform bacteria detections (after well disinfection)
- Reduction in turbidity and sediment
- Stable water quality regardless of weather
- Improved taste and odor
- Reduced filter clogging and sediment accumulation
- Lower risk of waterborne illness
Important: If contamination has occurred, simply installing a new cap isn't enough. You must also disinfect your well (shock chlorination) to kill bacteria colonized in your system. See our guide or consult a professional. Test water 2-4 weeks after cap replacement and disinfection to verify improvement.
Concerned About Water Quality?
We provide comprehensive well inspection, cap replacement, sanitary seal installation, and water quality testing throughout San Diego County.
📞 (760) 440-8520 Schedule Water Test →Well Cap Materials Comparison
Well caps are manufactured from several different materials, each with distinct advantages, disadvantages, and lifespans. Choosing the right material depends on your budget, climate conditions, and how long you plan to keep the cap.
Aluminum Well Caps
Description: The most popular choice for residential wells. Lightweight, affordable, and corrosion-resistant. Available in cast aluminum or stamped aluminum construction.
Advantages: Excellent corrosion resistance (won't rust), lightweight and easy to handle, good value for cost, available in all standard sizes, moderate to good lifespan (15-20 years), won't crack from impact like plastic.
Disadvantages: Can develop pinhole corrosion over time (especially in coastal areas), not as durable as stainless steel, threaded fastener holes can strip if overtightened, powder coating can fade and peel.
Best for: Most residential wells in non-coastal areas, good balance of price and performance, standard replacement applications.
Expected lifespan: 15-20 years (10-15 in coastal salt air)
Cost: $50-$150
Stainless Steel Well Caps
Description: Premium caps made from 304 or 316 stainless steel. The longest-lasting and most corrosion-resistant option, but also the most expensive.
Advantages: Superior corrosion resistance (virtually rust-proof), longest lifespan of any cap material (25-30+ years), maintains appearance over time, excellent for coastal areas with salt exposure, holds value (quality visible to home inspectors/buyers).
Disadvantages: Expensive (2-3x cost of aluminum), heavier than aluminum, can still have issues with dissimilar metal corrosion if paired with steel casing (use appropriate gaskets).
Best for: Coastal properties, high-value homes, situations where maximum longevity justifies higher cost, wells with history of cap corrosion problems, permanent installations.
Expected lifespan: 25-30+ years
Cost: $150-$300
Cast Iron Well Caps
Description: Traditional heavy-duty caps, less common in modern installations. Very durable but prone to rust.
Advantages: Extremely strong and impact-resistant, heavy weight prevents theft or displacement, long history of use (proven design), often used on older wells with larger casing sizes.
Disadvantages: Prone to rust (even with protective coating), very heavy (difficult to remove for maintenance), painted surfaces require maintenance, fasteners often rust and seize, gaskets compress and fail, increasingly difficult to find replacement parts.
Best for: Replacing existing cast iron caps on older wells, situations where extreme durability is needed, locations with theft/vandalism concerns (weight deters removal).
Expected lifespan: 10-20 years (with maintenance and repainting)
Cost: $100-$250
Note: Cast iron is increasingly being replaced by aluminum and stainless options that don't rust.
Thermoplastic/ABS Well Caps
Description: Plastic caps made from high-density polyethylene (HDPE), ABS, or PVC. The most economical option but shortest lifespan.
Advantages: Lowest cost, lightweight, won't corrode or rust, easy to install, adequate for temporary or budget applications, available at most hardware stores.
Disadvantages: UV degradation causes brittleness and cracking (10-15 years), less durable than metal, can crack from impact or freezing, warps in heat, not as secure (easier for animals to dislodge), lower-quality appearance.
Best for: Temporary installations, very tight budgets, wells in shaded locations (reduced UV exposure), non-critical applications, irrigation wells or non-potable water wells.
Expected lifespan: 10-15 years (less in high UV exposure)
Cost: $30-$80
Important: Many cheap plastic caps from hardware stores are NOT vermin-proof—they lack proper gasket seals and have unscreened vent holes. If using plastic, ensure it's a sanitary well cap with screened vents and gasket seal.
Material Comparison Table
| Material | Lifespan | Corrosion Resistance | Cost | Best Use |
|---|---|---|---|---|
| Aluminum | 15-20 years | Excellent | $50-$150 | Most residential wells |
| Stainless Steel | 25-30+ years | Superior | $150-$300 | Premium/coastal wells |
| Cast Iron | 10-20 years | Poor (rusts) | $100-$250 | Older well replacements |
| Thermoplastic | 10-15 years | Excellent (no rust) | $30-$80 | Budget/temporary use |
Special Considerations for San Diego County
Our regional conditions affect cap material selection:
- Coastal areas (Oceanside, Encinitas, Del Mar): Stainless steel strongly recommended—salt air accelerates aluminum and iron corrosion
- Inland valleys (Ramona, Valley Center, Alpine): Aluminum performs excellently and offers best value
- Mountain areas (Julian, Palomar Mountain): Aluminum or stainless; avoid plastic in areas with freeze-thaw cycles
- High UV exposure: Metal caps strongly preferred over plastic (San Diego's intense sun degrades plastic quickly)
- Budget constraints: Quality aluminum is far better than cheap plastic—the $20-$30 price difference buys years of additional protection
Frequently Asked Questions
What is the difference between a well cap and a sanitary seal?
A well cap is a removable cover that sits on top of your well casing to keep out debris, insects, and surface water. It's typically made of aluminum, steel, or thermoplastic and can be removed for well maintenance. A sanitary seal is a more permanent, watertight seal that's installed at or below ground level where the well casing enters the ground. It provides superior protection against contamination by creating a vermin-proof, watertight barrier that prevents surface water, rodents, insects, and other contaminants from entering the well. California well standards (Bulletin 74-81 and 74-90) require sanitary seals on all new wells and many existing wells to meet current contamination prevention standards.
How much does it cost to replace a well cap?
Well cap replacement costs vary by type and installation complexity. Basic vermin-proof well caps range from $50-$150 for materials, with professional installation adding $100-$200 (total: $150-$350). Premium sanitary well caps with locking mechanisms cost $150-$300 plus installation ($250-$500 total). Complete sanitary seal installation is more expensive, ranging from $300-$800 for materials and labor depending on well depth, casing size, and soil conditions. Expandable well plugs for abandoned wells cost $100-$200 plus $200-$400 installation. The investment is worthwhile—a failed well cap can lead to contamination costing thousands in water treatment, well rehabilitation, or health issues.
What are California's requirements for well caps and sanitary seals?
California Department of Water Resources Bulletins 74-81 and 74-90 establish well construction and seal standards. All new wells must have approved sanitary seals installed at or below ground level, creating a watertight, vermin-proof barrier. The seal must prevent surface water infiltration and extend at least 50 feet deep (or to competent bedrock/impermeable formation). Well caps must be vermin-proof, watertight, and secured to prevent unauthorized access. Vents must be screened with corrosion-resistant mesh (#16 or finer). Wells lacking proper seals may be required to upgrade during property transfers, refinancing, or upon inspection violations. County health departments enforce these standards and can require seal upgrades if contamination risks are identified.
How do I know if my well cap needs to be replaced?
Warning signs that your well cap needs replacement include: visible cracks, splits, or holes in the cap; rust, corrosion, or deterioration (especially on metal caps); loose fit that allows the cap to wobble or lift off easily; missing or damaged vent screens allowing insects in; gaps between the cap and casing; weathered gaskets or seals that are brittle or compressed; pooling water on top of the cap indicating poor drainage; evidence of rodent or insect entry (droppings, nests, dead insects); age over 15-20 years for metal caps or 10-15 years for plastic; and failed water quality tests showing coliform bacteria or other surface contamination. If you notice any of these signs during your annual well inspection, schedule cap replacement immediately to prevent contamination.
Can I replace a well cap myself or do I need a professional?
Simple well cap replacement is a DIY-friendly project if you have basic tools and the existing cap is above ground and accessible. You'll need the correct cap size for your casing diameter (common sizes: 4-inch, 6-inch, 8-inch), basic tools (wrench, screwdriver, wire brush), and about 30-60 minutes. However, professional installation ($100-$200) is recommended if: your well has a below-ground sanitary seal requiring excavation; the cap is corroded or stuck; you're unsure of the cap type or size needed; you need to install a sanitary seal to meet California standards; the well serves a commercial property or has special requirements; or you're uncomfortable working around your well. Incorrect installation can compromise your well's sanitary protection, so when in doubt, hire a licensed well contractor.
What is a vermin-proof well cap?
A vermin-proof well cap is designed to prevent rodents, insects, snakes, and other pests from entering your well while allowing proper ventilation. Key features include: screened vents with corrosion-resistant mesh (#16 or finer) that allows air circulation but blocks insects; tight-fitting gaskets that seal against the casing; secure fastening mechanisms (bolts, set screws, or compression fittings) that prevent animals from pushing the cap off; sealed penetrations for electrical wires with no gaps; and durable construction that resists gnawing and weathering. California well standards require all well caps to be vermin-proof. Standard hardware store caps often lack proper screening or sealing—purchase caps specifically labeled as 'vermin-proof' or 'sanitary well caps' from well supply retailers to ensure compliance and protection.
How often should well caps be inspected?
Well caps should be inspected at least annually, ideally in spring before heavy use season. During your annual well inspection, check for: cap integrity (no cracks, rust, or damage); tight seal against the casing; properly screened vents free of debris or damage; secure fastening with no looseness; gasket condition (not brittle or compressed); proper drainage (no standing water); and no evidence of pest entry. Also inspect after: any severe weather events (earthquakes, floods, heavy storms); unexplained changes in water quality or appearance; after any well maintenance or repairs; before property transfers or refinancing; and if you notice unusual sounds, odors, or debris in your water. Keeping a well maintenance log helps track inspection dates and any issues found. Early detection of cap problems prevents costly contamination issues.
Will a new well cap improve my water quality?
Yes, replacing a damaged or inadequate well cap can significantly improve water quality if surface contamination has been entering your well. A properly installed vermin-proof well cap or sanitary seal prevents: coliform bacteria from surface water runoff; insects, rodents, and other animals from entering and dying in your well; debris, dirt, and leaves from contaminating your water; pesticides and fertilizers from washing into the well; and surface water infiltration during rain or flooding. However, a new cap won't fix contamination issues originating from your aquifer (like arsenic, nitrates from deep sources, or naturally occurring minerals). If water quality problems persist after cap replacement, you'll need comprehensive water testing to identify the contamination source and appropriate treatment. Always test your water 2-4 weeks after installing a new cap to verify improvement and establish a new baseline.
What size well cap do I need?
Well cap size must match your well casing's outer diameter. Common residential well casing sizes are: 4-inch (4.5-inch outer diameter), 5-inch (5.5-inch OD), 6-inch (6.625-inch OD), and 8-inch (8.625-inch OD). To determine your size: measure the outside diameter of your casing with a tape measure or caliper; check well completion records or permits (casing size is always listed); look for markings stamped on the existing cap; or call your well driller if you have their contact information. Well caps are labeled by nominal casing size (4-inch cap fits 4-inch casing). Buying the wrong size is the most common DIY mistake—the cap won't seal properly if too large or won't fit if too small. When ordering online, confirm the cap's compatible casing sizes. If between sizes or uncertain, consult a well professional before purchasing.
Do I need a sanitary seal if I already have a well cap?
California well standards require sanitary seals on all new wells, and many existing wells must be upgraded to include sanitary seals, especially during property transfers or if contamination is detected. A sanitary seal provides far superior protection compared to a well cap alone. While a cap only covers the top of the casing above ground, a sanitary seal creates a watertight barrier at ground level extending deep into the soil (typically 50+ feet). This prevents surface water, contaminants, and pests from migrating down the outside of your well casing into the aquifer. If your well was drilled before modern standards (pre-1990s), you likely have only a well cap and no sanitary seal. Upgrading to a sanitary seal is strongly recommended and may be required by county health departments, especially if: your well has had coliform bacteria detections; you're selling or refinancing your property; your well is in a flood-prone area; or county inspectors identify deficiencies. The investment ($300-$800) prevents far costlier contamination problems.
Protect Your Well and Your Family's Health
Don't wait for contamination to strike. We provide expert well cap inspection, replacement, and sanitary seal installation throughout San Diego County. Our licensed professionals ensure your well meets California standards and protects your water quality for years to come. Get a professional well inspection to identify any cap or seal deficiencies before they become costly problems.
Related Articles
Continue learning about well maintenance and troubleshooting