How to Winterize Your Well: Complete Freeze Protection for Mountain Communities
By SCWS Team | February 1, 2026 | 10 min read
📋 In This Guide
- Why San Diego Mountain Areas Need Well Winterization
- Freeze Protection for Wellheads
- Insulating Exposed Pipes
- Heat Tape Installation for Well Systems
- Pressure Tank Protection
- Vacation Home Considerations
- Emergency Thawing: What to Do If Frozen
- Professional Winterization Services
- Frequently Asked Questions
- Related Seasonal Articles
- Related Articles
❄️ When temperatures drop in Julian, the threat to your well system rises. Living in San Diego County's stunning mountain communities—Julian, Palomar Mountain, Mount Laguna, Pine Valley, or Descanso—means trading coastal fog for crisp mountain air, starry skies, and yes... freezing temperatures that can destroy your well system overnight. A burst pipe at 3 AM in sub-freezing weather isn't just inconvenient—it's a catastrophe. This guide shows you exactly how to winterize your well and protect your water supply when Jack Frost comes calling.
Why San Diego Mountain Areas Need Well Winterization
Many people assume "Southern California" means never worrying about freezing temperatures. While that's true for coastal San Diego, our mountain communities regularly experience winter conditions that can devastate unprotected well systems.
🌡️ Mountain Temperature Reality
Julian and the Cuyamaca Mountains routinely see temperatures in the teens and low 20s during winter nights. Palomar Mountain and Mount Laguna can drop below 10°F during cold snaps. Even Pine Valley and Alpine experience hard freezes several times each winter. These aren't unusual events—they're expected seasonal conditions that require preparation.
The danger isn't just cold temperatures—it's the combination of cold and exposed well components. While groundwater stays at a constant 55-60°F year-round, the piping, pressure tanks, and connections above ground or in uninsulated spaces are vulnerable to freezing. When water freezes, it expands with tremendous force, cracking pipes, rupturing pressure tanks, and damaging pumps.
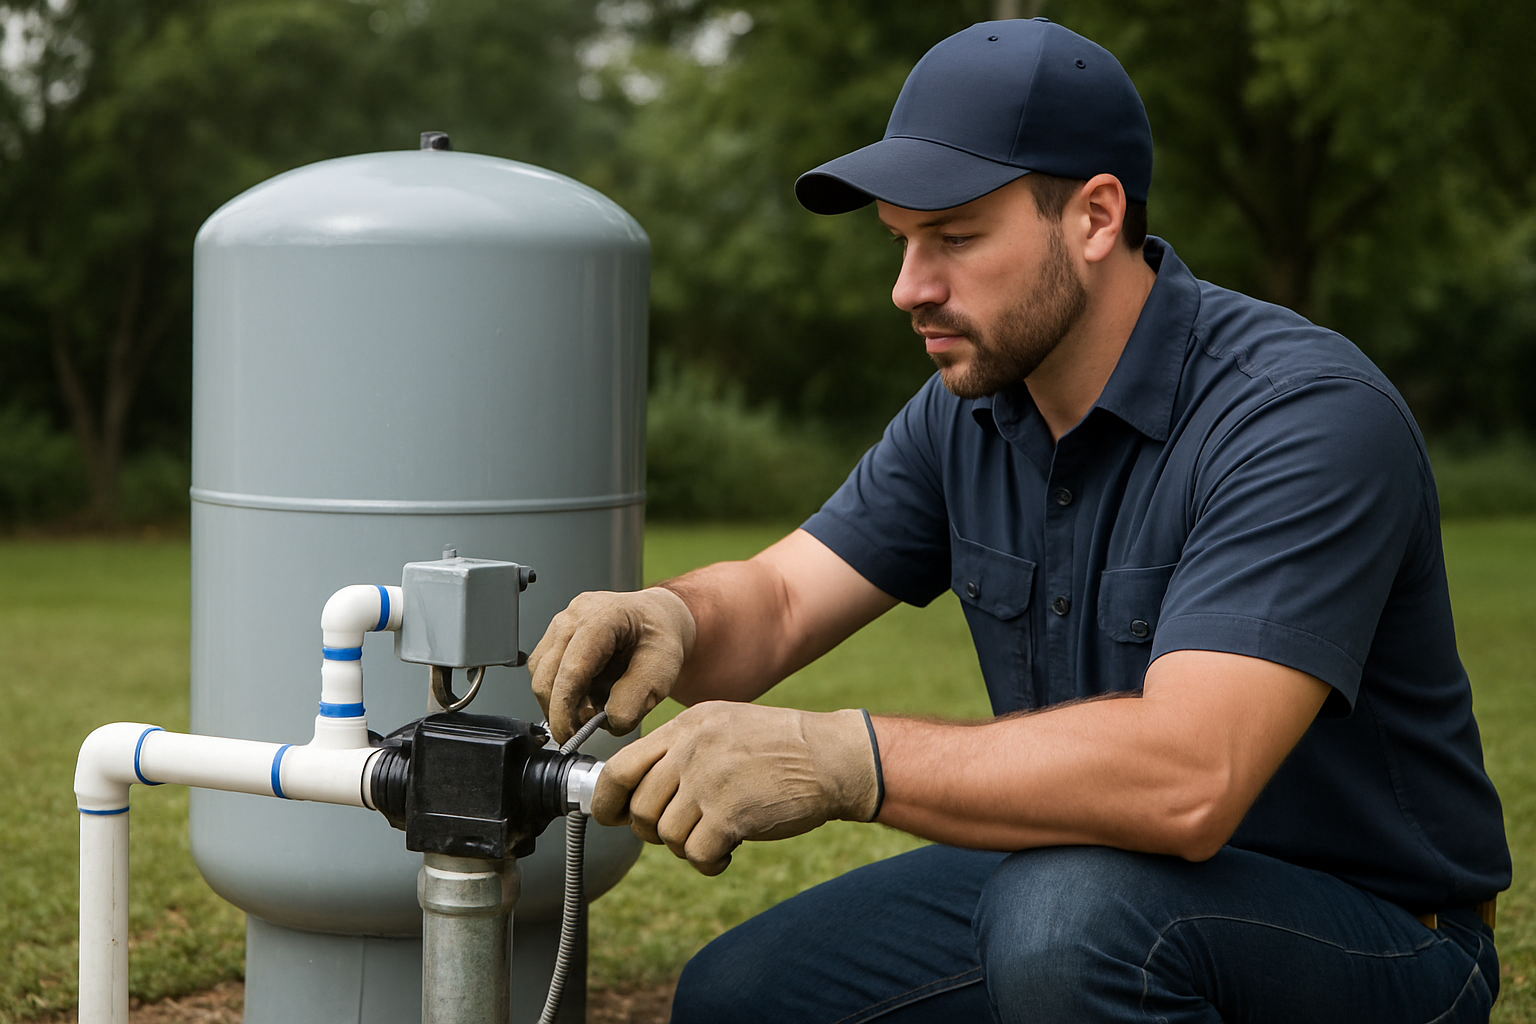
Freeze Protection for Wellheads
The wellhead—where the well casing emerges from the ground—is often the most vulnerable point in your entire system. Even though it's at ground level, the wellhead contains critical components that can freeze.
Well Cap and Casing Protection
Modern wells typically have the water line exiting through a pitless adapter below the frost line, which provides good freeze protection. However, older wells may have above-ground discharge pipes, and any wellhead can be vulnerable in extreme cold.
- Install a well cap insulator: Foam insulating covers designed for wellheads protect the cap and upper casing from cold air infiltration
- Build a well house: An insulated enclosure around the wellhead provides excellent protection and easy access for maintenance
- Add heat tape: Self-regulating heat tape wrapped around the wellhead and upper casing provides active freeze protection during extreme cold
- Seal any gaps: Check where electrical conduit and pipes enter the well casing—seal gaps with expanding foam or caulk to prevent cold air intrusion
Pitless Adapter Considerations
The pitless adapter—where your water line connects to the well casing below ground—is typically installed below the frost line. In San Diego's mountains, the frost line is generally 6-12 inches deep, though it can reach 18 inches in the highest elevations. If your pitless adapter is too shallow or if you have an older well with above-ground connections, additional protection may be needed.
Insulating Exposed Pipes
Pipe insulation is your first line of defense against frozen well pipes. Any exposed water lines—from the well to the house, in crawl spaces, garages, or pump houses—need protection.
Types of Pipe Insulation
| Insulation Type | R-Value | Best For |
|---|---|---|
| Foam pipe sleeves | R-2 to R-4 | Easy DIY installation on straight pipe runs |
| Fiberglass wrap | R-3 to R-6 | Irregular shapes, valves, and fittings |
| Rubber insulation | R-3 to R-5 | Outdoor/wet locations, UV resistant |
| Foam-in-place | R-5+ | Irregular areas, permanent installation |
Installation Tips for Well Insulation
- Measure pipe diameter before buying—insulation must fit snugly without gaps
- Don't forget fittings, valves, and elbows—these are often where freezing starts
- Seal all seams with tape designed for your insulation type
- For outdoor locations, add a weather-resistant outer layer to prevent moisture damage
- Extend insulation at least 6 inches past where pipes enter heated spaces
Insulation alone may not be sufficient during extreme cold snaps. For temperatures below 20°F, especially with wind, you'll need additional active protection like heat tape.
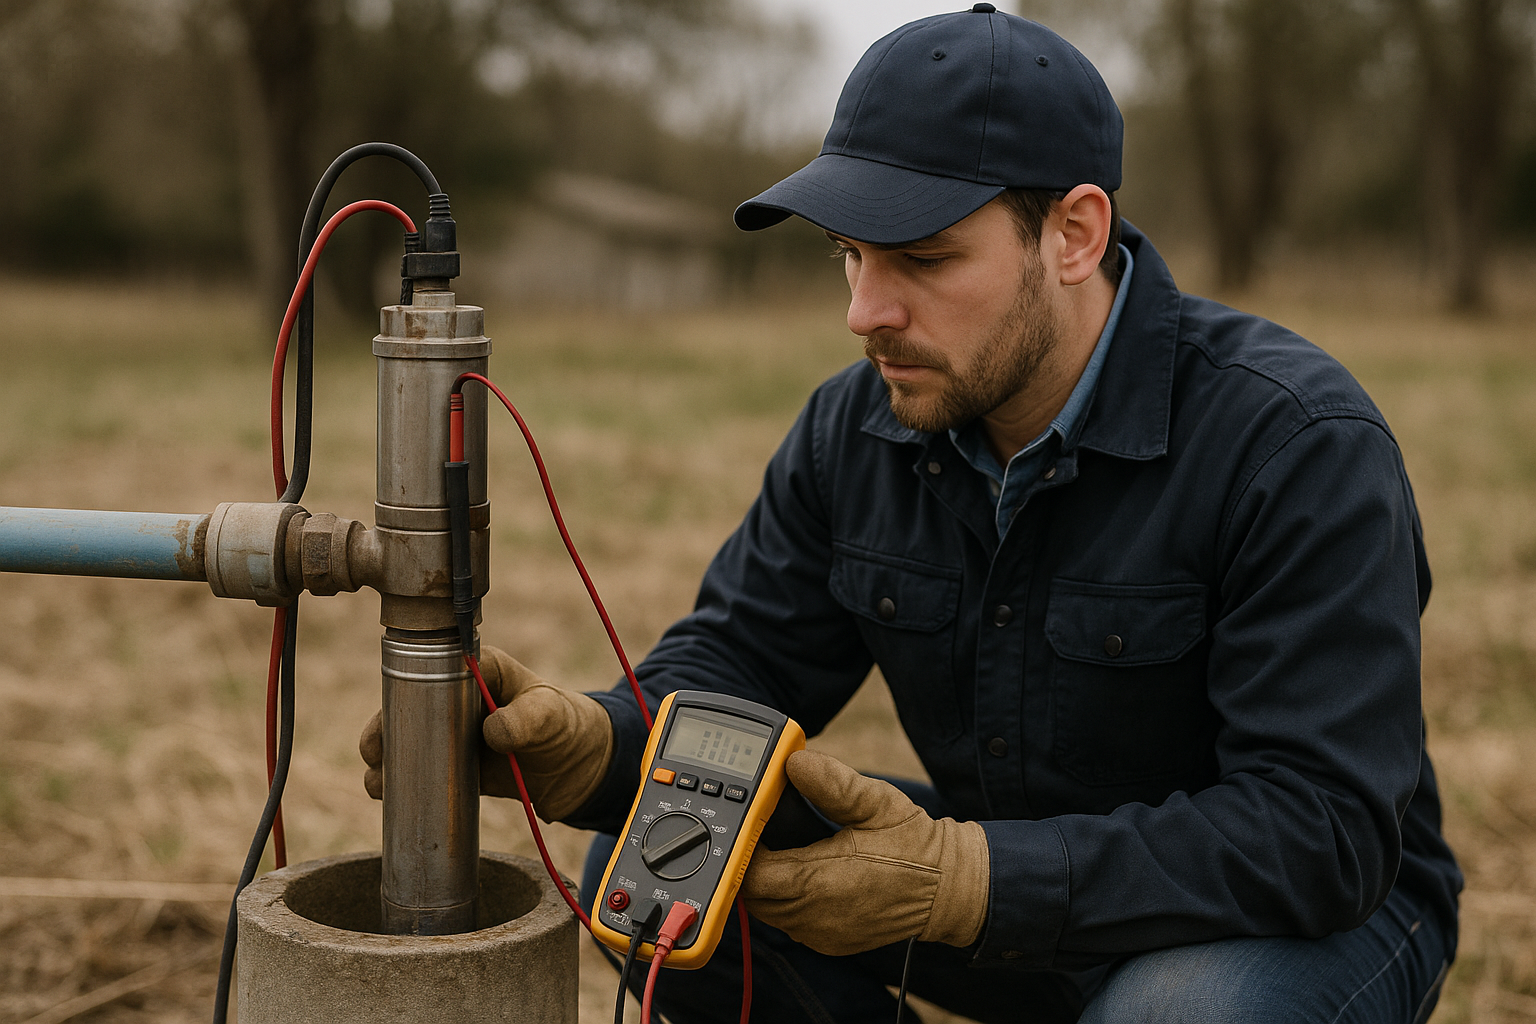
Heat Tape Installation for Well Systems
Heat tape (also called heat cable or heat trace) provides active freeze protection by maintaining pipe temperature above freezing. For mountain well systems, heat tape is often essential—not just helpful.
Types of Heat Tape
Self-regulating heat tape is the best choice for most well applications. It automatically adjusts heat output based on temperature—using more energy when it's colder and less when it's warmer. This prevents overheating and reduces electricity costs. Self-regulating tape can be overlapped without burning out, making installation easier.
Constant-wattage heat tape is cheaper but requires careful installation to prevent hot spots and must be used with a thermostat. It's generally not recommended for well systems where varying exposure conditions make consistent heating important.
Where to Install Heat Tape
- Wellhead and pitless adapter: Wrap the upper casing and pitless connection
- Water line to house: Especially any above-ground or shallow-buried sections
- Pressure tank plumbing: The pipes entering and exiting the tank, plus the pressure switch
- Pump house plumbing: All exposed pipes within unheated enclosures
- Outdoor faucets: Any frost-free hydrants or hose bibs connected to well water
Heat Tape Safety
Heat tape involves electricity and water—a potentially dangerous combination. Use only UL-listed products rated for your application. Ensure proper grounding and use a GFCI-protected circuit. Inspect heat tape annually for damage, wear, or rodent chewing. If you're not comfortable with electrical work, hire a professional for installation.
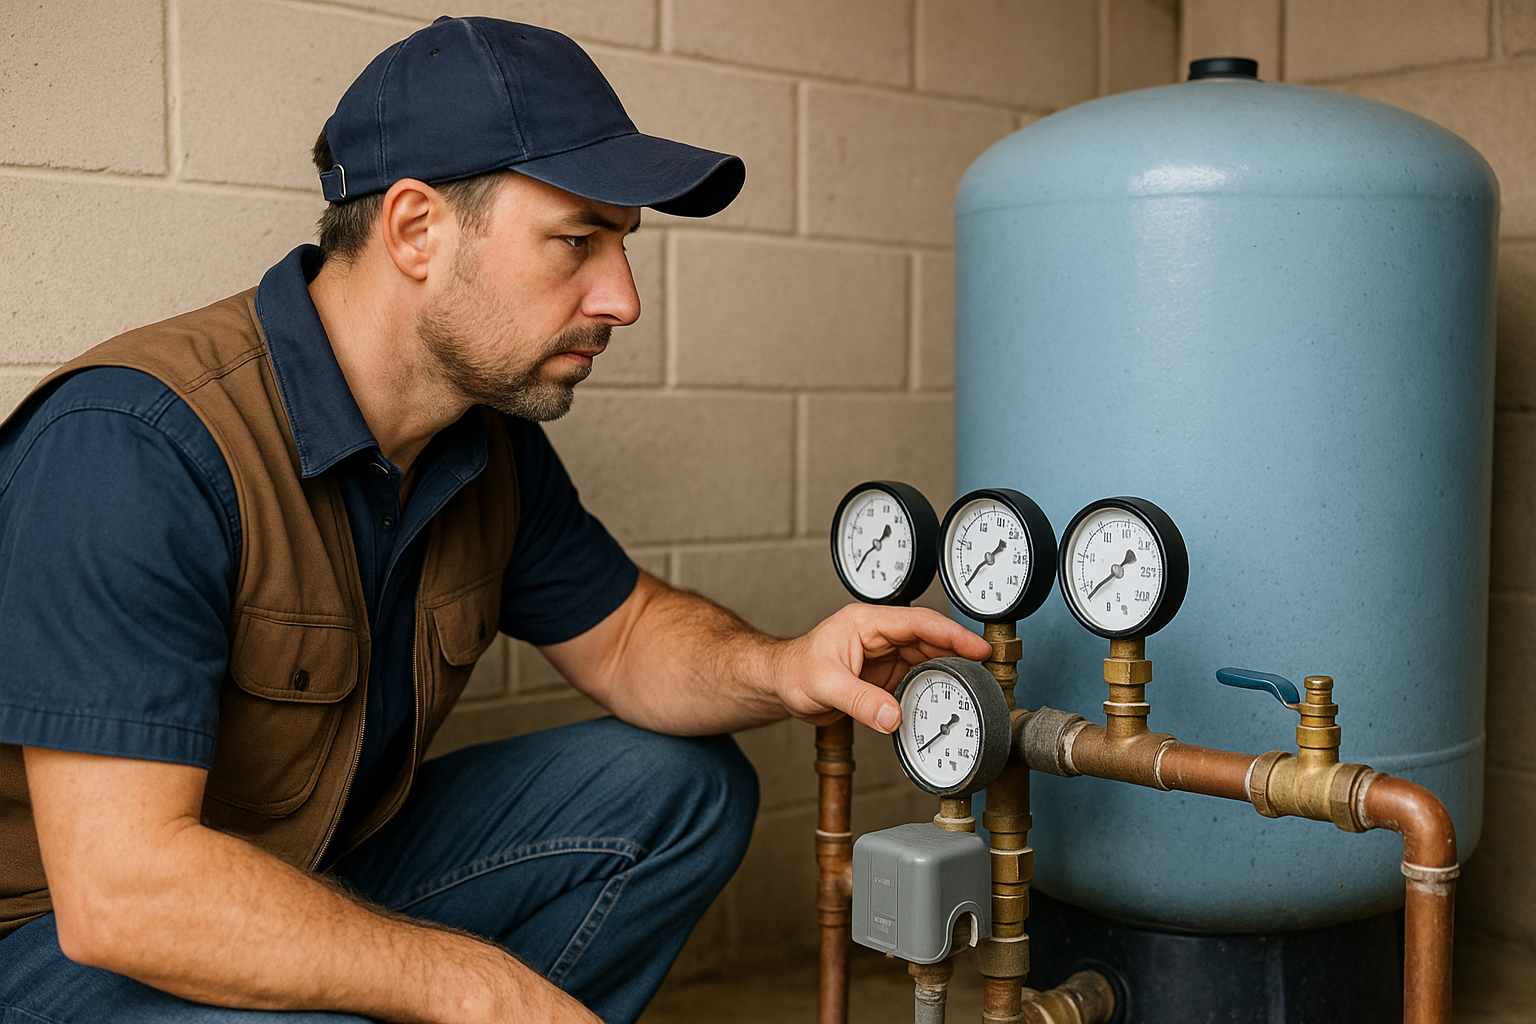
Pressure Tank Protection
Your pressure tank is one of the most expensive components in your well system—and one of the most vulnerable to freeze damage. A frozen pressure tank can crack, split, or rupture, requiring complete replacement at a cost of $800-$2,000+.
Pressure Tank Winterization Steps
- Location matters: If possible, install pressure tanks in heated spaces. A basement or heated utility room is ideal
- Insulate the tank: If the tank must be in an unheated space, wrap it with an insulated tank blanket or fiberglass insulation
- Protect the plumbing: The pipes connecting to the pressure tank are often the first to freeze—insulate and add heat tape
- Add a space heater: A thermostatically controlled heater in the pump house can maintain above-freezing temperatures
- Insulate the pump house: If your pressure tank is in an outbuilding, add wall and ceiling insulation
Pump House Improvements
Many mountain properties have a pump house or well house containing the pressure tank and other equipment. This small building is your well system's first line of defense—make it effective:
- Add insulation to walls and ceiling (R-19 or higher recommended)
- Seal all gaps, cracks, and openings where cold air can enter
- Install a frost-free vent or small heater for extreme cold
- Consider a buried or bermed design for new pump houses—underground stays above freezing naturally
- Ensure the door seals tightly and is insulated
Vacation Home Considerations
Mountain vacation homes and cabins face unique winterization challenges. When you're not there to monitor temperatures, detect problems, or run water occasionally, the risk of freeze damage increases dramatically.
Option 1: Keep the System Active
If you visit regularly (every few weeks), you may choose to keep your well system running:
- Install a programmable thermostat to maintain minimum temperatures (55°F is common)
- Use heat tape with thermostatic controls on all vulnerable components
- Install a temperature alarm that alerts you if the house drops below a set point
- Ask a neighbor to check on the property during cold snaps
- Consider a smart leak detector that notifies you of water problems
Option 2: Full Winterization (Drain Down)
For extended absences, completely draining the system provides the best protection:
- Turn off the pump: Disconnect power to prevent the pump from running dry
- Open all faucets: Hot and cold, including outdoor faucets and shower heads
- Drain the pressure tank: Open the drain valve and allow complete drainage
- Drain the water heater: Turn off power/gas and drain completely
- Blow out lines: Use compressed air to remove remaining water from pipes
- Add antifreeze: Pour RV-safe antifreeze into toilet bowls, sink traps, and drain traps
- Open outdoor hydrants: Ensure frost-free faucets drain completely
Important: Proper Drain-Down Procedure
Improper winterization can damage your well pump. Never run the pump with no water in the system—it can burn out in minutes. Some submersible pumps have check valves that hold water in the line; these need professional attention for proper drainage. If you're uncertain about the procedure, have a well professional perform the winterization.
Emergency Thawing: What to Do If Frozen
Despite best efforts, well systems sometimes freeze. Knowing how to respond can prevent additional damage and get your water flowing again.
Immediate Steps
- Turn off the pump immediately: A pump running against frozen pipes can overheat and burn out within minutes
- Locate the freeze: Check all exposed pipes, the wellhead, pressure tank connections, and pump house for frost or ice
- Open a faucet: This allows water to flow once the ice begins to melt and relieves pressure
- Apply gentle heat: Use a hair dryer, heat lamp, or portable space heater—never an open flame
- Start from the faucet: Thaw toward the frozen section so melting water has somewhere to go
- Be patient: Gradual thawing is safer than rapid heating, which can damage pipes
After Thawing
Once water flows again, carefully inspect the entire system:
- Check all visible pipes, fittings, and connections for cracks or leaks
- Inspect the pressure tank for bulges, cracks, or moisture
- Monitor the pressure gauge for abnormal readings
- Listen for unusual pump sounds
- Check your water for discoloration or debris
Even if everything appears fine, schedule a professional well inspection before the next cold spell. Freeze damage isn't always immediately visible—hairline cracks can lead to leaks weeks or months later.
Professional Winterization Services
While some winterization tasks are DIY-friendly, professional well winterization services offer several advantages—especially for complex systems, vacation homes, or if you're unsure about your system's vulnerabilities.
What Professional Winterization Includes
- Complete system assessment: Identifying all vulnerable points including those you might miss
- Heat tape installation: Proper sizing, placement, and electrical connection
- Insulation upgrades: Correct materials and installation for your specific conditions
- Pump house improvements: Sealing, insulating, and adding heating if needed
- Vacation home drain-down: Complete, proper drainage that protects your pump
- Documentation: A record of what was done and recommendations for ongoing maintenance
Professional winterization typically costs $150-$400 depending on your system's complexity and what work is needed. It's a fraction of the cost of repairing frozen and burst pipes, replacing a cracked pressure tank, or installing a new well pump.
Frequently Asked Questions
At what temperature should I worry about my well freezing?
You should take freeze precautions when temperatures drop to 32°F (0°C) or below, but the real danger zone starts around 20°F (-6°C) and especially below 15°F (-9°C). At these temperatures, exposed pipes, wellheads, and pressure tanks can freeze within hours. In San Diego's mountain communities like Julian, Mount Laguna, and Palomar Mountain, overnight temperatures regularly drop into the teens during winter. Even brief cold snaps can cause damage if your well system isn't protected.
What parts of a well system are most likely to freeze?
The most vulnerable components are: the wellhead and piping above the frost line, exposed water lines between the well and house, pressure tanks located in unheated spaces like garages or pump houses, above-ground plumbing near the pressure tank, and any outdoor faucets connected to the system. The well itself—deep underground—rarely freezes because groundwater temperature remains constant at around 55-60°F year-round.
How do I know if my well pipes are frozen?
Signs of frozen well pipes include: no water flow when you turn on faucets (but the pump runs); greatly reduced water pressure; pump cycling on and off rapidly; visible frost or ice on exposed pipes; strange sounds from the plumbing system; or pipes that feel extremely cold to touch. If you suspect frozen pipes, don't continue running the pump, as it can burn out when unable to move water.
Can I winterize my well myself or do I need a professional?
Many winterization tasks can be DIY projects: installing pipe insulation, adding foam covers to outdoor faucets, improving insulation in pump houses, and installing basic heat tape on accessible pipes. However, you should call a professional for heat tape installation on the wellhead or underground connections, draining and winterizing vacation homes, inspecting and repairing damaged well pits, and any work below ground or inside the well casing.
What should I do if my well system freezes?
If your well system freezes: First, turn off the pump to prevent motor burnout. Locate the frozen section by checking for frost or ice. For accessible frozen pipes, apply gentle heat using a hair dryer, heat lamp, or portable heater—never use an open flame. Open a faucet to allow water to flow once ice begins melting. After thawing, inspect all components for cracks or leaks and have your system inspected before the next cold spell.
Protect Your Well This Winter
Don't wait for the first freeze to think about winterization. We help mountain property owners throughout San Diego County prepare their well systems for winter weather. Whether you need a professional winterization assessment, heat tape installation, pump house improvements, or vacation home drain-down services, our experienced team can ensure your well system survives the cold.