By SCWS Team
February 1, 2026 · 14 min read
How Do Wells Work? Complete Guide to Water Well Systems
Every time you turn on a faucet, flush a toilet, or water your garden, you're tapping into an engineering marvel that's been refined over centuries. For the 43 million Americans who rely on private wells, understanding how this hidden water delivery system works isn't just interesting—it's essential. Whether you're a new well owner, considering drilling, or simply curious about the technology beneath your feet, this guide will transform you from mystified to informed in just 14 minutes.
Water Well Basics: Key Concepts
- Aquifer: Underground layer of rock or sediment that holds and transmits groundwater
- Water Table: The top level of the saturated zone where groundwater begins
- Static Water Level: The natural resting level of water in your well when not pumping
- Well Yield: The rate at which water flows into your well, measured in gallons per minute
- Drawdown: How far the water level drops during pumping
Where Does Well Water Come From? Understanding Aquifers
The water in your well doesn't come from underground rivers or lakes as many people imagine. Instead, it comes from aquifers—geological formations of permeable rock, sand, or gravel that can store and transmit significant quantities of water. Understanding aquifers is the first step to understanding how your well works. For a deeper dive into California's groundwater resources, visit California DWR Groundwater, a comprehensive resource for well owners statewide.

The Water Cycle and Groundwater Recharge
Your well water began its journey as precipitation—rain or snow that fell on the Earth's surface. Some of this water runs off into streams and rivers, some evaporates, and some soaks into the ground. This infiltrating water is called recharge, and it's how aquifers get replenished.
As water percolates downward through soil and rock, gravity pulls it deeper until it reaches a zone where all the spaces between rock particles are completely saturated. The top of this saturated zone is called the water table. Below the water table, every crack, crevice, and pore space in the rock is filled with water—this is your aquifer.
Types of Aquifers
Not all aquifers are created equal. The type of aquifer beneath your property affects well depth, yield, and water quality:
- Unconfined Aquifers: The water table is the top boundary, and water can move freely up and down with precipitation. These aquifers are recharged directly from the surface and are more vulnerable to contamination.
- Confined Aquifers: Sandwiched between impermeable rock layers (called aquitards), these aquifers are under pressure. When a well taps a confined aquifer, water may rise above the aquifer level—sometimes creating an artesian well that flows without pumping.
- Fractured Rock Aquifers: Common in mountainous areas of Southern California, these aquifers store water in cracks and fractures rather than pore spaces. Well yields can be unpredictable depending on whether the well intersects productive fracture zones.
🌴 Southern California Aquifers: Our region has diverse geology, from coastal alluvial basins with productive sand and gravel aquifers to inland fractured granite formations. This is why well depths vary dramatically across San Diego County—from 150 feet in some valley areas to over 600 feet in the mountains.
Types of Water Wells: Drilled, Driven, and Dug
Throughout history, humans have developed different methods to access groundwater. Today, three main well types exist, though modern residential wells are almost exclusively drilled wells due to their depth capability and reliability.
Drilled Wells
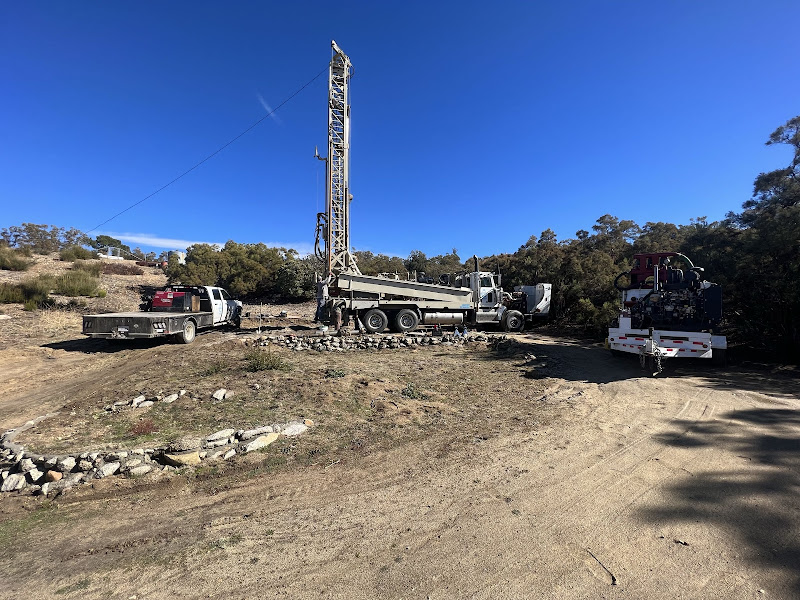
Drilled wells are the modern standard for residential water supply. They're created using powerful drilling rigs that can penetrate hundreds of feet into bedrock. There are two main drilling methods:
- Rotary Drilling: Uses a rotating drill bit with drilling fluid (mud) to cut through rock. The fluid carries rock cuttings to the surface and stabilizes the borehole. This is the fastest method and is used for most modern wells.
- Cable Tool (Percussion) Drilling: An older method where a heavy bit is repeatedly raised and dropped to pulverize rock. Slower but sometimes preferred in fractured rock where drilling mud could seal off water-producing fractures.
Drilled wells typically range from 4 to 8 inches in diameter and can reach depths exceeding 1,000 feet. The borehole is lined with steel or PVC casing to prevent collapse and protect water quality. Learn more about the drilling process and how long it takes to drill a well.
Driven Wells
Driven wells are constructed by hammering a small-diameter pipe (typically 1.25 to 2 inches) with a screened point directly into the ground. They're also called sand point wells or well points.
These wells can only be installed in soft, unconsolidated soil (sand, gravel, or loose alluvium) and typically reach depths of only 30-50 feet. Because of their shallow depth and small diameter, driven wells:
- Only work in areas with shallow water tables
- Are more susceptible to contamination from surface sources
- Have limited water yield
- May go dry during drought
- Cannot accommodate submersible pumps
In Southern California, driven wells are rarely suitable due to our typically deep water tables and hard rock geology.
Dug Wells
Dug wells are the oldest type, created by excavating a large-diameter hole (3-10 feet across) by hand or machine. Historically lined with stone, brick, or concrete, these wells are shallow—usually only 10-30 feet deep—and extend just below the water table.
While picturesque in old farmstead photos, dug wells have significant drawbacks:
- High contamination risk from surface water infiltration
- Frequently go dry in drought conditions
- Require more maintenance (clearing sediment, repairing linings)
- Don't meet modern health department standards in most jurisdictions
If you have an older dug well on your property, it should be properly decommissioned and replaced with a drilled well for safety and reliability.
| Characteristic | Drilled Well | Driven Well | Dug Well |
|---|---|---|---|
| Typical Depth | 100-1,000+ feet | 30-50 feet | 10-30 feet |
| Diameter | 4-8 inches | 1.25-2 inches | 3-10 feet |
| Construction Method | Drilling rig | Hammering pipe | Excavation |
| Contamination Risk | Low | Moderate | High |
| Drought Reliability | High | Low | Very Low |
| Best For | Modern residential use | Shallow water tables only | Historical interest only |
Well Construction: What's Inside Your Well
A modern drilled well is an engineered system with multiple components working together. Understanding these parts helps you communicate with well professionals and maintain your system properly.
Well Casing
The casing is a pipe (typically steel or PVC) that lines the borehole from the surface down into the aquifer. It serves several critical functions:
- Prevents the borehole from collapsing
- Keeps out contaminated surface water and shallow groundwater
- Provides a smooth conduit for the pump and pipes
- Seals off undesirable water-bearing zones
In California, steel casing is required through the upper portion of the well (typically the first 50+ feet) to ensure a proper sanitary seal. PVC casing may be used in the lower sections. Damaged well casing can lead to water quality problems and should be inspected regularly.
Annular Seal (Grout)
The space between the casing and the borehole wall is called the annular space. This is filled with cement grout or bentonite clay to create a watertight seal. The annular seal is crucial—it prevents surface water and shallow contamination from traveling down alongside the casing into your drinking water aquifer.
Well Screen
At the bottom of the well, in the water-producing zone, the casing may have perforations or a specialized well screen. This allows groundwater to enter the well while keeping sand and sediment out. The screen design depends on the aquifer material:
- Slotted screens: Vertical slots cut into the casing, used in sand/gravel aquifers
- Wire-wrapped screens: Precision openings for fine sand aquifers
- Open hole: In stable bedrock, the casing may simply end and leave an open borehole in the rock
Well Cap
At the surface, a well cap seals the top of the casing. A proper well cap is vermin-proof (keeps out insects and small animals) and watertight while allowing electrical wires for the pump to pass through. The cap should be at least 12 inches above ground level to prevent surface water entry.
Components of a Well System: From Pump to Faucet
The well itself is just a hole in the ground until you add the equipment that makes it a working water system. Here's how each component functions in the journey from aquifer to your faucet.
The Well Pump
The pump is the heart of your well system—it lifts water from deep underground to the surface. For most residential wells, this is a submersible pump installed inside the well casing, typically set 10-20 feet above the well bottom.
A submersible pump consists of:
- Sealed electric motor: Waterproof motor at the bottom of the unit
- Impeller stages: Series of spinning impellers that push water upward
- Check valve: Prevents water from flowing back down when pump stops
- Pump cable: Electrical wires running to the surface
When the pump activates, the motor spins the impellers at high speed, creating pressure that pushes water up through the drop pipe. Modern submersible pumps can lift water from over 400 feet and are remarkably efficient. Learn to recognize the signs of a failing well pump.
Drop Pipe
The drop pipe connects the pump to the surface. It's usually 1 to 2-inch diameter PVC or polyethylene pipe that carries water up from the pump. The pump, pipe, and electrical cable are all suspended from the wellhead by the pipe itself or by a safety rope.
Pitless Adapter
The pitless adapter is an ingenious fitting that allows the water line to exit the well casing below the frost line (the depth where ground freezing occurs). This prevents freeze damage without requiring a buried well pit.
The adapter consists of two parts: one attached to the casing with a watertight seal, and one connected to the drop pipe. When the drop pipe is lowered into the well, the two parts lock together, creating a connection that directs water horizontally through the casing and into the underground supply line leading to your home.
Pressure Tank
The pressure tank is typically located in your garage, basement, or a pump house. It's a large steel tank (usually 20-120 gallons) that stores pressurized water and manages pump cycling.
Modern pressure tanks have a rubber bladder inside that separates air from water. The tank is pre-charged with air (typically to 2 PSI below cut-in pressure). When the pump fills the tank with water, it compresses this air, creating pressure that pushes water through your home's plumbing.
Without a pressure tank, your pump would turn on and off every time you used any water—this rapid cycling would quickly burn out the pump. The tank provides a buffer, allowing the pump to run for longer periods less frequently. Pressure tank problems are a common cause of well system issues.
Pressure Switch
The pressure switch is the brain of the system. It monitors system pressure and tells the pump when to run. A typical residential switch is set to:
- Cut-in pressure (30-40 PSI): When pressure drops to this level, the pump turns on
- Cut-out pressure (50-60 PSI): When pressure reaches this level, the pump shuts off
The 20-PSI difference between cut-in and cut-out is called the differential. This range provides consistent water pressure while minimizing pump cycles.
Control Box
For pumps larger than ½ horsepower, a control box mounted near the pressure tank houses the starting capacitors and relay that manage the pump motor. The control box converts household electrical power into the proper starting and running power the pump needs.
How Water Travels From Ground to Faucet: Step by Step
Now let's trace the complete journey of water through your well system:
The Journey of Well Water
-
1
Groundwater accumulates: Precipitation soaks into the ground and collects in the aquifer over months to thousands of years
-
2
Water enters the well: Groundwater flows through the well screen or perforations into the casing
-
3
You turn on a faucet: Water leaves the pressure tank, and system pressure begins to drop
-
4
Pressure switch activates: When pressure reaches the cut-in point (e.g., 40 PSI), the switch closes the circuit
-
5
Pump starts: The control box sends power to the submersible pump motor
-
6
Water is pushed upward: The pump's impellers spin, forcing water up the drop pipe
-
7
Water exits the well: At the pitless adapter, water is redirected horizontally through the casing
-
8
Water reaches the pressure tank: The supply line carries water to your pressure tank, refilling it
-
9
Pressure builds: As the tank fills, air compression increases system pressure
-
10
Pump stops: When pressure reaches cut-out (e.g., 60 PSI), the pressure switch opens and the pump stops
-
11
Water reaches your faucet: Pressurized water from the tank flows through your plumbing to every fixture
This entire cycle happens automatically, dozens of times per day, delivering fresh groundwater on demand. The system is designed to be hands-off—when working properly, you simply turn on the tap and water appears.
Maintaining Your Well System
Understanding how your well works helps you keep it functioning properly. Here are key maintenance considerations:
Annual Inspection
Have your well system professionally inspected at least once per year. A technician will check pump performance, pressure tank operation, water flow rate, and electrical components. Catching small problems early prevents expensive emergency repairs. Read our complete well inspection guide for more details.
Water Testing
Test your water quality annually for bacteria and every few years for minerals and other contaminants. Changes in water quality can indicate problems with your well or aquifer. Our water testing guide explains what to test for and how often.
Pressure Tank Maintenance
Check your pressure tank's air charge annually. A waterlogged tank (low air pressure) causes rapid pump cycling that shortens pump life dramatically. You can check this by pressing the air valve—if water comes out, the bladder has failed and the tank needs replacement.
⚠️ Watch for Warning Signs
Know the signs of well problems so you can address them quickly:
- • Decreased water pressure or flow
- • Pump running constantly or cycling rapidly
- • Cloudy or murky water
- • Strange tastes or odors
- • Air sputtering from faucets
- • Unusually high electric bills
Frequently Asked Questions
How does water get into a well?
Water enters a well through natural groundwater stored in underground aquifers. When rain and snowmelt seep into the ground, gravity pulls the water down through soil and rock until it reaches the water table—the top of the saturated zone where all pore spaces are filled with water. Wells are drilled deep enough to reach below this water table, allowing water to flow into the well casing through perforations or screens at the bottom.
How deep does a water well need to be?
Well depth depends on local geology and the depth of the water table. In Southern California, residential wells typically range from 200 to 600 feet deep, with some areas requiring wells over 1,000 feet. The well must reach at least 20-50 feet below the static water level to ensure consistent water supply even during drought conditions when water tables drop.
What are the main components of a well system?
A complete well system includes: the well casing (steel or PVC pipe lining the borehole), well screen (perforated section allowing water entry), submersible pump (pushes water to surface), drop pipe (carries water up), pitless adapter (connects to horizontal pipe below frost line), pressure tank (stores water and maintains pressure), pressure switch (controls pump cycling), and the distribution plumbing to your home.
What is the difference between drilled, driven, and dug wells?
Drilled wells use rotary or cable-tool drilling to reach depths of 100-1,000+ feet, making them the most reliable for deep aquifers. Driven wells are created by hammering a small-diameter pipe into soft ground, typically reaching only 30-50 feet—suitable for areas with shallow water tables. Dug wells are large-diameter holes excavated by hand or machine, usually only 10-30 feet deep. Drilled wells are the standard for modern residential use due to their depth capability and contamination protection.
How does a well pump and pressure tank work together?
The pump and pressure tank work as a team to provide consistent water pressure. When you turn on a faucet, water flows from the pressure tank, which is pre-charged with air. As water leaves, pressure drops. When it reaches the cut-in pressure (typically 30-40 PSI), the pressure switch activates the pump. The pump refills the tank until the cut-out pressure (50-60 PSI) is reached, then shuts off. This system prevents the pump from cycling on and off with every small water use, extending pump life and providing steady pressure.
Need Help With Your Well System?
Whether you're considering drilling a new well, need repairs on an existing system, or just have questions about how your well works, our experienced technicians are here to help. We service wells throughout San Diego and Riverside counties, providing well drilling, pump installation and repair, and comprehensive maintenance services.